Looks#
Print#
Print#
The Print block is used to print values or text in the Print Console or VEX IQ Brain’s screen.
print [Hello] ▶
All reporter blocks will be printed as integer (whole) numbers by default. Use the Set Print Precision block to adjust the number of decimal places printed.
All new projects begin with the screen cursor at row 1 column 1, and at row 1 on the Print Console.
By default, the Print block will remain on the same row for any subsequent print commands. By expanding the Print block to show and set cursor to next row, this will move the cursor to the next row after printing.
Important: The Print block will not print anything to the Brain screen unless it is expanded to and set cursor to next row or followed by a Next Row block.
print [Hello] ◀ and set cursor to next row
Any block that returns a value can be used in the Print block.
In this example, the robot’s current rotation will be printed to the IQ Brain.
  when started
  print ([Gyro5 v] heading in degrees) on [Brain v] ◀ and set cursor to next row
Set Cursor#
The Set Cursor block is used to set the cursor location for Print blocks on the IQ (1st gen) Brain’s screen or Controller’s screen.
set cursor to row (1) column (1) on [Brain v]
The Set Cursor block accepts a range for row of 1 to 5 and a range for column of 1 to 21.
In this example, the robot will print the current timer value on the Brain, clear the value, and reset back to the first column and row before printing again.
    when started
    forever
    [Print the current timer on the Brain.]
    print (timer in seconds) on [Brain v] ◀ and set cursor to next row
    [After 1 second, clear the value and reset the cursor.]
    wait (1) seconds
    clear all rows on [Brain v]
    set cursor to row (1) column (1) on Brain
Next Row#
The Next Row block is used to set the print output cursor on the Print Console, IQ (1st gen) Brain’s screen, or Controller’s screen to the next available row.
set cursor to next row on [Brain v]
By default, all projects begin with the screen cursor at row 1 column 1. The Next Row block will move the cursor down by a single row on the screen. The Next Row block will also set the cursor’s column to position 1.
In this example, the robot will print “Hello” on the 1st row and “world!” on the 2nd row.
    when started
    print [Hello] on [Brain v] ▶
    set cursor to next row on [Brain v]
    print [world!] on [Brain v] ◀ and set cursor to next row
Set Print Precision#
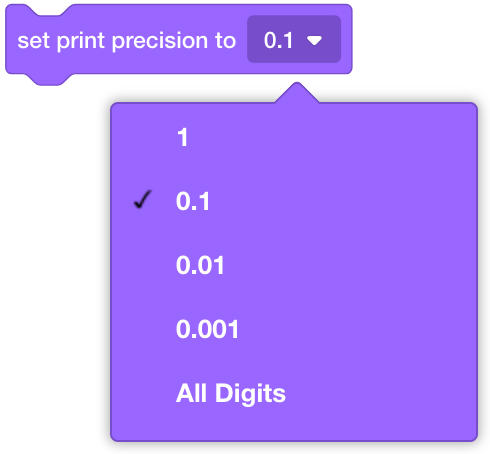
The Set Print Precision block is used to set the number of digits that appear after the decimal point when printing reporter blocks on the Print Console or IQ (1st gen) Brain’s screen.
set print precision to [0.1 v]
Choose the level of precision that inserted reporter blocks will be printed to the screen.
Ones (1) (Default)
Tenths (0.1)
Hundredths (0.01)
Thousandths (0.001)
All Digits (0.000001)
In this example, the print precision is set to hundredths before printing the current drivetrain heading.
    when started
    set print precision to [0.01 v] on [Brain v]
    print ([Gyro5 v] heading in degrees) on [Brain v] ◀ and set cursor to next row
Clear All Rows#
The Clear All Rows block is used to clear the entire IQ (1st gen) Brain’s screen.
clear all rows on [Brain v]
In this example, the robot will print the current timer value on the Brain, clear the value, and reset back to the first column and row before printing again.
    when started
    forever
    [Print the current timer on the Brain.]
    print (timer in seconds) on [Brain v] ◀ and set cursor to next row
    [After 1 second, clear the value and reset the cursor.]
    wait (1) seconds
    clear all rows on [Brain v]
    set cursor to row (1) column (1) on Brain
Clear Row#
The Clear Row block is used to clear a single row on the IQ (1st gen) Brain’s screen.
clear row (1) on [Brain v]
In this example, the robot will print “VEXcode” on three different rows before deleting the “VEXcode” in the 2nd row.
    when started
    [Print "VEXcode" on the 1st, 2nd, and 3rd rows.]
    repeat (3)
    print [VEXcode] on [Brain v] ◀ and set cursor to next row
    end
    [Wait 1 second before clearing the 2nd row.]
    wait (1) seconds
    clear row (2) on Brain
Touch LED#
Set Touch LED Color#
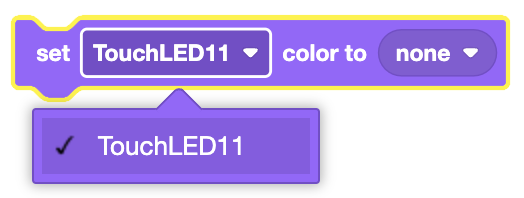
The Set Touch LED Color block is used to set the color of the VEX IQ Touch LED.
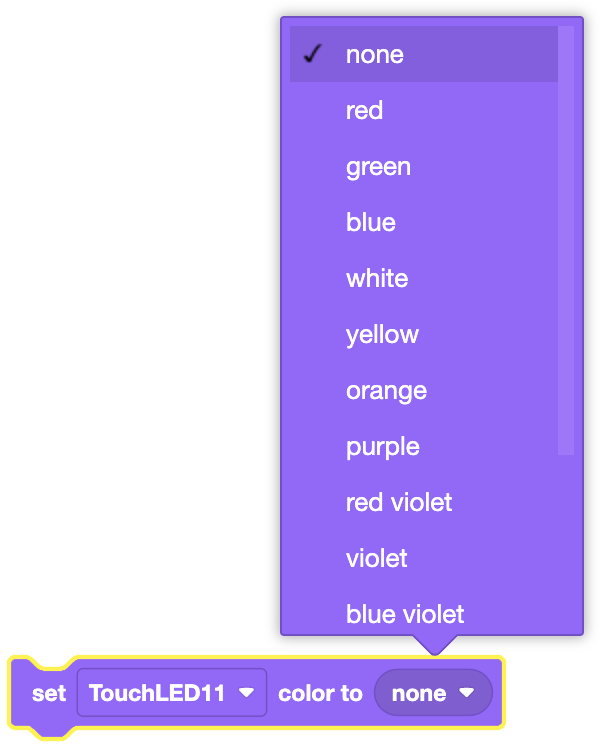
set [TouchLED11 v] color to (none v)
Select which Touch LED device to use.
Select which color to display.
You can also set the color of the Touch LED to the color detected by the Color Sensor or Optical Sensor using the Color Sensor Color Name or Optical Sensor Color Name block.
    set [TouchLED11 v] color to ([Color12 v] color name)

    set [TouchLED11 v] color to ([Optical4 v] color name)
In this example, the Touch LED will be set to green at the start of the project, then turn off after 2 seconds.
    when started
    set [TouchLED11 v] color to (green v)
    wait (2) seconds
    set [TouchLED11 v] color to (none v)
Set Touch LED Fade#
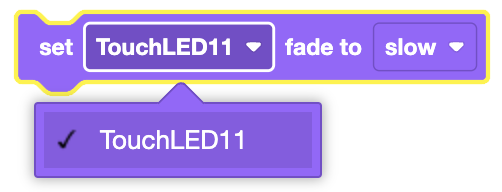
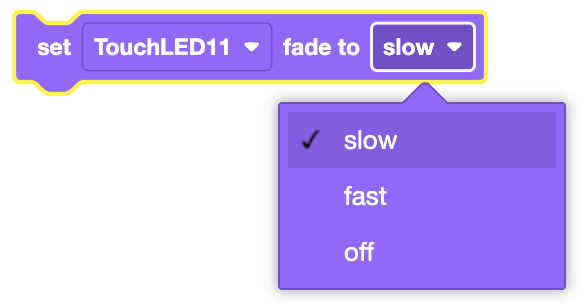
The Set Touch LED Fade block is used to set how fast the color of the VEX IQ Touch LED fades between colors.
set [TouchLED11 v] fade to [slow v]
Choose which Touch LED to use.
Choose how fast a color on the Touch LED will fade when swapped to a new color.
slow - The Touch LED will slowly fade to a new color.
fast - The Touch LED will quickly fade to a new color.
off - The Touch LED’s color will change instantly.
In this example, the Touch LED will be set to green and the fade will be set to slow at the start of the project, then the Touch LED will change to red after two seconds.
    when started
    set [TouchLED11 v] color to (green v)
    set [TouchLED11 v] fade to [slow v]
    wait (2) seconds
    set [TouchLED11 v] color to (red v)
Set Touch LED Brightness#
The Set Touch LED Brightness block is used to set the brightness level of the VEX IQ Touch LED.
set [TouchLED11 v] brightness to (50) %
Choose which Touch LED to use.

In this example, the Touch LED will turn green at 25% brightness, then after 2 seconds, the brightness will be set to 100%.
    when started
    set [TouchLED11 v] brightness to (25) %
    set [TouchLED11 v] color to (green v)
    wait (2) seconds
    set [TouchLED11 v] brightness to (100) %
Color#
Set Color Sensor Light#
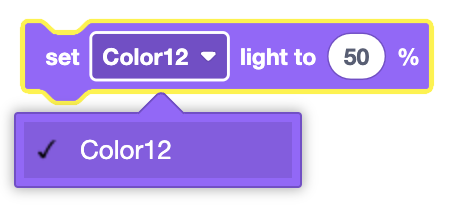
The Set Color Sensor Light block is used to set the brightness of the VEX IQ Color Sensor’s light.
set [Color12 v] light to (50) %
Choose which Color Sensor to use.
In this example, the Color Sensor will start at 25% brightness, then after 2 seconds, the brightness will be set to 100%.
    when started
    set [Color12 v] light to (25) %
    wait (2) seconds
    set [Color12 v] light to (100) %