AI Vision#
Introduction#
The AI Vision Sensor can detect and track objects, colors, and AprilTag IDs. This allows the robot to analyze its surroundings, follow objects, and react based on detected visual data.
This page uses ai_vision_1, RED_BOX, and BOX_CODE as the example AI Vision Sensor, Color Signature, and Color Code names respectively. Replace them with your own configured names as needed.
Below is a list of all methods:
Getters – Get data from the AI Vision Sensor.
take_snapshot– Captures data for a specific signature.installed– Whether the AI Vision Sensor is connected to the V5 Brain.
Properties – Object data returned from take_snapshot.
.exists– Whether the object exists in the current detection..width– Width of the detected object..height– Height of the detected object..centerX– X position of the object’s center..centerY– Y position of the object’s center..angle– Orientation of the Color Code..originX– X position of the object’s top-left corner..originY– Y position of the object’s top-left corner..id– Classification or tag ID of the object..score– Confidence score for AI Classifications.
Constructors – Manually initialize and configure the AI Vision Sensor and its signatures.
Getters#
take_snapshot#
take_snapshot filters data from the AI Vision Sensor’s frame to a single signature — a saved description of something the sensor can recognize, such as a pre-trained object, an AprilTag ID, or a configured Color Signature or Color Code — and returns a tuple.
Color Signatures and Color Codes must be configured first in the Vision Utility before they can be used with this method.
The tuple stores objects ordered from largest to smallest by width, starting at index 0. Each object’s properties can be accessed using its index. An empty tuple is returned if no matching objects are detected.
Usage:
ai_vision_1.take_snapshot(SIGNATURE)
Parameters |
Description |
|---|---|
|
Filters the dataset to only include data of the given signature. Available signatures are:
|
|
Optional. Sets the maximum number of objects that can be returned from 1 to 24. The default is 8. |
# Drive forward if an object is detected
while True:
    objects = ai_vision_1.take_snapshot(AiVision.ALL_AIOBJS)
    if objects[0].exists:
        drivetrain.drive_for(FORWARD, 50, MM)
    wait(50, MSEC)
AI Classifications#
The AI Vision Sensor can detect different objects under certain AI Classifications. Depending on the AI Classification model selected when configuring the AI Vision Sensor in the Devices window, different objects will be detected. The currently available models are:
Classroom Elements
ID Number |
AI Classification |
|---|---|
0 |
|
1 |
|
2 |
|
3 |
|
4 |
|
5 |
|
6 |
|
7 |
|
8 |
|
V5RC High Stakes
ID Number |
AI Classification |
|---|---|
0 |
|
1 |
|
2 |
|
V5RC Push Back
ID Number |
AI Classification |
|---|---|
0 |
|
1 |
|
Color Signatures#
A Color Signature is a unique color that the AI Vision Sensor can recognize. These signatures allow the AI Vision Sensor to detect and track objects based on their color. Once a Color Signature is configured, the sensor can identify objects with that specific color in its field of view. Color signatures are used with take_snapshot to process and detect colored objects in real-time.
In order to use a configured Color Signature in a project, its name must be the name of the sensor, two underscores, and then the Color Signature’s name. For example: ai_vision_1__RED_BOX.
# Display if any objects match the RED_BOX signature
while True:
    brain.screen.set_cursor(1, 1)
    brain.screen.clear_row(1)
    # Change to any configured Color Signature
    red_box = ai_vision_1.take_snapshot(ai_vision_1__RED_BOX)
    if red_box[0].exists:
        brain.screen.print("Color detected!")
        wait(100, MSEC)
Color Codes#
A Color Code is a structured pattern made up of color signatures arranged in a specific order. These codes allow the AI Vision Sensor to recognize predefined patterns of colors. Color Codes are useful for identifying complex objects or creating unique markers for autonomous navigation.
In order to use a configured Color Code in a project, its name must be the name of the sensor, two underscores, and then the Color Code’s name. For example: ai_vision_1__BOX_CODE.
# Display if any objects match the BOX_CODE code
while True:
    brain.screen.set_cursor(1, 1)
    brain.screen.clear_row(1)
    # Change to any configured Color Code
    box_code = ai_vision_1.take_snapshot(ai_vision_1__BOX_CODE)
    if box_code[0].exists:
        brain.screen.print("Code detected!")
        wait(100, MSEC)
installed#
installed returns a Boolean indicating whether the AI Vision Sensor is currently connected to the V5 Brain.
True– The AI Vision Sensor is connected to the V5 Brain.False– The AI Vision Sensor is not connected to the V5 Brain.
Usage:
ai_vision_1.installed()
Parameters |
Description |
|---|---|
This method has no parameters. |
# Display a message if the AI Vision Sensor is connected
if ai_vision_1.installed():
    brain.screen.print("Installed!")
Properties#
There are ten properties that are included with each object stored in a tuple after take_snapshot is used.
All property values except .id and .score describe the detected object’s position and size in the AI Vision Sensor’s view at the moment take_snapshot was used. These values are measured in pixels, based on the sensor’s 320 by 240 pixel resolution.
.exists#
.exists returns a Boolean indicating if the index exists in the tuple or not.
True– The index exists.False– The index does not exist.
# Check if at least two objects are detected
while True:
    brain.screen.clear_screen()
    brain.screen.set_cursor(1, 1)
    objects = ai_vision_1.take_snapshot(AiVision.ALL_AIOBJS)

    if objects[0].exists:
        if objects[1].exists:
            brain.screen.print("At least 2")

        else:
            brain.screen.print("Less than 2")
    wait(50, MSEC)
.width#
.width returns the width of the detected object in pixels, which is an integer between 1 and 320.
# Approach an object until it's at least 100 pixels wide
while True:
    objects = ai_vision_1.take_snapshot(AiVision.ALL_AIOBJS)

    if objects[0].exists:
        if objects[0].width < 100:
            drivetrain.drive(FORWARD)
    else:
        drivetrain.stop()
    wait(50, MSEC)
.height#
.height returns the height of the detected object in pixels, which is an integer between 1 and 240.
# Approach an object until it's at least 90 pixels tall
while True:
    objects = ai_vision_1.take_snapshot(AiVision.ALL_AIOBJS)

    if objects[0].exists:
        if objects[0].height < 90:
            drivetrain.drive(FORWARD)
    else:
        drivetrain.stop()
    wait(50, MSEC)
.centerX#
.centerX returns the x-coordinate of the detected object’s center in pixels, which is an integer between 0 and 320.
# Turn until an object is directly in front of the sensor
drivetrain.set_turn_velocity(10, PERCENT)
drivetrain.turn(RIGHT)

while True:
    objects = ai_vision_1.take_snapshot(AiVision.ALL_AIOBJS)

    if objects[0].exists:
        if 140 < objects[0].centerX < 180:
            drivetrain.stop()
    wait(10,MSEC)
.centerY#
.centerY returns the y-coordinate of the detected object’s center in pixels, which is an integer between 0 and 240.
# Approach an object until the object's center is
# high enough in the field of view
while True:
    objects = ai_vision_1.take_snapshot(AiVision.ALL_AIOBJS)

    if objects[0].exists:
        if objects[0].centerY < 150:
            drivetrain.drive(FORWARD)
    else:
        drivetrain.stop()
    wait(50, MSEC)
.angle#
.angle returns the orientation of the detected Color Code or AprilTag ID in degrees, which is an integer between 0 and 359.
# Turn left or right depending on how a
# configured Color Code is rotated
while True:
    box_code = ai_vision_1.take_snapshot(ai_vision_1__BOX_CODE)

    if box_code[0].exists:
        if 50 < box_code[0].angle < 100:
            drivetrain.turn(RIGHT)

        elif 270 < box_code[0].angle < 330:
            drivetrain.turn(LEFT)

        else:
            drivetrain.stop()
    else:
        drivetrain.stop()
    wait(50, MSEC)
.originX#
.originX returns the x-coordinate of the top-left corner of the detected object’s bounding box in pixels, which is an integer between 0 and 320.
# Display if an object is to the left or the right
while True:
    brain.screen.clear_screen()
    brain.screen.set_cursor(1,1)

    objects = ai_vision_1.take_snapshot(AiVision.ALL_AIOBJS)

    if objects[0].exists:
        if objects[0].originX < 120:
            brain.screen.print("To the left!")
        else:
            brain.screen.print("To the right!")
    else:
        brain.screen.print("No objects")
    wait(100, MSEC)
.originY#
.originY returns the y-coordinate of the top-left corner of the detected object’s bounding box in pixels, which is an integer between 0 and 240.
# Display if an object is close or far
while True:
    brain.screen.clear_screen()
    brain.screen.set_cursor(1,1)

    objects = ai_vision_1.take_snapshot(AiVision.ALL_AIOBJS)

    if objects[0].exists:
        if objects[0].originY < 110:
            brain.screen.print("Close")
        else:
            brain.screen.print("Far")
.id#
.id returns the ID of the detected AI Classification or AprilTag ID as an integer.
For an AprilTag ID, the .id property represents the detected AprilTag ID number in the range of 0 to 36. For an AI Classification, the .id property corresponds to the predefined ID in the AI Classifications section.
# Move forward when AprilTag ID 1 is detected
while True:
    apriltags = ai_vision_1.take_snapshot(AiVision.ALL_TAGS)

    if apriltags[0].exists:
        if apriltags[0].id == 1:
            robot.drive(FORWARD)
    else:
        drivetrain.stop()

    wait(50, MSEC)
.score#
.score returns the confidence score of the detected AI Classification as an integer between 1 and 100.
A lower score means the sensor is less confident about the detected object, while a higher score means the sensor is more confident.
Constructors#
Constructors are used to manually create AiVision, Colordesc, and Codedesc objects, which are necessary for configuring the AI Vision Sensor outside of VEXcode.
AiVision#
AiVision creates an AI Vision Sensor.
Usage
Vision(smartport, sigs)
Parameters |
Description |
|---|---|
|
The Smart Port that the AI Vision Sensor is connected to, written as |
|
Optional. The name of one or more signatures, separated by commas (
|
# Create the Color Signatures
RED_BOX = Colordesc(1, 255, 0, 0, 20, 0.9)
BLUE_BOX = Colordesc(0, 26, 255, 0, 20, 0.9)

# Create the Color Code
RED_BLUE = Codedesc(RED_BOX, BLUE_BOX)

"""
Create an AI Vision Sensor with the following signatures:
- RED_BLUE
- AiVision.ALL_TAGS - for AprilTag IDs
"""
ai_vision_1 = AiVision(Ports.PORT1, RED_BLUE, AiVision.ALL_TAGS)
Colordesc#
Colordesc creates a Color Signature. Up to seven different Color Signatures can be stored on an AI Vision Sensor at once.
Usage:
Colordesc(index, red, green, blue, hangle, hdsat)
Parameter |
Description |
|---|---|
|
The |
|
The red value of the color from 0 to 255. |
|
The green value of the color from 0 to 255. |
|
The blue value of the color from 0 to 255. |
|
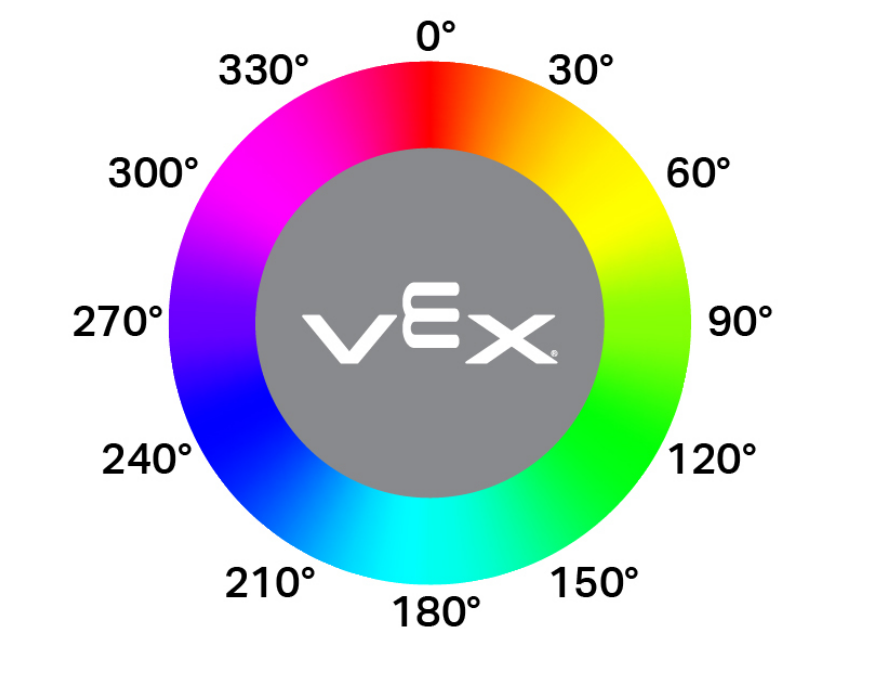
The allowable hue variance as a span of degrees on the color wheel (1–40). Higher values permit a wider rotational deviation from the base hue. |
|
The allowable saturation deviation, from 0.10 to 1.00. This value represents the fraction of the full saturation range the color may shift within (e.g., 0.10 = ±10% saturation) |
"""
Create a Color Signature with the following values:
- index: 1
- red: 255
- green: 0
- blue: 0
- hangle: 20
- hdsat: 0.9
"""
# Create a red Color Signature
RED_BOX = Colordesc(1, 255, 0, 0, 20, 0.9)
Codedesc#
Codedesc creates a Color Code. It requires at least two already defined Color Signatures in order to be used. Up to eight different Color Codes can be stored on a Vision Sensor at once.
Usage:
Codedesc(sig1, sig2, sig3, sig4, sig5)
Parameter |
Description |
|---|---|
|
A previously created Color Signature. |
|
A previously created Color Signature. |
|
Optional. A previously created Color Signature. |
|
Optional. A previously created Color Signature. |
|
Optional. A previously created Color Signature. |
# Create the Color Signatures
RED_BOX = Colordesc(1, 255, 0, 0, 20, 0.9)
BLUE_BOX = Colordesc(0, 26, 255, 0, 20, 0.9)

# Create a Color Code with the Color Signatures
BOX_CODE = Codedesc(RED_BOX, BLUE_BOX)
Tagdesc#
Tagdesc creates an AprilTag ID. You can use it to define identifiable AprilTag IDs, which makes your code clearer and easier to read.
Usage:
Tagdesc(id)
Parameter |
Description |
|---|---|
|
The AprilTag ID to be used. |
# Set AprilTag ID 7 to be the "goal"
goal = Tagdesc(7)