Configuring VEX AIM for Wi-Fi Station Mode#
Instead of broadcasting its own network, the robot can also join an existing Wi-Fi network (Station Mode). This page walks through entering Wi-Fi credentials, finding the robot’s assigned IP address, and updating your workspace to match.
1. Access the AIM Setup Dashboard#
In a web browser, enter the robot’s IP Address from the Access Point Information menu.

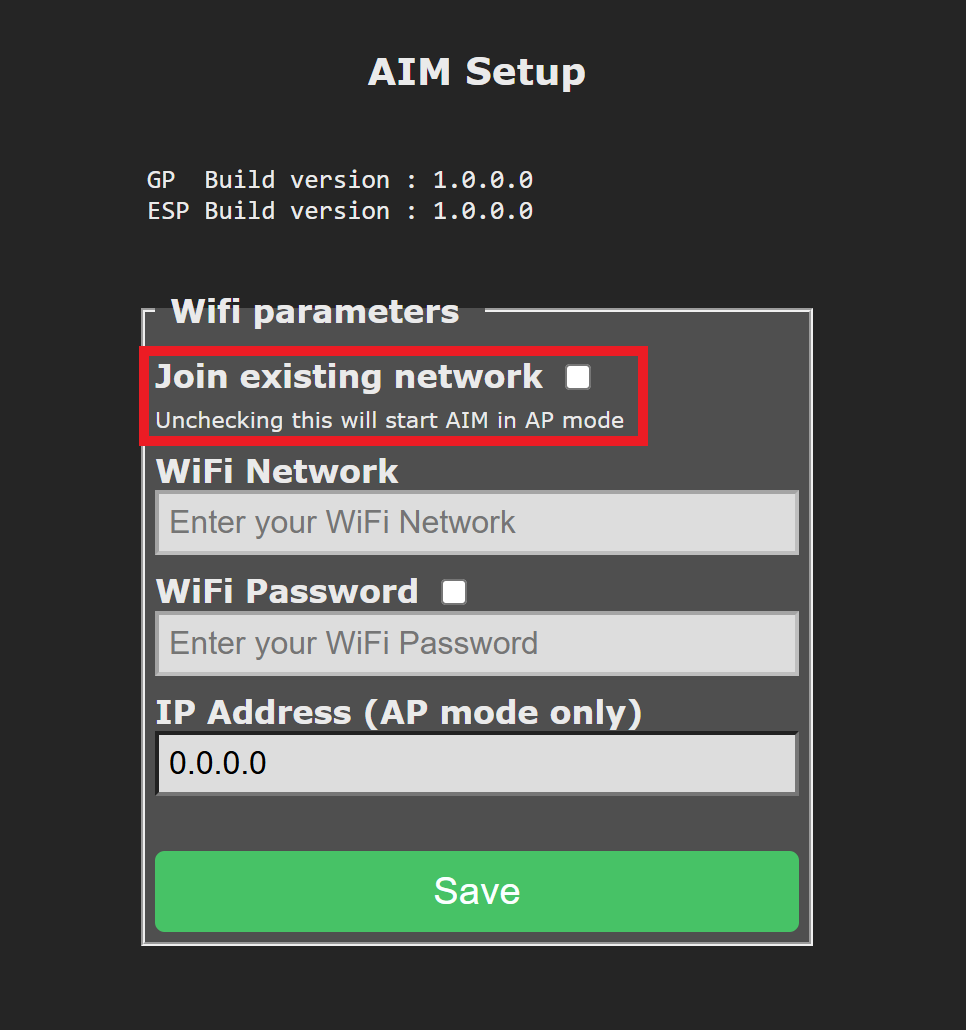
2. Enable Station Mode#
Check the Join existing network box.
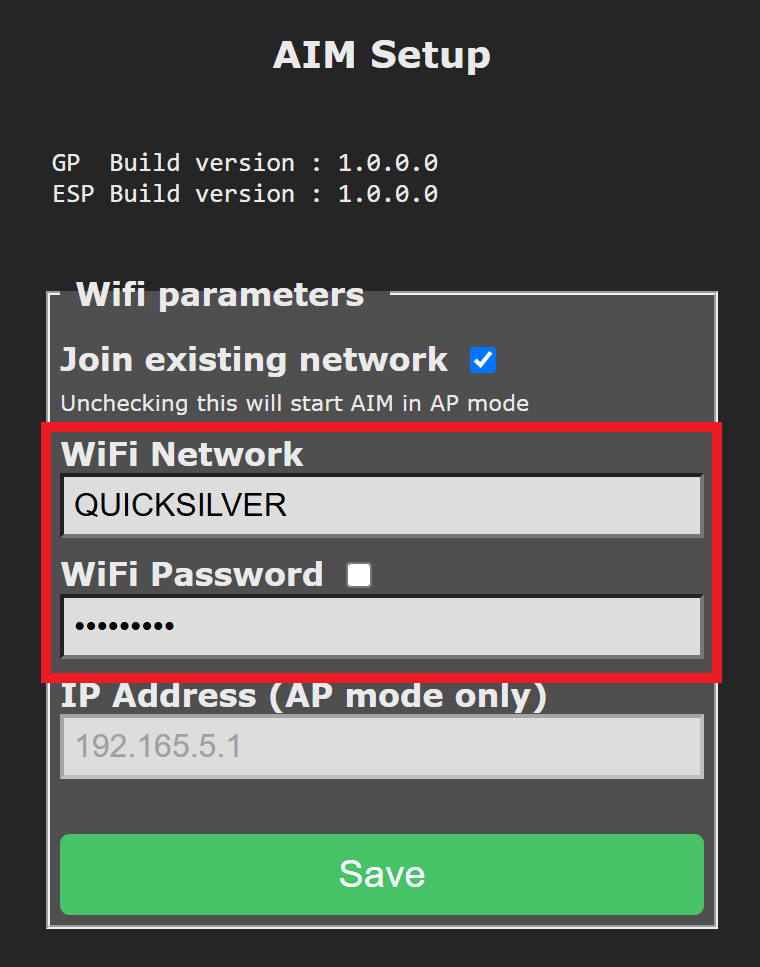
3. Enter the Network Information#
Enter the target Wi-Fi network SSID and password. Each field supports a maximum of 20 characters.
Note: Static IP addresses are not supported. The robot uses DHCP to obtain its network settings. Because the SSID and password are stored directly on the robot, VEX recommends setting up a dedicated Wi-Fi network for AIM in environments where the device will be shared—this helps avoid connection issues caused by overwritten or conflicting credentials.
After selecting Save, the robot will exit AP mode and switch to Station Mode, joining the specified network.
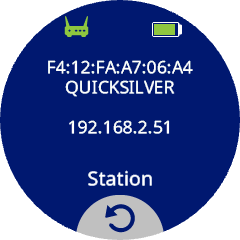
4. Find the Robot’s Assigned IP Address#
Once connected to the network, press the Station icon to view the different IP Address assigned to the robot by the router.
5. Clone the WebSocket Repository#
The WebSocket client library used to communicate with the VEX AIM Coding Robot is available on GitHub.
To get started, clone the repository and open it in your preferred Python editor or IDE (e.g., VS Code, PyCharm, or a terminal-based editor like Vim).
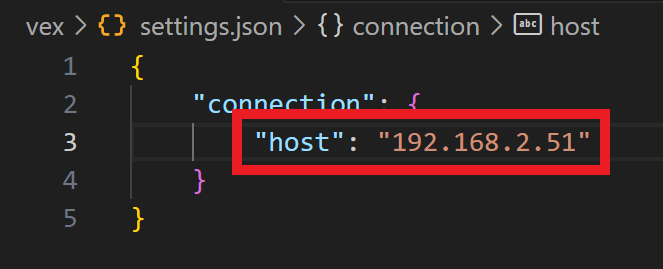
6. Save the Assigned IP Address#
Open the settings.json file located in the vex folder. Update the host field with the assigned IP Address in Station Mode.
You can now proceed with setting up your Python virtual environment if you haven’t already.