Changing VEX AIM’s IP Address in Access Point Mode#
Once the robot is in Access Point (AP) mode, you optionally have the ability to assign it a custom IP address if needed. This can make reconnecting easier and more consistent, especially in environments with multiple robots or shared networks. This page explains how to configure the robot’s AP-mode IP address and update your workspace to match.
1. Access the AIM Setup Dashboard#
In a web browser, enter the robot’s IP Address from the Access Point Information menu.

2. Update the IP Address#
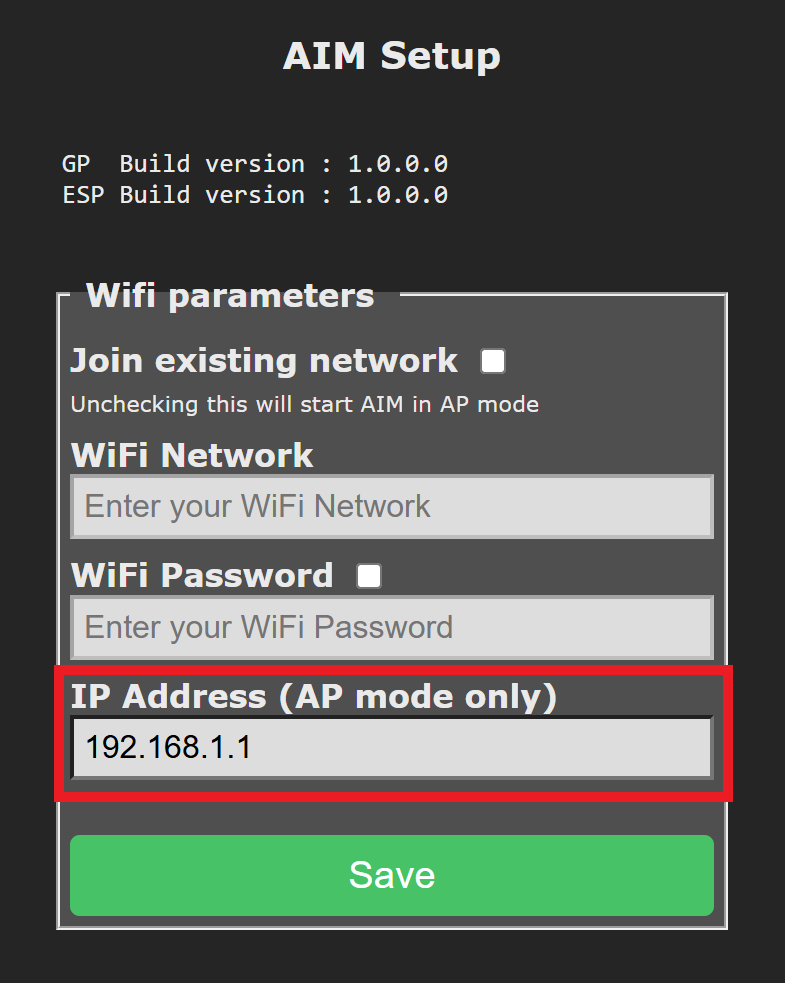
Manually update the IP Address by editing the IP Address (AP mode only) field and selecting Save to apply the changes.

Note: Leave Join existing network unchecked.
3. Clone the WebSocket Repository#
The WebSocket client library used to communicate with the VEX AIM Coding Robot is available on GitHub.
To get started, clone the repository and open it in your preferred Python editor or IDE (e.g., VS Code, PyCharm, or a terminal-based editor like Vim).
4. Save the Configured IP Address#
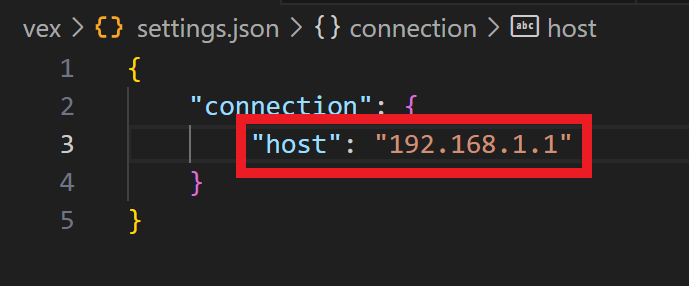
Open the settings.json file located in the vex folder. Update the host field with the IP Address assigned in Station Mode.

You can now proceed with setting up your Python virtual environment if you haven’t already.
