Sensing#
Brain Sensing#
Reset Timer#
The Reset Timer block is used to reset the EXP Brain’s timer.
timer in seconds
The Brain’s timer begins at the beginning of each project. The reset timer block is used to reset the timer back to 0 seconds.
In this example, the Brain will print the current time after waiting 2 seconds before resetting its timer.
  when started
  wait (2) seconds
  print (timer in seconds) on [Brain v] ◀ and set cursor to next row
  reset timer
  print (timer in seconds) on [Brain v] ◀ and set cursor to next row
Timer Value#
The Timer Value block is used to report the value of the EXP Brain’s timer in seconds.
timer in seconds
The timer starts at 0 seconds when the program starts, and reports the timer’s value as a decimal value.
In this example, the Brain will print the current time after waiting 2 seconds before resetting its timer.
  when started
  wait (2) seconds
  print (timer in seconds) on [Brain v] ◀ and set cursor to next row
  reset timer
  print (timer in seconds) on [Brain v] ◀ and set cursor to next row
Cursor Column#
The Cursor Column block is used to report the column number of the EXP Brain’s screen cursor location.
cursor column
The Cursor Column block will report a value from 1-80 and will start on column 1 at the start of a project.
In this example, the Brain will move the cursor to (3, 7) and then print the current column (7) on the Brain’s screen.
  when started
  set cursor to row (3) column (7) on Brain
  print (cursor column) on [Brain v] ◀ and set cursor to next row
Cursor Row#
The Cursor Row block is used to report the row number of the EXP Brain’s screen cursor location.
cursor row
The Cursor Column block will report a value from 1-9 and will start on row 1 at the start of a project.
In this example, the Brain will move the cursor to (3, 7) and then print the current row (3) on the Brain’s screen.
  when started
  set cursor to row (3) column (7) on Brain
  print (cursor row) on [Brain v] ◀ and set cursor to next row
Battery Voltage#
The Battery Voltage block is used to report the voltage of the EXP Brain’s battery.
(battery voltage in volts)
The Battery Voltage block reports a range from 6 volts to 9 volts.
In this example, the Brain will print its current battery voltage on the Brain’s screen.
  when started
  print (battery voltage in volts) on [Brain v] ◀ and set cursor to next row
Battery Current#
The Battery Current block is used to report the current of the EXP Brain’s battery.
(battery current in amps)
The Battery Current block reports a range from 0.0 amps to 15.0 amps.
In this example, the Brain will print its current battery current on the Brain’s screen.
  when started
  print (battery current in amps) on [Brain v] ◀ and set cursor to next row
Battery Capacity#
The Battery Capacity block is used to report the charge level of the EXP Brain’s battery.
(battery capacity in %)
The Battery Capacity block reports a range from 0% to 100%.
In this example, the Brain will print its current battery charge on the Brain’s screen.
  when started
  print (battery capacity in %) on [Brain v] ◀ and set cursor to next row
Controller Sensing#
Controller Pressed#
The Controller Pressed block is used to report if a button on the EXP Controller is pressed.
<Controller [▲ v] pressed?>
The Controller Pressed block reports True when the selected Controller button is pressed.
The Controller Pressed block reports False when the selected Controller button is not pressed.
In this example, the Brain will print a message on its screen the first time the A button on the controller is pressed.
  when started
  [Don't do anything until the ▲ button is pressed.]
  wait until <Controller [▲ v] pressed?>
  print [The ▲ button was pressed.] on [Brain v] ◀ and set cursor to next row
Position of Controller#
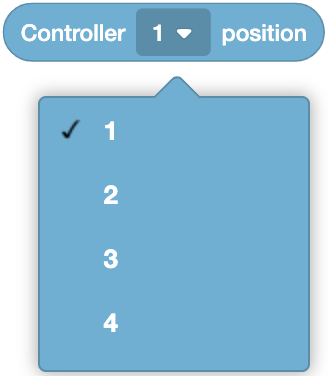
The Position of Controller block is used to report the position of a joystick on the EXP Controller along an axis.
(Controller [1 v] position)
The Position of Controller block reports a range from -100 to 100.
The Position of Controller block reports 0 when the joystick axis is centered.
Choose the joystick’s axis.
In this example, the Brain will print the 3rd axis of the EXP Controller’s joysticks.
  when started
  print (Controller [3 v] position) on [Brain v] ◀ and set cursor to next row
Controller Enable/Disable#
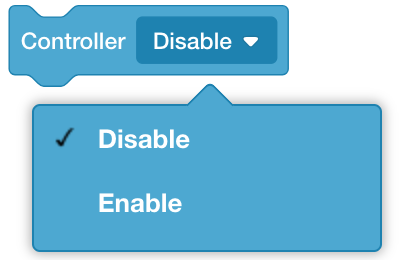
The Controller Enable/Disable block is used to enable or disable Controller configured actions from the Devices menu.
Controller [Disable v]
Choose to either enable or disable the configured Controller actions. By default, the Controller is Enabled in every project.
In this example, the Controller will be disabled at the start of the project and be re-enabled after the drivetrain has moved forward for 6 inches.
  when started
  Controller [Disable v]
  drive [forward v] for (6) [inches v] ▶
  Controller [Enable v]
Motor Sensing#
Motor is Done?#
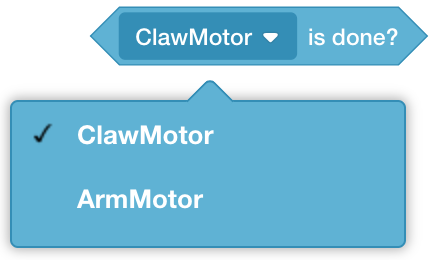
The Motor is Done? block is used to report if the selected EXP Smart Motor or Motor Group has completed its movement.
<[ClawMotor v] is done?>
The Motor is Done? block reports True when the selected Motor or Motor Group has completed its movement.
The Motor is Done? block reports False when the selected Motor or Motor Group is still moving.
Choose which Motor or Motor Group to use.
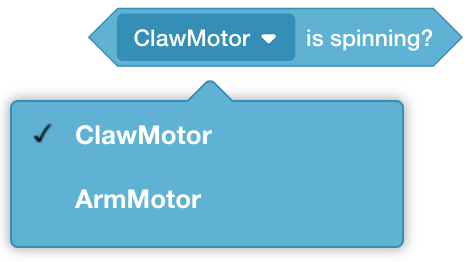
Motor is Spinning?#
The Motor is Spinning? block is used to report if the selected EXP Smart Motor or Motor Group is currently moving.
<[ClawMotor v] is spinning?>
The Motor is Spinning? block reports True when the selected Motor or Motor Group is moving.
The Motor is Spinning? block reports False when the selected Motor or Motor Group is not moving.
Choose which Motor or Motor Group to use.
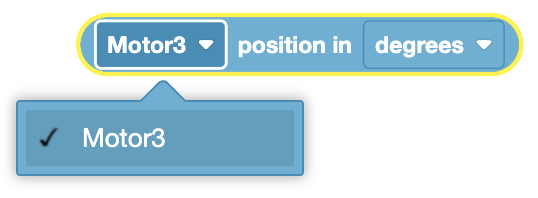
Position of Motor#
The Position of Motor block is used to report the distance an EXP Smart Motor or the first motor of a Motor Group has traveled.
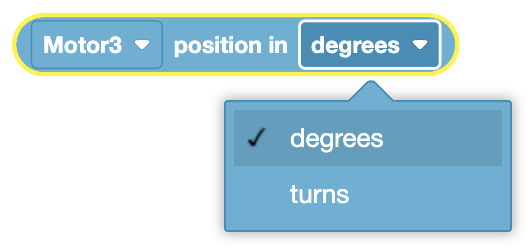
([Motor3 v] position in [degrees v])
Choose which Motor or Motor Group to use.
Choose the units to report in, degrees or turns.
In this example, the Motor will spin forward for 1 second before its current position is printed on the Brain’s screen.
  when started
  [Spin Motor3 forward for 1 second.]
  spin [Motor3 v] [forward v]
  wait (1) seconds
  [Print Motor3's current position after 1 second.]
  print ([Motor3 v] position in [degrees v]) on [Brain v] ◀ and set cursor to next row
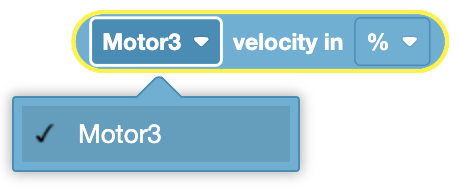
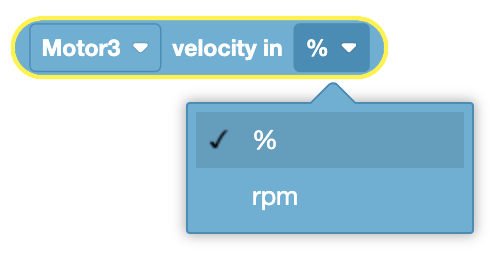
Velocity of Motor#
The Velocity of Motor block is used to report the current velocity of an EXP Smart Motor or the first motor of a Motor Group.
([Motor3 v] velocity in [% v])
The Velocity of Motor block reports a range from -100% to 100% or -600rpm to 600rpm.
Choose which Motor or Motor Group to use.
Choose the units to report in, percent (%) or rpm.
In this example, the Motor will spin forward for 1 second before its current velocity is printed on the Brain’s screen.
  when started
  [Spin Motor3 forward for 1 second.]
  spin [Motor3 v] [forward v]
  wait (1) seconds
  [Print Motor3's current velocity after 1 second.]
  print ([Motor3 v] velocity in [% v]) on [Brain v] ◀ and set cursor to next row
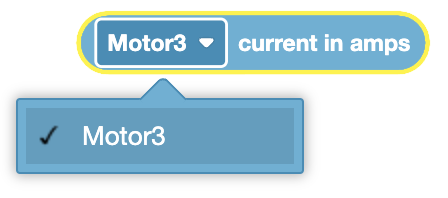
Current of Motor#
The Current of Motor block is used to report the amount of current a EXP Smart Motor or Motor Group is drawing in amperes (amps).
([Motor3 v] current in amps)
Choose which Motor or Motor Group to use.
In this example, the Motor will spin forward for 1 second before its current is printed on the Brain’s screen.
  when started
  [Spin Motor3 forward for 1 second.]
  spin [Motor3 v] [forward v]
  wait (1) seconds
  [Print Motor3's current after 1 second.]
  print ([Motor3 v] current in amps) on [Brain v] ◀ and set cursor to next row
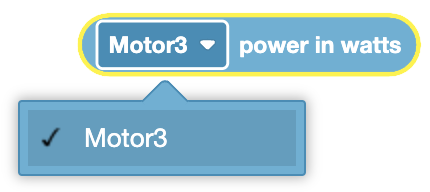
Power of Motor#
The Power of Motor block is used to report the amount of power output a EXP Smart Motor or the first motor of a Motor Group is currently generating.
([Motor3 v] power in watts)
Choose which Motor or Motor Group to use.
In this example, the Motor will spin forward for 1 second before its current power is printed on the Brain’s screen.
  when started
  [Spin Motor3 forward for 1 second.]
  spin [Motor3 v] [forward v]
  wait (1) seconds
  [Print Motor3's current power after 1 second.]
  print ([Motor3 v] power in watts) on [Brain v] ◀ and set cursor to next row
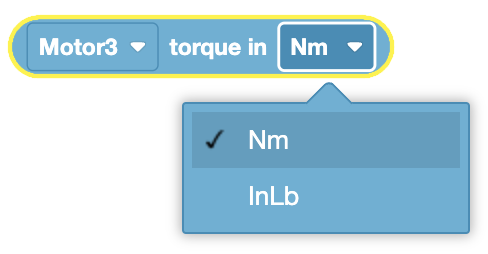
Torque of Motor#
The Torque of Motor block is used to report the amount of torque (rotational force) a EXP Smart Motor or the first motor of a Motor Group is currently using.
([Motor3 v] torque in [Nm v])
The Torque of Motor block reports a range from 0.0 to 18.6 inch-pounds (InLB) or 0.0 to 2.1 Newton-meters (Nm).
Choose which Motor or Motor Group to use.
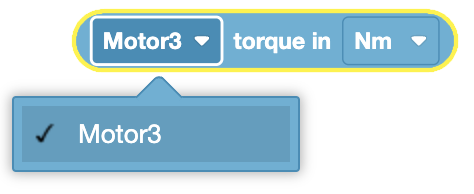
Choose the units to report in, Nm or InLb.
In this example, the Motor will spin forward for 1 second before its current torque is printed on the Brain’s screen.
  when started
  [Spin Motor3 forward for 1 second.]
  spin [Motor3 v] [forward v]
  wait (1) seconds
  [Print Motor3's current torque after 1 second.]
  print ([Motor3 v] torque in [Nm v]) on [Brain v] ◀ and set cursor to next row
Efficiency of Motor#
The Efficiency of Motor block is used to report the efficiency of a EXP Smart Motor or the first motor of a Motor Group.
([Motor3 v] efficiency in %)
The Efficiency of Motor block reports a range from 0% to 100%, determined by the value of the power (in watts) the motor is using (input), versus the amount of power (in watts) the motor is providing (output).
An EXP Smart Motor or Motor Group typically reaches a maximum efficiency of 65% under normal use cases.
Choose which Motor or Motor Group to use.
In this example, the Motor will spin forward for 1 second before its current efficiency is printed on the Brain’s screen.
  when started
  [Spin Motor3 forward for 1 second.]
  spin [Motor3 v] [forward v]
  wait (1) seconds
  [Print Motor3's current efficiency after 1 second.]
  print ([Motor3 v] efficiency in %) on [Brain v] ◀ and set cursor to next row
Temperature of Motor#
The Temperature of Motor block is used to report the temperature of a EXP Smart Motor or the first motor of a Motor Group.
([Motor3 v] temperature in %)
The Temperature of Motor block reports a range from 0% to 100%.
Choose which Motor or Motor Group to use.

In this example, the Motor will spin forward for 1 second before its current temperature is printed on the Brain’s screen.
when started
[Spin Motor3 forward for 1 second.]
spin [Motor3 v] [forward v]
wait (1) seconds
[Print Motor3's current temperature after 1 second.]
print ([Motor3 v] temperature in %) on [Brain v] ◀ and set cursor to next row
Drivetrain Sensing#
Drive is Done?#
The Drive is Done? block is used to report if the Drivetrain has completed its movement.
<drive is done?>
The Drive is Done? block reports True when the Drivetrain’s motors have completed their movement.
The Drive is Done? block reports False when the sDrivetrain’s motors are still moving.
Drive is Moving?#
The Drive is Moving? block is used to report if the Drivetrain is currently moving.
<drive is moving?>
The Drive is Moving? block reports True when the Drivetrain’s motors are moving.
The Drive is Moving? block reports False when the sDrivetrain’s motors are not moving.
Drive Heading#
The Drive Heading block is used to report the direction that the Drivetrain is facing by using the Inertial sensor’s current angular position.
(drive heading in degrees)
The Drive Heading block reports a range from 0.0 to 359.99 degrees.
In this example, the Drivetrain will turn to the right for 1 second before its current heading is printed on the Brain’s screen.
  when started
  [Turn towards the right for 1 second.]
  turn [right v]
  wait (1) seconds
  [Print Drivetrain's current heading after 1 second.]
  print (drive heading in degrees) on [Brain v] ◀ and set cursor to next row
Drive Rotation#
The Drive Rotation block is used to report the Drivetrain’s angle of rotation.
(drive rotation in degrees)
A clockwise direction is reported as a positive value, and a counterclockwise value is reported as a negative value.
In this example, the Drivetrain will turn to the left for 1 second before its current rotation is printed on the Brain’s screen.
  when started
  [Turn towards the left for 1 second.]
  turn [left v]
  wait (1) seconds
  [Print Drivetrain's current rotation after 1 second.]
  print (drive rotation in degrees) on [Brain v] ◀ and set cursor to next row
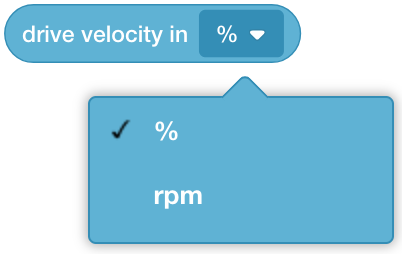
Drive Velocity#
The Drive Velocity block is used to report the current velocity of the Drivetrain.
(drive velocity in [% v])
The Drive Velocity block reports a range from -100% to 100% or -600rpm to 600rpm.
Choose the units to report in, percent (%) or rpm.
In this example, the Drivetrain will drive forward for 1 second before its current velocity is printed on the Brain’s screen.
  when started
  [Drive forward for 1 second.]
  drive [forward v]
  wait (1) seconds
  [Print Drivetrain's current velocity after 1 second.]
  print (drive velocity in [% v]) on [Brain v] ◀ and set cursor to next row
Drive Current#
The Drive Current block is used to report the amount of current (power) that the Drivetrain is currently using.
(drive current amps)
In this example, the Drivetrain will drive forward for 1 second before its current is printed on the Brain’s screen.
  when started
  [Drive forward for 1 second.]
  drive [forward v]
  wait (1) seconds
  [Print Drivetrain's current after 1 second.]
  print (drive current amps) on [Brain v] ◀ and set cursor to next row
Drive Power#
The Drive Power block is used to report the amount of power output the Drivetrain is currently generating.
(drive power in watts)
In this example, the Drivetrain will drive forward for 1 second before its current power is printed on the Brain’s screen.
  when started
  [Drive forward for 1 second.]
  drive [forward v]
  wait (1) seconds
  [Print Drivetrain's current power after 1 second.]
  print (drive power in watts) on [Brain v] ◀ and set cursor to next row
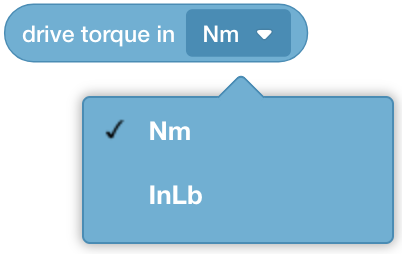
Drive Torque#
The Drive Torque block is used to report the amount of torque (rotational force) the Drivetrain is currently using.
(drive torque in [Nm v])
The Drive Torque block reports a range from 0.0 to 18.6 inch-pounds (InLB) or 0.0 to 2.1 Newton-meters (Nm).
Choose the units to report in, Nm or InLb.
In this example, the Drivetrain will drive forward for 1 second before its current torque is printed on the Brain’s screen.
  when started
  [Drive forward for 1 second.]
  drive [forward v]
  wait (1) seconds
  [Print Drivetrain's current torque after 1 second.]
  print (drive torque in [Nm v]) on [Brain v] ◀ and set cursor to next row
Drive Efficiency#
The Drive Efficiency block is used to report the efficiency of the Drivetrain.
(drive efficiency in %)
The Drive Efficiency block reports a range from 0% to 100%, determined by the value of the power (in watts) the motor is using (input), versus the amount of power (in watts) the motor is providing (output).
An EXP Drivetrain typically reaches a maximum efficiency of 65% under normal use cases.
In this example, the Drivetrain will drive forward for 1 second before its current efficiency is printed on the Brain’s screen.
  when started
  [Drive forward for 1 second.]
  drive [forward v]
  wait (1) seconds
  [Print Drivetrain's current efficiency after 1 second.]
  print (drive efficiency in %) on [Brain v] ◀ and set cursor to next row
Drive Temperature#
The Drive Temperature block is used to report the temperature of the EXP Smart Motors powering the Drivetrain.
(drive temperature in %)
The Drive Temperature block reports a range from 0% to 100%.
In this example, the Drivetrain will drive forward for 1 second before its current temperature is printed on the Brain’s screen.
  when started
  [Drive forward for 1 second.]
  drive [forward v]
  wait (1) seconds
  [Print Drivetrain's current temperature after 1 second.]
  print (drive temperature in %) on [Brain v] ◀ and set cursor to next row
Bumper Sensing#
Bumper Pressed#
The Bumper Pressed block is used to report if the Bumper Switch is pressed.
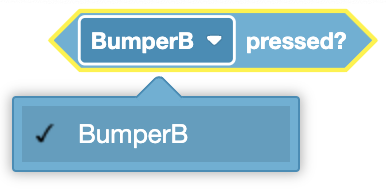
<[BumperB v] pressed?>
The Bumper Pressed block reports True when the selected Bumper Switch is pressed.
The Bumper Pressed block reports False when the selected Bumper Switch is not pressed.
Choose which Bumper Switch to use.
In this example, the Brain will print a message on its screen the first time the Bumper Switch is pressed.
  when started
  [Don't print the message until the Bumper Switch is pressed.]
  wait until <[BumperB v] pressed?>
  print [Bumper Switch was pressed.] on [Brain v] ◀ and set cursor to next row
Limit Sensing#
Limit Pressed#
The Limit Pressed block is used to report if the Limit Switch is pressed.
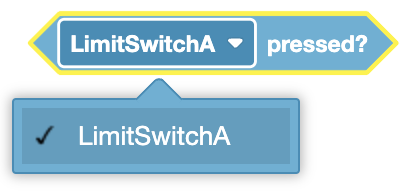
<[LimitSwitchA v] pressed?>
The Limit Pressed block reports True when the selected Limit Switch is pressed.
The Limit Pressed block reports False when the selected Limit Switch is not pressed.
Choose which Limit Switch to use.
In this example, the Brain will print a message on its screen the first time the Limit Switch is pressed.
  when started
  [Don't print the message until the Limit Switch is pressed.]
  wait until <[LimitSwitchA v] pressed?>
  print [Limit Switch was pressed.] on [Brain v] ◀ and set cursor to next row
Gyro Sensing#
Calibrate#
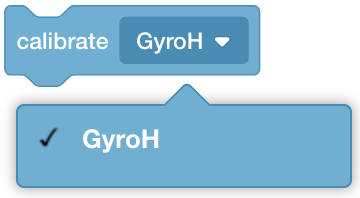
The Calibrate block is used to calibrate the Gyro or Inertial Sensor to reduce the amount of drift. It is recommended that this block is used at the start of the project.
The Gyro or Inertial Sensor will automatically adjust its values depending on the orientation of the EXP Brain during calibration so it remains consistent across all possible EXP Brain orientations.

The Brain must remain still for calibration process to succeed, which takes approximately 2 seconds.
calibrate [GyroH v]
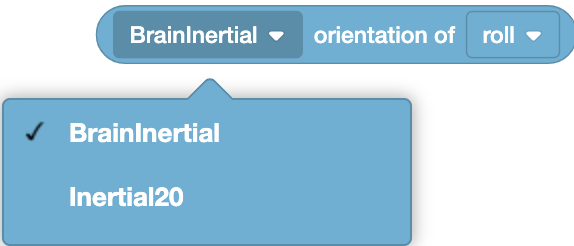
Choose which Gyro/Inertial Sensor to use.
In this example, the Brain’s Inertial Sensor will calibrate for 2 seconds before printing the current orientation of the Inertial Sensor.
  when started
  calibrate [BrainInertial v]
  wait (2) seconds
  print ([BrainInertial v] orientation of [roll v] in degrees) on [Brain v] ◀ and set cursor to next row
Set Heading#
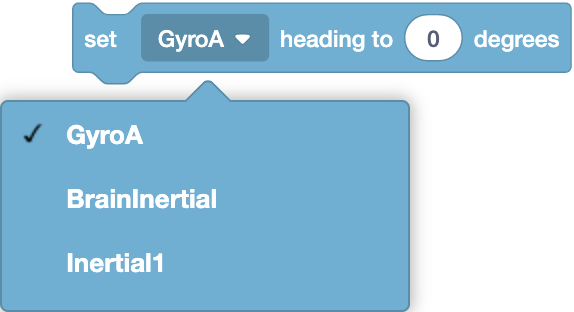
The Set Heading block is used to set the Gyro/Inertial sensor’s current heading position to a set value.
set [GyroA v] heading to (0) degrees
The Set Heading block accepts a range of 0.0 to 359.99 degrees.
Choose which Gyro/Inertial Sensor to use.
In this example, the Brain’s Inertial sensor will print its starting heading, set its heading to 90 degrees, and then print the new heading.
  when started
  print ([BrainInertial v] heading in degrees) on [Brain v] ◀ and set cursor to next row
  set [BrainInertial v] heading to (90) degrees
  print ([BrainInertial v] heading in degrees) on [Brain v] ◀ and set cursor to next row
Set Rotation#
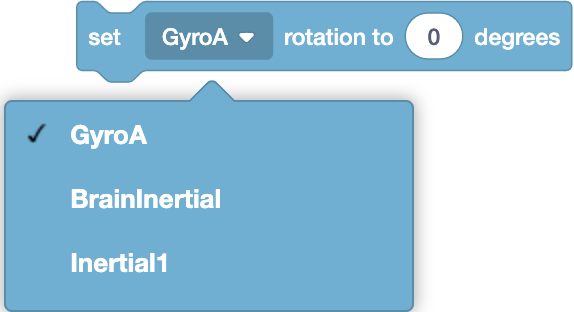
The Set Rotation block is used to set the Gyro/Inertial sensor’s current rotation position to a set value.
set [Inertial1 v] rotation to (0) degrees
The Set Rotation block accepts any positive or negative decimal or integer number.
Choose which Gyro/Inertial Sensor to use.
In this example, the Brain’s Inertial sensor will print its starting rotation, set its rotation to -100 degrees, and then print the new rotation.
  when started
  print ([BrainInertial v] rotation in degrees) on [Brain v] ◀ and set cursor to next row
  set [BrainInertial v] rotation to (-100) degrees
  print ([BrainInertial v] rotation in degrees) on [Brain v] ◀ and set cursor to next row
Angle of Heading#
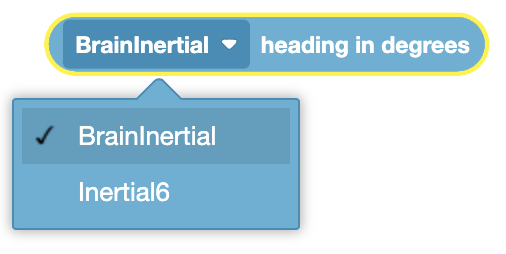
The Angle of Heading block is used to report the 3-Wire Gyro Sensor or EXP Inertial Sensor’s current heading in degrees.
([BrainInertial v] heading in degrees)
The Angle of Heading block reports a range from 0.0 to 359.99 degrees.
Choose which Gyro/Inertial Sensor to use.
In this example, the Brain’s Inertial sensor will print its starting heading, set its heading to 90 degrees, and then print the new heading.
  when started
  print ([BrainInertial v] heading in degrees) on [Brain v] ◀ and set cursor to next row
  set [BrainInertial v] rotation to (90) degrees
  print ([BrainInertial v] heading in degrees) on [Brain v] ◀ and set cursor to next row
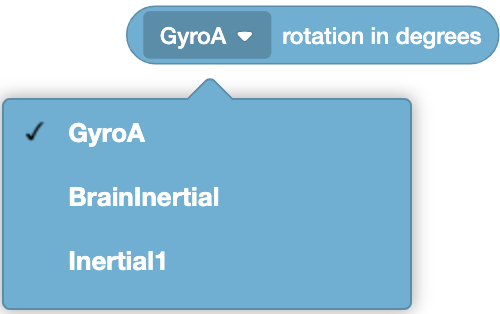
Angle of Rotation#
The Angle of Rotation block is used to report the 3-Wire Gyro Sensor or EXP Inertial Sensor’s current rotation in degrees.
([BrainInertial v] rotation in degrees)
A clockwise direction is reported as a positive value, and a counterclockwise value is reported as a negative value.
Choose which Gyro/Inertial Sensor to use.
In this example, the Brain’s Inertial sensor will print its starting rotation, set its rotation to -100 degrees, and then print the new heading.
  when started
  print ([BrainInertial v] rotation in degrees) on [Brain v] ◀ and set cursor to next row
  set [BrainInertial v] rotation to (-100) degrees
  print ([BrainInertial v] rotation in degrees) on [Brain v] ◀ and set cursor to next row
Inertial Sensing#
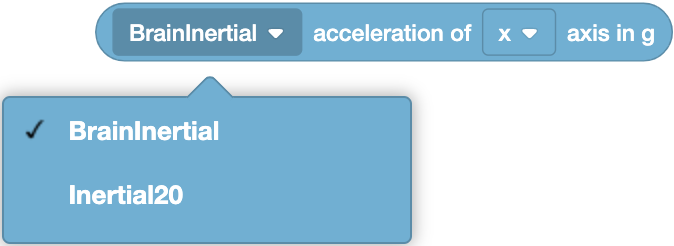
Acceleration of#
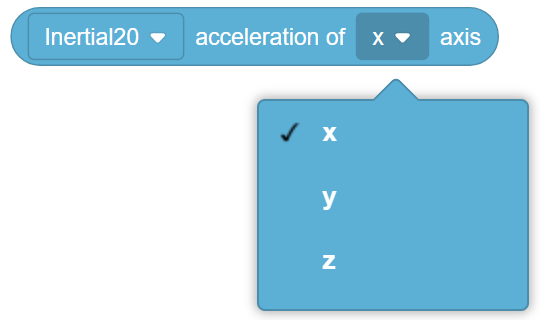
The Acceleration of block is used to report the acceleration value from one of the axes (x, y, or z) on the Inertial Sensor.
([Inertial20 v] acceleration of [X v] axis in g)
The Acceleration of block reports a range from -4.0 to 4.0 Gs.
Choose which Gyro/Inertial Sensor to use.
Choose which axis to use:
x - The X-axis reports acceleration when the Inertial Sensor moves forward to backward.
y - The Y-axis reports acceleration when the Inertial Sensor moves side to side.
z - The Z-axis reports acceleration when the Inertial Sensor moves up to down.
In this example, the Drivetrain will move forward and print its current X-axis acceleration while moving.
  when started
  [Drive forward for 1 second.]
  drive [forward v]
  wait (1) seconds
  [Print the X-axis acceleration while the Drivetrain is moving.]
  print ([BrainInertial v] acceleration of [X v] axis in g) on [Brain v] ◀ and set cursor to next row
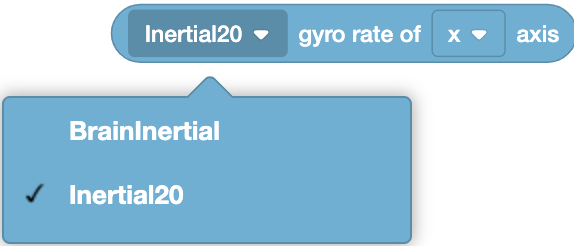
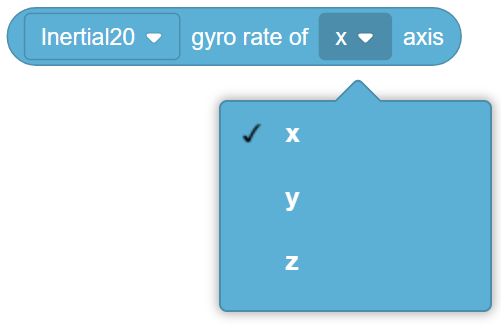
Gyro Rate of#
The Gyro Rate of block is used to report the rate of rotation from one of the axes (x, y, or z) on the Inertial Sensor.
([Inertial20 v] gyro rate of [X v] axis in dps)
The Gyro Rate of block reports a range from -1000.0 to 1000.0 in dps (degrees per second).
Choose which Gyro/Inertial Sensor to use.
Choose which axis to use:
x - The X-axis reports rate of rotation when the Inertial Sensor rotates on the X-Axis (based on the orientation of the sensor).
y - The Y-axis reports rate of rotation when the Inertial Sensor rotates on the Y-Axis (based on the orientation of the sensor).
z - The Z-axis reports rate of rotation when the Inertial Sensor rotates in the Z-Axis (based on the orientation of the sensor).
In this example, the Drivetrain will turn to the right and print its current X-axis gyro rate while turning.
  when started
  [Turn towards the right 1 second.]
  turn [right v]
  wait (1) seconds
  [Print the X-axis gyro rate while the Drivetrain is turning.]
  print ([Inertial20 v] gyro rate of [X v] axis in dps) on [Brain v] ◀ and set cursor to next row
Orientation of#
The Orientation of block is used to report the orientation angle of the inertial sensor.
([Inertial20 v] orientation of [roll v] in degrees)
Choose which Gyro/Inertial Sensor to use.
Choose which orientation to use:
roll - The Y-axis represents roll, which reports a value between -180 to +180 degrees.
pitch - The X-axis represents pitch, which reports a value between -90 to +90 degrees.
yaw - The Z-axis represents yaw, which reports a value between -180 to +180 degrees.
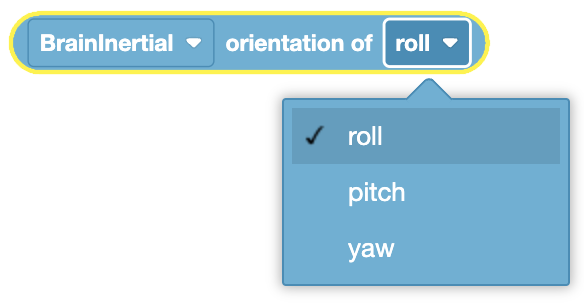
In this example, the Drivetrain will turn to the right and print its current yaw as it turns.
  when started
  [Turn towards the right for 1 second.]
  turn [right v]
  wait (1) seconds
  [Print the roll while the Drivetrain is turning.]
  print ([BrainInertial v] orientation of [roll v] in degrees) on [Brain v] ◀ and set cursor to next row
Encoder Sensing#
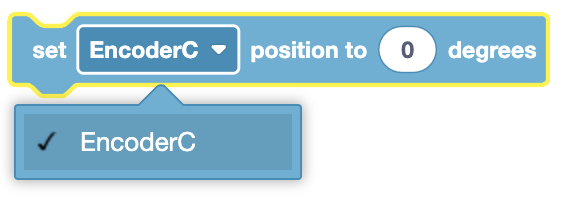
Set Shaft Encoder Position#
The Set Shaft Encoder Position block is used to set the Shaft Encoder’s position to the given value.
set [EncoderC v] position to (0) degrees
Choose which Shaft Encoder to use.
In this example, the Shaft Encoder will print its starting position, set its position to 90 degrees, and then print the new position.
  when started
  print ([EncoderC v] position in [degrees v] :: custom-sensing) on [Brain v] ◀ and set cursor to next row
  set [EncoderC v] position to (90) degrees
  print ([EncoderC v] position in [degrees v] :: custom-sensing) on [Brain v] ◀ and set cursor to next row
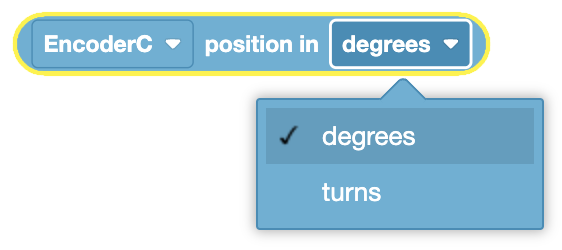
Shaft Encoder Position#
The Shaft Encoder Position block is used to report the distance the Shaft Encoder has rotated.
([EncoderC v] position in [degrees v] :: custom-sensing)
Choose which Shaft Encoder to use.
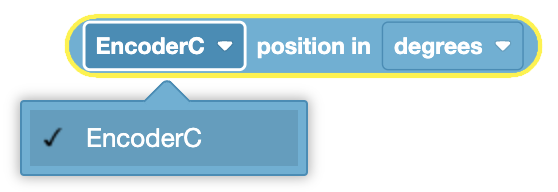
Choose which unit to report in: degrees or turns.
In this example, the Shaft Encoder will print its starting position, set its position to 90 degrees, and then print the new position.
  when started
  print ([EncoderC v] position in [degrees v] :: custom-sensing) on [Brain v] ◀ and set cursor to next row
  set [EncoderC v] position to (90) degrees
  print ([EncoderC v] position in [degrees v] :: custom-sensing) on [Brain v] ◀ and set cursor to next row
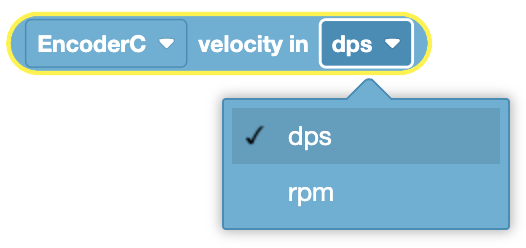
Shaft Encoder Velocity#
The Shaft Encoder Velocity block is used to report the current velocity of a Shaft Encoder.
([EncoderC v] velocity in [dps v] :: custom-sensing)
Choose which Shaft Encoder to use.
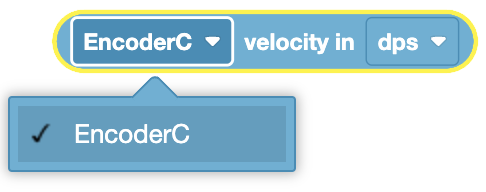
Choose which unit to report in: degrees per second (dps) or rotations per minute (rpm).
Distance Sensing#
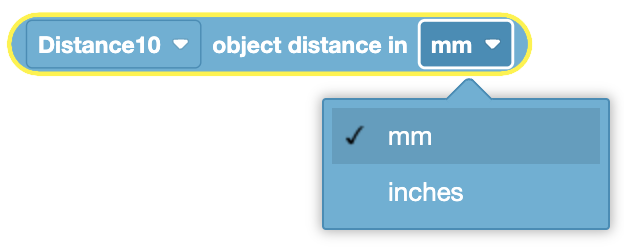
Object Distance#
The Object Distance block is used to report the distance of the nearest object from the Distance Sensor.
([Distance10 v] object distance in [mm v])
The Object Distance block reports a range from 20mm to 2000mm.
Choose which Distance Sensor to use.
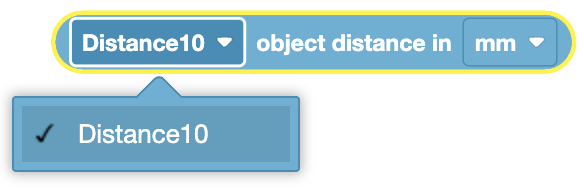
Choose what units to report in: millimeters (mm) or inches.
In this example, the Distance Sensor will report the current distance between it and the closest object.
  when started
  print ([Distance10 v] object distance in [mm v]) on [Brain v] ◀ and set cursor to next row
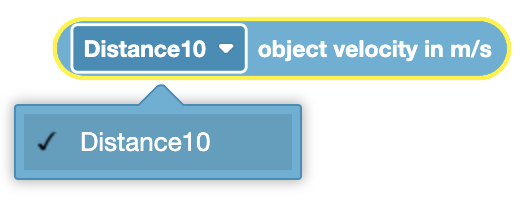
Object Velocity#
The Object Velocity block is used to report the current velocity of an object in meters per second (m/s).
([Distance10 v] object velocity in m/s)
Choose which Distance Sensor to use.
In this example, the Distance Sensor will report the current velocity of an object moving in front of it.
  when started
  print ([Distance10 v] object velocity in m/s) on [Brain v] ◀ and set cursor to next row
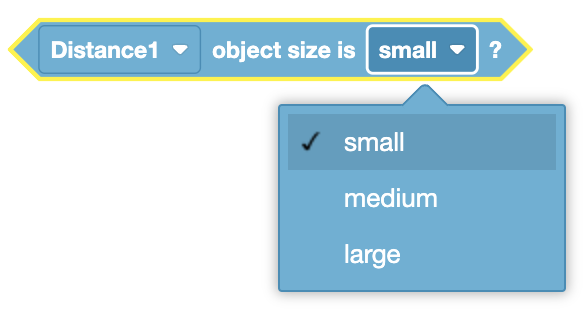
Object Size Is#
The Object Size Is block is used to report if the Distance Sensor detects the specified object size.
<[Distance10 v] object size is [small v]?>
The Distance Sensor determines the size of the object detected (none, small, medium, large) based on the amount of light reflected and returned to the sensor.
The Object Size Is block reports True when the Distance Sensor detects the specified size.
The Object Size Is block reports False when the Distance Sensor doesn’t detect the specified size.
Choose which Distance Sensor to use.
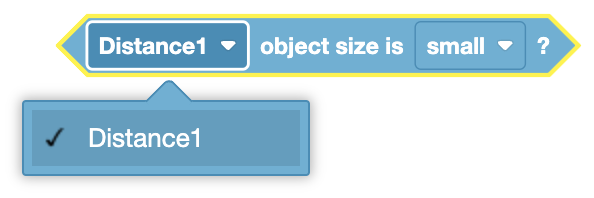
Choose which size of the object you want the Object Sensor to check for.
small
medium
large
In this example, if the Distance Sensor detects a small object, it will drive forward until the object is large.
  when started
  [Check if the Distance Sensor sees a small object .]
  if <[Distance10 v] object size is [small v]?> then
  [If a small object is detected, drive forward.]
  drive [forward v]
  [Wait until the small detected object is large.]
  wait until <[Distance10 v] object size is [large v]?>
  [When the object size is large, stop driving.]
  stop driving
  end
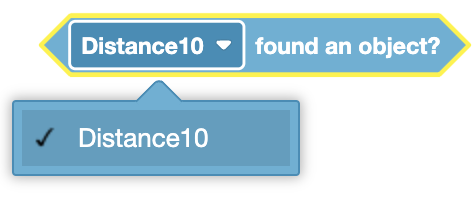
Distance Sensor Found Object#
The Distance Sensor Found Object block is used to report if the Distance Sensor sees an object within its field of view.
<[Distance10 v] found an object?>
The Distance Sensor Found Object block reports True when the Distance Sensor sees an object or surface within its field of view.
The Distance Sensor Found Object block reports False when the Distance Sensor does not detect an object or surface.
Choose which Distance Sensor to use.
In this example, when the Distance Sensor detects an object, it will print a message to the Brain.
  when started
  [Don't print the message until the Distance Sensor finds an object.]
  wait until <[Distance10 v] found an object?>
  print [Distance Sensor has detected an object.] on [Brain v] ◀ and set cursor to next row
Optical Sensing#
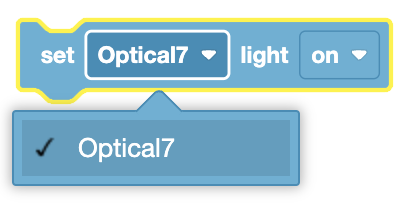
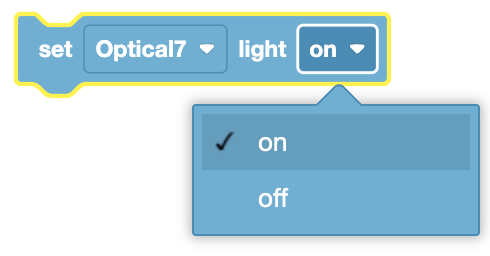
Set Optical Light#
The Set Optical Light block is used to set the light on the Optical Sensor to on or off. The light lets the Optical Sensor see objects if it is looking at an object in a dark area.
set [Optical7 v] light [on v]
Choose which Optical Sensor to use.
Choose whether to turn the light on or off.
In this example, the Optical Sensor will turn its light on for two seconds before turning it off.
  when started
  set [Optical7 v] light [on v]
  wait (2) seconds
  set [Optical7 v] light [off v]
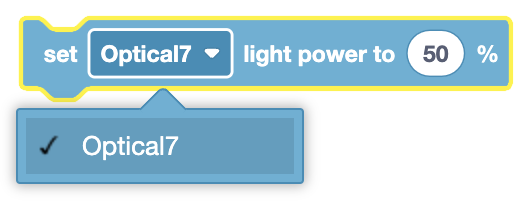
Set Optical Light Power#
The Set Optical Light Power block is used to set the light power of Optical sensor
set [Optical7 v] light power to (50)%
The The Set Optical Light Power block block accepts a range of 0% to 100%. This will change the brightness of the light on the Optical Sensor. If the light is off, this block will turn the light on.
Choose which Optical Sensor to use.
In this example, the Optical Sensor’s power light is set to 75% before it waits to detect an object to print a message.
  when started
  [Set the Optical Sensor's light power to 75%]
  set [Optical7 v] light power to (75)%
  [Don't print the message until an object is detected.]
  wait until <[Optical7 v] found an object?>
  print [Object detected.] on [Brain v] ◀ and set cursor to next row
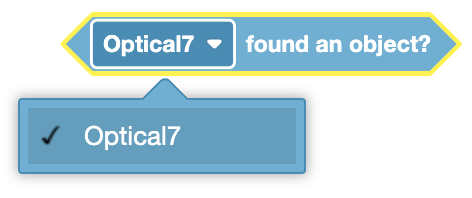
Optical Sensor Found Object#
The Optical Sensor Found Object block is used to report if the Optical Sensor detects an object close to it.
<[Optical7 v] found an object?>
The Optical Sensor Found Object block reports True when the Optical Sensor detects an object close to it.
The Optical Sensor Found Object block reports False when an object is not within range of the Optical Sensor.
Choose which Optical Sensor to use.
In this example, the Optical Sensor’s power light is set to 75% before it waits to detect an object to print a message.
  when started
  [Set the Optical Sensor's light power to 75%.]
  set [Optical7 v] light power to (75)%
  [Don't print the message until an object is detected.]
  wait until <[Optical7 v] found an object?>
  print [Object detected.] on [Brain v] ◀ and set cursor to next row
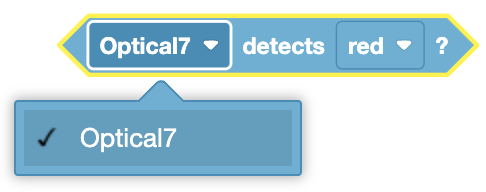
Optical Sensor Detects Color#
The Optical Sensor Detects Color block is used to report if the Optical Sensor detects the specified color.
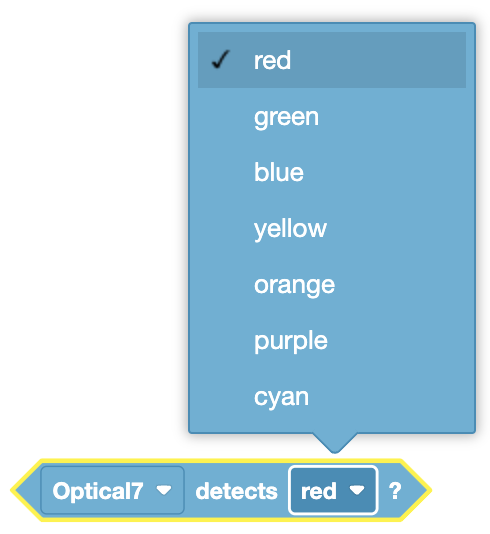
<[Optical7 v] detects [red v]?>
The Optical Sensor Detects Color block reports True when the Optical Sensor detects the specified color.
The Optical Sensor Detects Color block reports False when the Optical Sensor doesn’t detect the specified color.
Choose which Optical Sensor to use.
Choose which color the Optical Sensor will check for.
In this example, the Optical Sensor’s will wait until it detects a blue object before printing a message.
  when started
  [Don't print the message until the color blue is detected.]
  wait until <[Optical7 v] detects [blue v]?>
  print [Color blue detected.] on [Brain v] ◀ and set cursor to next row
Optical Brightness#
The Optical Brightness block is used to report the amount of light detected by the Optical Sensor.
([Optical7 v] brightness in %)
The Optical Brightness block reports a number value from 0% to 100%.
A large amount of light detected will report a high brightness value.
A small amount of light detected will report a low brightness value.
Choose which Optical Sensor to use.

In this example, the Optical Sensor will print the current brightness value to the Brain’s screen.
  when started
  print ([Optical7 v] brightness in %) on [Brain v] ◀ and set cursor to next row
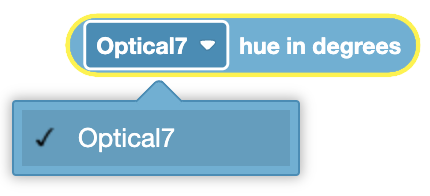
Optical Hue#
The Optical Hue block is used to report the hue of the color of an object.
([Optical7 v] hue in degrees)
The Optical Hue block reports a number value that is the hue of the color of an object. It returns a number between 0 and 359.
The value can be thought of as the location of the color on a color wheel in degrees.
Choose which Optical Sensor to use.
In this example, the Optical Sensor will print the currently seen hue to the Brain’s screen.
  when started
  print ([Optical7 v] hue in degrees) on [Brain v] ◀ and set cursor to next row
Rotation Sensing#
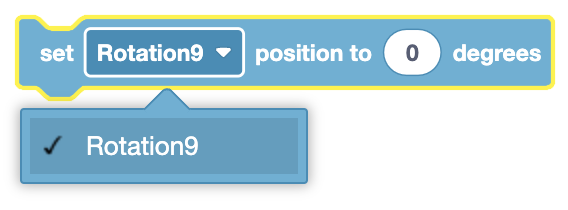
Set Rotation Sensor Position#
The Set Rotation Sensor Position block is used to set a Rotation Sensor’s current position to a defined value.
set [Rotation9 v] position to (0) degrees
The Set Rotation Sensor Position block accepts any positive or negative decimal or integer number.
Choose which Rotation Sensor to use.
In this example, the Rotation Sensor will print its starting position, set its position to -100 degrees, and then print the new position.
  when started
  print ([Rotation9 v] position in [degrees v] :: custom-sensing) on [Brain v] ◀ and set cursor to next row
  set [Rotation9 v] position to (-100) degrees
  print ([rotation9 v] position in [degrees v] :: custom-sensing) on [Brain v] ◀ and set cursor to next row
Rotation Sensor Angle#
The Rotation Sensor Angle block is used to report the Rotation Sensor’s current angle of rotation in degrees.
([Rotation9 v] angle in degrees)
The Rotation Sensor Angle block reports values in the range of 0.00 to 359.99.
Choose which Rotation Sensor to use.

In this example, the Rotation Sensor will print its starting rotation.
  when started
  print ([Rotation9 v] angle in degrees) on [Brain v] ◀ and set cursor to next row
Rotation Sensor Position#
The Rotation Sensor Position block is used to report the current rotational position of the selected Rotation Sensor.
([Rotation9 v] position in [degrees v] :: custom-sensing)
Choose which Rotation Sensor to use.
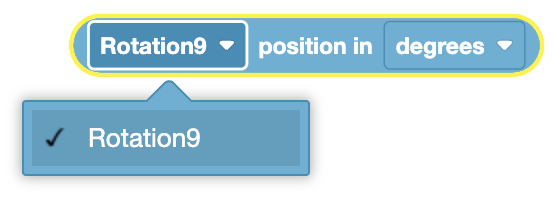
Choose what units the position will be reported in: degrees or turns.
In this example, the Rotation Sensor will print its starting position, set its position to -100 degrees, and then print the new position.
  when started
  print ([Rotation9 v] position in [degrees v] :: custom-sensing) on [Brain v] ◀ and set cursor to next row
  set [Rotation9 v] position to (-100) degrees
  print ([Rotation9 v] position in [degrees v] :: custom-sensing) on [Brain v] ◀ and set cursor to next row
Rotation Sensor Velocity#
The Rotation Sensor Velocity block is used to report the current velocity of a Rotation Sensor.
([Rotation9 v] velocity in [rpm v] :: custom-sensing)
Choose which Rotation Sensor to use.

Choose what units the position will be reported in: revolutions per minute (rpm) or degrees per second (dps).

In this example, the Drivetrain will drive turn to the right for 1 second before its current rotational velocity is printed on the Brain’s screen.
  when started
  [Turn towards the right for 1 second.]
  turn [right v]
  wait (1) seconds
  [Print the correct rotational velocity after 1 second.]
  print ([Rotation9 v] velocity in [rpm v] :: custom-sensing) on [Brain v] ◀ and set cursor to next row
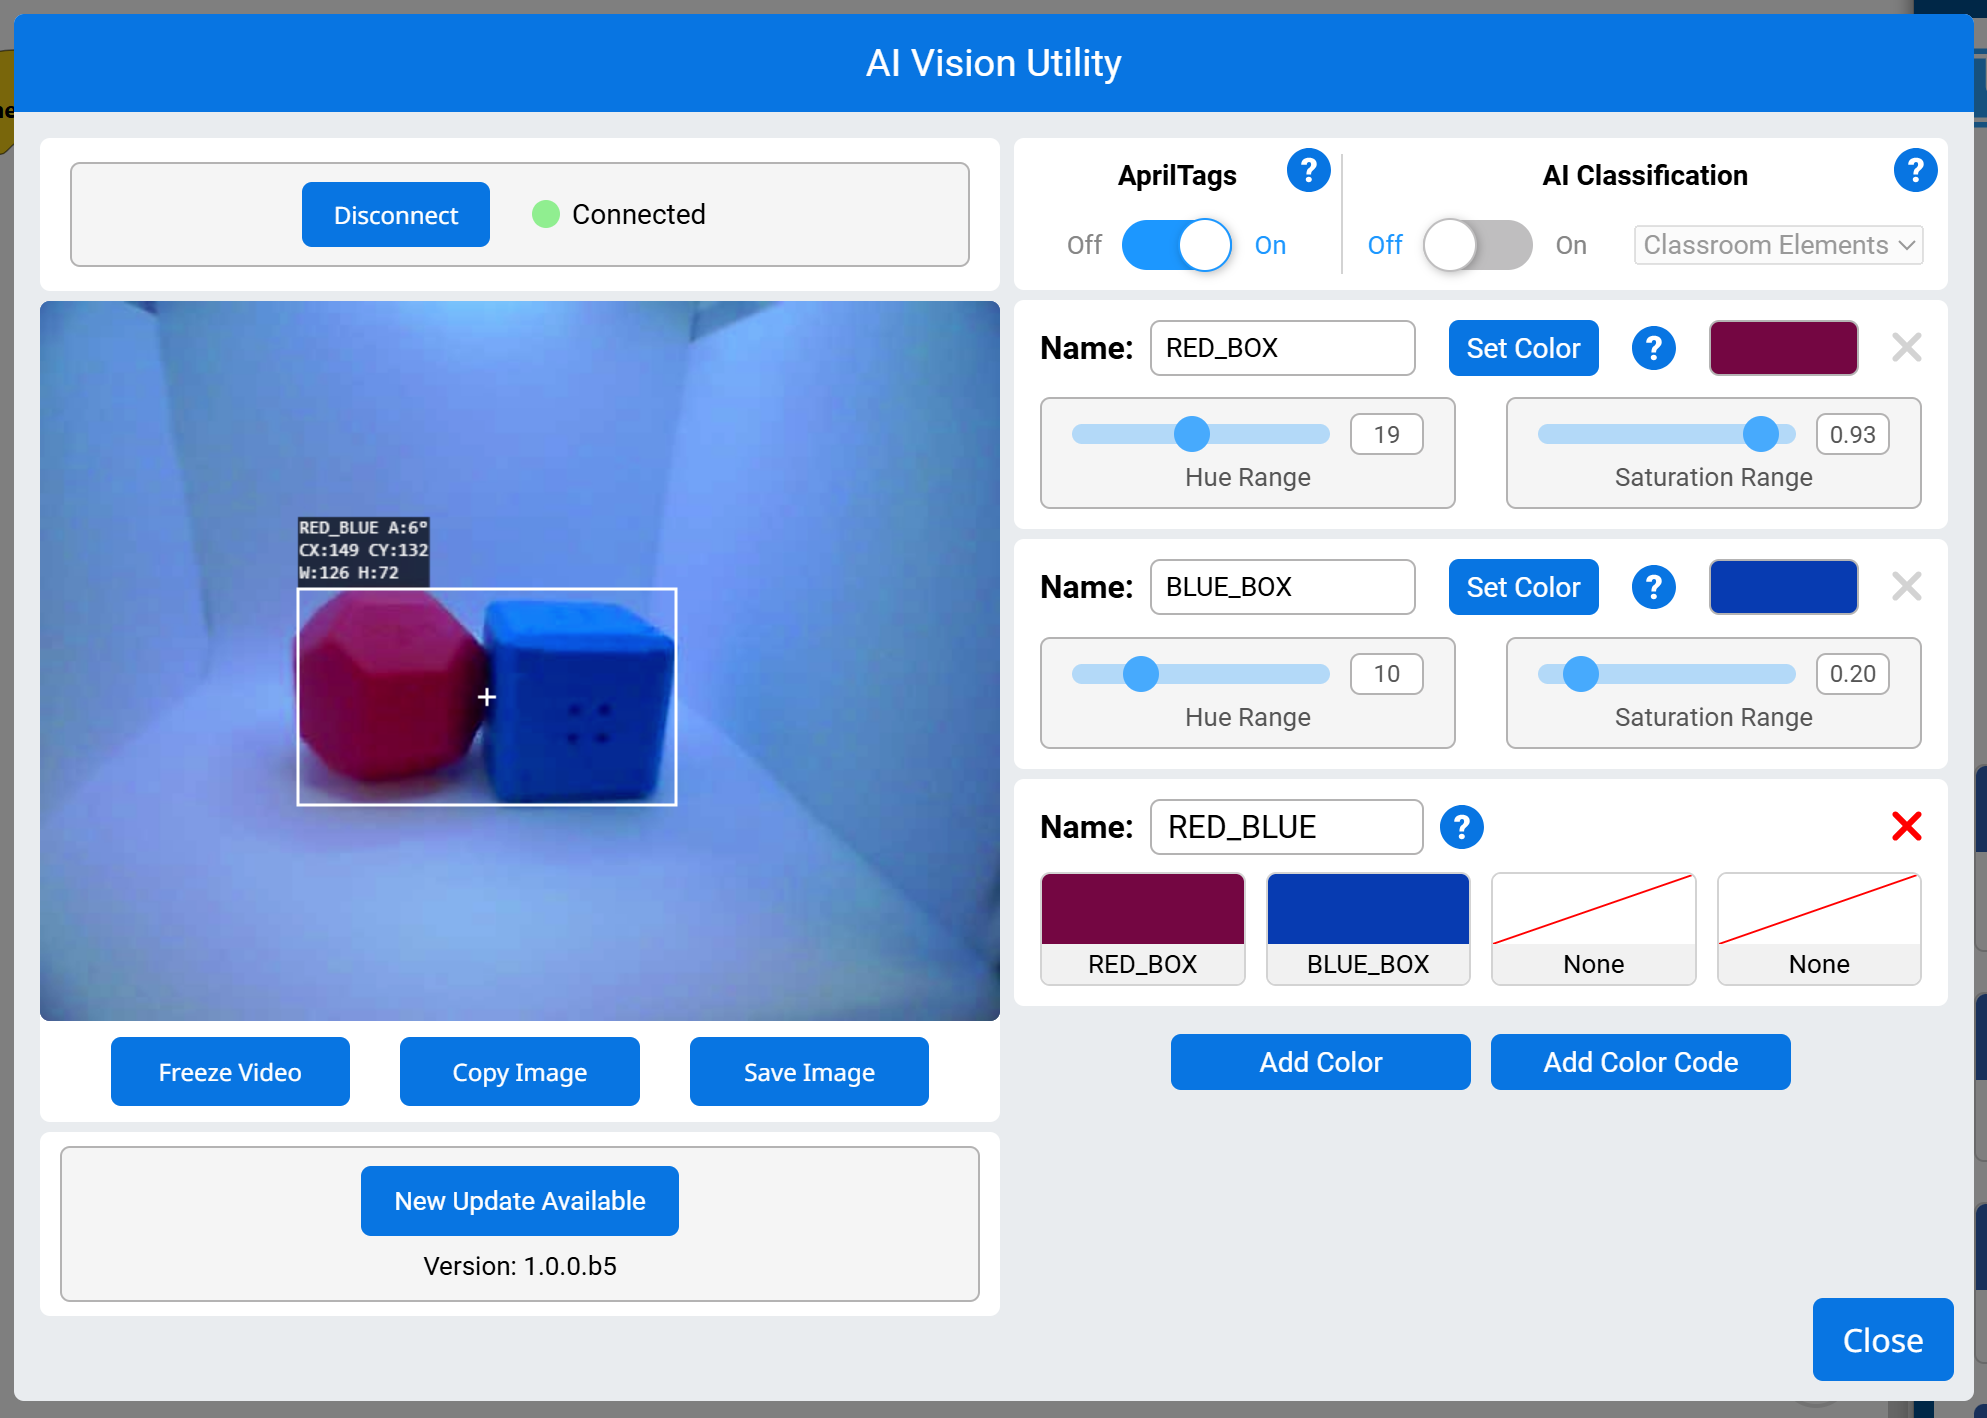
Vision Sensing#
take Vision Sensor snapshot#
The take Vision Sensor snapshot block filters data from the Vision Sensor frame. The Vision Sensor can detect signatures that include configured colors and color codes.
Colors and color codes must be configured first in the Vision Utility before they can be used with this block.
The dataset stores objects ordered from largest to smallest by width, starting at item 1. Each object’s properties can be accessed using Vision object property block. An empty dataset is returned if no matching objects are detected.
take a [Vision1 v] snapshot of [SELECT_A_SIG v]
Parameter |
Description |
|---|---|
vision |
The Vision Sensor to use, configured in the Devices window. |
signature |
The color signature or color code to analyze in the snapshot. |
Example
  when started
  [Move forward if a red box is detected.]
  forever
  take a [Vision1 v] snapshot of [RED_BOX v]
  if <[Vision1 v] object exists?> then
  drive [forward v] for [10] [mm v] ▶
set Vision Sensor object item#
The set Vision Sensor object item block sets which item in the dataset to use.
set [Vision1 v] object item to (1)
Parameter |
Description |
|---|---|
vision |
The Vision Sensor to use, configured in the Devices window. |
item |
The number of the item in the dataset to use. |
Example
  when started
  [Display the largest detected red object.]
  forever
  take a [Vision1 v] snapshot of [RED_BOX v]
  clear all rows on [Brain v]
  set cursor to row [1] column [1] on [Brain v]
  if <[Vision1 v] object exists?> then
  set [Vision1 v] object item to (1)
  print ([Vision1 v] object [width v]) on [Brain v] ▶
  end
  wait [0.5] seconds
Vision Sensor object count#
The Vision Sensor object count block returns the number of detected objects in the dataset as an integer.
([Vision1 v] object count)
Parameter |
Description |
|---|---|
vision |
The Vision Sensor to use, configured in the Devices window. |
Example
  when started
  [Display the amount of red objects.]
  forever
  clear all rows on [Brain v]
  set cursor to row [1] column [1] on [Brain v]
  take a [Vision1 v] snapshot of [RED_BOX v]
  if <[Vision1 v] object exists?> then
  print ([Vision1 v] object count) on [Brain v] ▶
  end
  wait [0.5] seconds
Vision Sensor object exists?#
The Vision Sensor object exists? block returns a Boolean indicating whether any object is detected in the dataset.
True – The dataset includes a detected object.
False – The dataset does not include any detected objects.
<[Vision1 v] object exists?>
Parameter |
Description |
|---|---|
vision |
The Vision Sensor to use, configured in the Devices window. |
Example
  when started
  [Move forward if a red box is detected.]
  forever
  take a [Vision1 v] snapshot of [RED_BOX v]
  if <[Vision1 v] object exists?> then
  drive [forward v] for [10] [mm v] ▶
Vision Sensor object property#
There are five properties that are included with each object (shown below) stored after the take Vision Sensor snapshot block is used.
([Vision1 v] object [width v])
Some property values are based off of the detected object’s position in the Vision Sensor’s view at the time that the take Vision Sensor snapshot block was used. The Vision Sensor has a resolution of 316 by 212 pixels.
Parameter |
Description |
|---|---|
vision |
The Vision Sensor to use, configured in the Devices window. |
property |
Which property of the detected object to use: |
width#
width returns the width of the detected object in pixels as an integer from 0 to 316.
([Vision1 v] object [width v])
Example
  when started
  [Move towards a red object until its width is larger than 100 pixels.]
  forever
  take a [Vision1 v] snapshot of [RED_BOX v]
  if <[Vision1 v] object exists?> then
  if <([Vision1 v] object [width v]) [math_less_than v] [100]> then
  drive [forward v]
  end
  else
  stop driving
height#
height returns the height of the detected object in pixels as an integer from 0 to 212.
([Vision1 v] object [height v])
Example
  when started
  [Move towards a red object until its height is larger than 100 pixels.]
  forever
  take a [Vision1 v] snapshot of [RED_BOX v]
  if <[Vision1 v] object exists?> then
  if <([Vision1 v] object [height v]) [math_less_than v] [100]> then
  drive [forward v]
  end
  else
  stop driving
centerX#
centerX returns the x-coordinate of the center of the detected object in pixels as an integer from 0 to 316.
([Vision1 v] object [centerX v])
Example
  when started
  [Turn slowly until a red object is centered in front of the Vision Sensor.]
  set turn velocity to [30] [% v]
  turn [right v]
  forever
  take a [Vision1 v] snapshot of [RED_BOX v]
  if <[Vision1 v] object exists?> then
  if <<[140] [math_less_than v] ([Vision1 v] object [centerX v])> and <([Vision1 v] object [centerX v]) [math_less_than v] [180]>> then
  stop driving
centerY#
centerY returns the y-coordinate of the center of the detected object in pixels as an integer from 0 to 212.
([Vision1 v] object [centerY v])
Example
  when started
  [Move towards a red object until its center y-coordinate is more than 140 pixels.]
  forever
  take a [Vision1 v] snapshot of [RED_BOX v]
  if <[Vision1 v] object exists?> then
  if <([Vision1 v] object [centerY v]) [math_less_than v] [140]> then
  drive [forward v]
  end
  else
  stop driving
angle#
angle returns the orientation of the detected Color Code as an integer in degrees from 0 to 180.
([Vision1 v] object [angle v])
Example
  when started
  [Turn left or right depending on how the Color Code is rotated.]
  forever
  take a [Vision1 v] snapshot of [BOX_CODE v]
  if <[Vision1 v] object exists?> then
  if <<[70] [math_less_than v] ([Vision1 v] object [angle v])> and <([Vision1 v] object [angle v]) [math_less_than v] [110]>> then
  turn [right v] for (45) degrees ▶
  else if <<[250] [math_less_than v] ([Vision1 v] object [angle v])> and <([Vision1 v] object [angle v]) [math_less_than v] [290]>> then
  turn [left v] for (45) degrees ▶
  else
  stop driving
  end
AI Vision Sensing#
The AI Vision Sensor can detect and track objects, colors, and AprilTags. This allows the robot to analyze its surroundings, follow objects, and react based on detected visual data.
Actions#
take snapshot#
The take snapshot block filters data from the AI Vision Sensor frame. The AI Vision Sensor can detect signatures that include pre-trained objects, AprilTags, or configured colors and color codes.
Colors and color codes must be configured first in the AI Vision Utility before they can be used with this block.
The dataset stores objects ordered from largest to smallest by width, starting at index 0. Each object’s properties can be accessed using AI Vision object property block. An empty dataset is returned if no matching objects are detected.
take a [AIVision1 v] snapshot of [SELECT_A_SIG v]
Parameter |
Description |
|---|---|
signature |
Filters the dataset to only include data of the given signature. Available signatures are:
|
Note: For AprilTag or AI Classification options to appear, their detection must be enabled in the AI Vision Utility.
Example
Example coming soon!
Color Codes#
A Color Code is a structured pattern made up of 2 to 4 Color Signatures arranged in a specific order. These codes allow the AI Vision Sensor to recognize predefined patterns of colors.
Color Codes are particularly useful for identifying complex objects, aligning with game elements, or creating unique markers for autonomous navigation. Up to 8 Color Codes can be configured at a time.
Example
Example coming soon!
Settings#
set AI Vision object item#
The set AI Vision object item block sets which item in the dataset to use.
set [AIVision1 v] object item to (1)
Parameters |
Description |
|---|---|
item |
The number of the item in the dataset to use. |
Example
Example coming soon!
Values#
AI Vision object exists?#
The AI Vision object exists block returns a Boolean indicating whether any object is detected in the dataset.
True – The dataset includes a detected object.
False – The dataset does not include any detected objects.
<[AIVision1 v] object exists?>
Parameters |
Description |
|---|---|
This block has no parameters. |
Example
Example coming soon!
AI Vision object is?#
The AI Vision object is? block returns a Boolean indicating whether a detected object matches a specific classification.
True – The item in the dataset is the specific object.
False – The item in the dataset is not the specific object.
<[AIVision1 v] object is [BlueBall v]?>
Parameter |
Description |
|---|---|
object |
Which AI Classification to compare the item to. |
Example
Example coming soon!
AI Vision object is AprilTag ID?#
The AI Vision object is AprilTag ID? block returns a Boolean indicating whether a detected AprilTag matches a specific ID.
True – The AprilTag ID is the number.
False – The AprilTag ID is not the number.
<[AIVision1 v] object is AprilTag [1] ?>
Parameters |
Description |
|---|---|
AprilTag number |
The number to compare against the detected AprilTag’s ID number. |
Example:
Example coming soon!
AI Vision object count#
The AI Vision object count block returns the number of detected objects in the dataset as an integer.
([AIVision1 v] object count)
Parameters |
Description |
|---|---|
This block has no parameters. |
Example
Example coming soon!
AI Vision object property#
There are nine properties that are included with each object (shown below) stored after the take snapshot block is used.
([AIVision1 v] object [width v])
Some property values are based off of the detected object’s position in the AI Vision Sensor’s view at the time that the take snapshot block was used. The AI Vision Sensor has a resolution of 320 by 240 pixels.
Parameter |
Description |
|---|---|
property |
Which property of the detected object to use: |
width#
width returns the width of the detected object in pixels as an integer from 1 to 320.
([AIVision1 v] object [width v])
Example
Example coming soon!
height#
height returns the height of the detected object in pixels as an integer from 1 to 240.
([AIVision1 v] object [height v])
Example
Example coming soon!
centerX#
centerX returns the x-coordinate of the center of the detected object in pixels as an integer from 0 to 320.
([AIVision1 v] object [centerX v])
Example
Example coming soon!
centerY#
centerY returns the y-coordinate of the center of the detected object in pixels as an integer from 0 to 240.
([AIVision1 v] object [centerY v])
Example
Example coming soon!
angle#
angle returns the orientation of the detected Color Code or AprilTag as an integer in degrees from 0 to 359.
([AIVision1 v] object [angle v])
Example
Example coming soon!
originX#
originX returns the x-coordinate of the top-left corner of the detected object’s bounding box in pixels as an integer from 0 to 320.
([AIVision1 v] object [originX v])
Example
Example coming soon!
originY#
originY returns the y-coordinate of the top-left corner of the detected object’s bounding box in pixels as an integer from 0 to 240.
([AIVision1 v] object [originY v])
Example
Example coming soon!
tagID#
tagID returns the identification number of the detected AprilTag as an integer.
([AIVision1 v] object [tagID v])
Example
Example coming soon!
score#
score returns how confident the model is in the detected AI Classification as a percentage from 70% to 100%.
([AIVision1 v] object [score v])
Example
Example coming soon!
Arm Sensing#
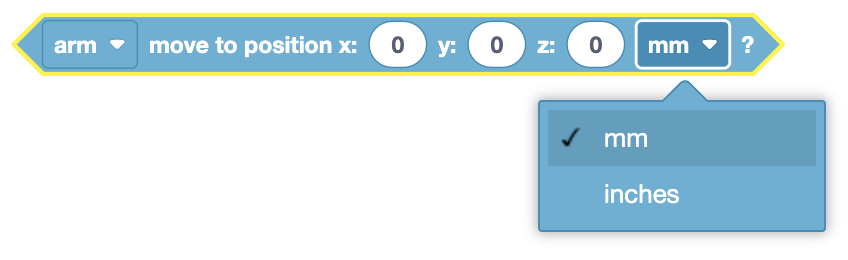
Can 6-Axis Arm Move to Position#
The Can 6-Axis Arm Move to Position block is used to report if the 6-Axis Robotic Arm is able to reach the specified position.
<[arm v] move to position x:(0) y:(0) z:(0) [mm v]?>
The Can 6-Axis Arm Move to Position block reports True when the 6-Axis Arm can reach that position.
The Can 6-Axis Arm Move to Position block reports False when the 6-Axis Arm can not reach that position.
Choose which 6-Axis Arm to use.
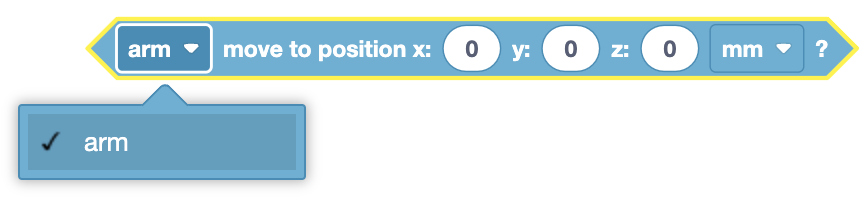
Select which unit to use: millimeters (mm) or inches.
In this example, the 6-Axis Arm will check if it can move to (0, 0, 0) and print that it can not reach the position.
when started
if <not <[arm v] move to position x:(0) y:(0) z:(0) [mm v]?>> then
    print [The Arm can't incremental move for this distance.] ▶
end
Can 6-Axis Arm Increment Move to Position#
The Can 6-Axis Arm Increment Move to Position block is used to report if the 6-Axis Robotic Arm is able to incrementally move for that distance.
when started
<[Arm2 v] increment position by x:(0) y:(500) z:(0) [mm v]?>
end
The Can 6-Axis Arm Increment Move to Position block reports True when the 6-Axis Arm can incrementally move for that distance.
The Can 6-Axis Arm Increment Move to Position block reports False when the 6-Axis Arm can not incrementally move for that distance.
Choose which 6-Axis Arm to use.
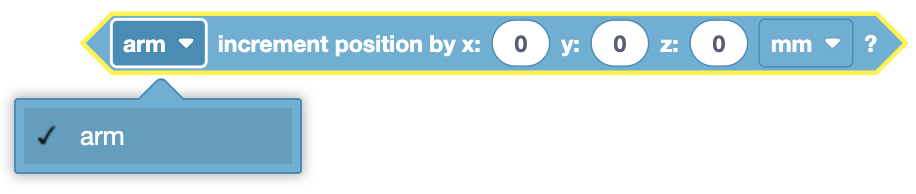
Select which unit to use: millimeters (mm) or inches.
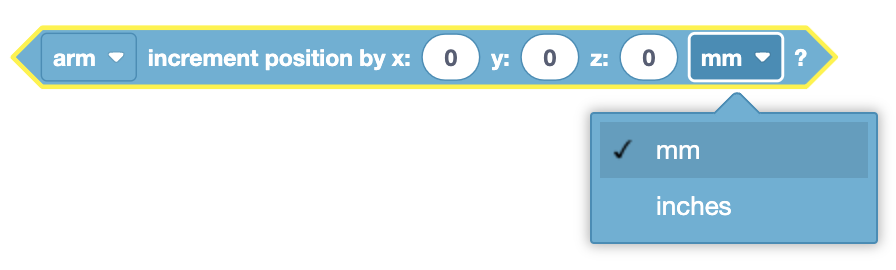
In this example, the 6-Axis Arm will check if it can increment move for 500 millimeters on the Y axis and print that it can’t move for that distance.
  when started
  if <not <[Arm2 v] increment position by x:(0) y:(500) z:(0) [mm v]?>> then
  print [The Arm can't incremental move for this distance.] ▶
  end
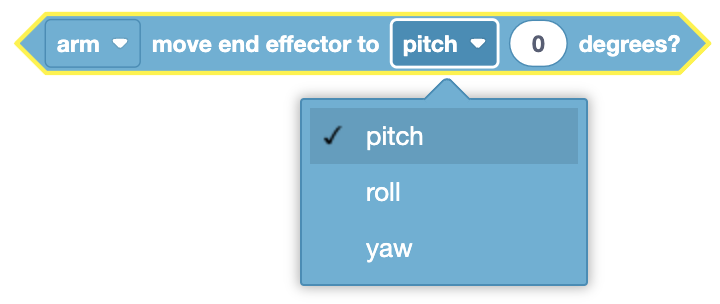
Can 6-Axis Arm End Effector Move to Orientation#
The Can 6-Axis Arm End Effector Move to Orientation block is used to report if the 6-Axis Arm’s End Effector can rotate about an axis to a specific orientation.
<[arm v] move end effector to [pitch v] (0) degrees?>
The Can 6-Axis Arm End Effector Move to Orientation block reports True when the 6-Axis Arm can rotate about an axis to a specific orientation.
The Can 6-Axis Arm End Effector Move to Orientation block reports False when the 6-Axis Arm can not rotate about an axis to a specific orientation.
Choose which 6-Axis Arm to use.

Select which axis to use:
pitch - Movement around the Y-axis.
roll - Movement around the X-axis.
yaw - Movement around the Z-axis.
In this example, the 6-Axis Arm will check if the End Effector can point towards the 40 degrees position on the X axis and print if it can or can not.
  when started
  if <[arm v] move end effector to [roll v] (40) degrees?> then
  print [The End Effector can move to this orientation] ▶
  else
  print [The End Effector can not move to this orientation] ▶
  end
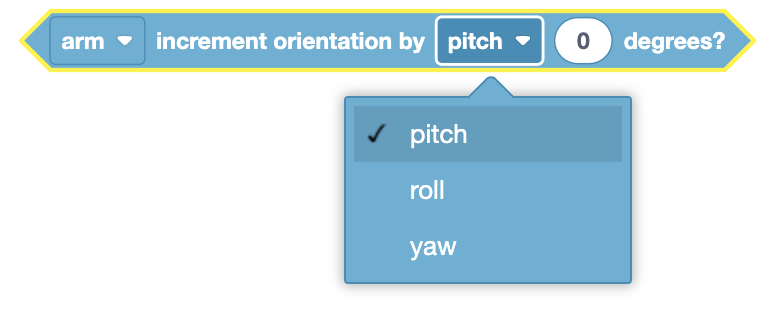
Can 6-Axis Arm End Effector Incrementally Move to Orientation#
The Can 6-Axis Arm End Effector Incrementally Move to Orientation block is used to report if the 6-Axis Arm’s End Effector can incrementally rotate about an axis its orientation for a specific amount of degrees.
<[arm v] increment orientation by [pitch v] [0] degrees?>
The Can 6-Axis Arm End Effector Incrementally Move to Orientation block reports True when the 6-Axis Arm can incrementally rotate about an axis for a specific amount of degrees.
The Can 6-Axis Arm End Effector Incrementally Move to Orientation block reports False when the 6-Axis Arm can not incrementally rotate about an axis for a specific amount of degrees.
Choose which 6-Axis Arm to use.
Select which axis to use:
pitch - Rotation around the Y-axis.
roll - Rotation around the X-axis.
yaw - Rotation around the Z-axis.
In this example, the 6-Axis Arm will check if the End Effector can increment move for 20 degrees on the Z axis and print if it can or can not.
  when started
  if <[arm v] increment orientation by [yaw v] [20] degrees?> then
  print [The End Effector can increment move for this distance.] ▶
  else
  print [The End Effector can not increment move for this distance.] ▶
  end
6-Axis Arm is Done?#
The 6-Axis Arm is Done? block is used to report if the 6-Axis Arm has completed moving.
<[arm v] is done moving?>
The 6-Axis Arm is Done? block reports True when the 6-Axis Arm is not moving.
The 6-Axis Arm is Done? block reports False when the 6-Axis Arm is moving.
Choose which 6-Axis Arm to use.

In this example, the Arm will move to the position (-100, 200, 100) and print its Y coordinate in mm every .25 seconds as it moves, until it is done moving.
  when started
  [Move to (-100, 200, 100) and let subsequent blocks trigger.]
  move [Arm1 v] to position x:[-100] y:[200] z:[100] [mm v] ◀ and don't wait
  [Repeat the blocks until the Arm has finished moving.]
  repeat until <[Arm1 v] is done moving?>
  [Print the Arm's current Y position in mm on the Brain every .25 seconds.]
  print ([Arm1 v] position [y v] in [mm v] :: custom-arm) on [Brain v] ◀ and set cursor to next row
  wait (0.25) seconds
  end
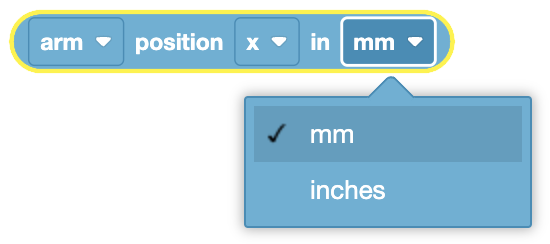
6-Axis Arm Position#
The 6-Axis Arm Position block is used to report the current position of the 6-Axis Arm in the specified axis.
([arm v] position [x v] in [mm v] :: custom-arm)
Choose which 6-Axis Arm to use.
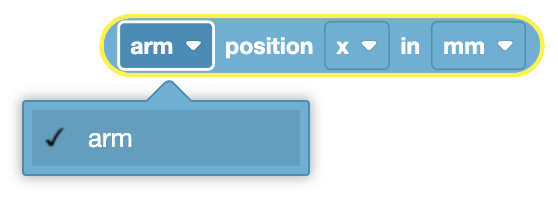
Choose which axis to report.
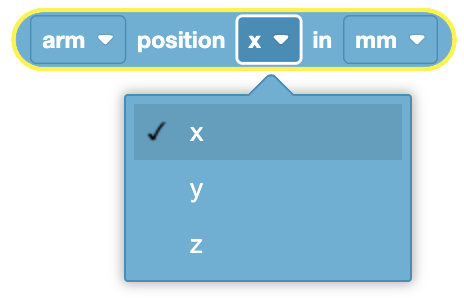
Choose which unit to report with: millimeters (mm) or inches.
In this example, the 6-Axis Arm will print its current Z axis position in millimeters to the Print Console.
  when started
  print ([arm v] position [z v] in [mm v] :: custom-arm) ▶
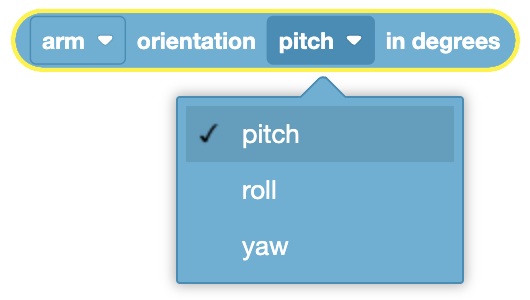
6-Axis Arm End Effector Orientation#
The 6-Axis Arm End Effector Orientation block is used to report the current orientation of the 6-Axis Arm’s End Effector.
([arm v] orientation [pitch v] in degrees)
Choose which 6-Axis Arm to use.
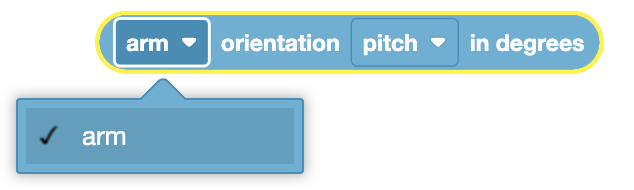
Choose which axis to report:
pitch - Rotation around the Y-axis.
roll - Rotation around the X-axis.
yaw - Rotation around the Z-axis.
In this example, the 6-Axis Arm will print the End Effector’s current Y axis orientation in degrees to the Print Console.
  when started
  print ([arm v] orientation [pitch v] in degrees) ▶
Line Tracking Sensing#
Line Tracker Reflectivity#
The Line Tracker Reflectivity block is used to report the amount of light reflected using the Line Tracker Sensor.
([LineTrackerG v] reflectivity in %)
Choose which Line Tracker Sensor to use.
![]()
In this example, the Line Tracker Sensor will print the current detected reflectivity to the Brain’s Screen.
  when started
  print ([LineTrackerG v] reflectivity in %) on [Brain v] ◀ and set cursor to next row
Light Sensing#
Light Sensor Brightness#
The Light Sensor Brightness block is used to report the amount of light detected by the Light Sensor.
([Light v] brightness in %)
Choose which Light Sensor to use.
In this example, the Light Sensor will print the current detected brightness to the Brain’s Screen.
  when started
  print ([LightH v] brightness in %) on [Brain v] ◀ and set cursor to next row
Potentiometer Sensing#
Potentiometer Angle#
The Potentiometer Angle block is used to report the angular position of the Potentiometer.
([Potentiometer3A v] angle in [% v])
Choose which Potentiometer to use.
Choose which unit to report in: percent (%) or degrees.
In this example, the Potentiometer will print its current angular position to the Brain’s Screen.
  when started
  print ([Potentiometer3A v] angle in [degrees v]) on [Brain v] ◀ and set cursor to next row
Accelerometer Sensing#
Accelerometer Acceleration#
The Accelerometer Acceleration block is used to report the acceleration value from one axis on the Analog Accelerometer.
([Accel2G3G v] acceleration in g)
The Accelerometer Acceleration block reports a range from -2.0 G to 2.0 G or -6.0 G to 6.0 G depending upon the jumper setting on the Analog Accelerometer.
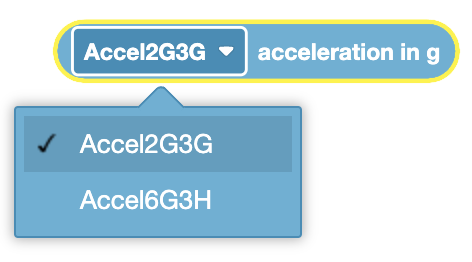
Choose which Accelerometer to use.
In this example, the Drivetrain will drive forward for 1 second before its current acceleration is printed on the Brain’s screen.
  when started
  [Drive forward for 1 second.]
  drive [forward v]
  wait (1) seconds
  [Print the current acceleration after 1 second.]
  print ([Accel2G3G v] acceleration in g) on [Brain v] ◀ and set cursor to next row
Range Finder Sensing#
Range Finder Found Object?#
The Range Finder Found Object? block is used to report if the Ultrasonic Range Finder Sensor sees an object within its field of view.
<[RangeFinderE v] found an object?>
The Range Finder Found Object? block reports True when the Ultrasonic Range Finder Sensor sees an object or surface within its field of view.
The Range Finder Found Object? block reports False when the Ultrasonic Range Finder Sensor does not detect an object or surface.
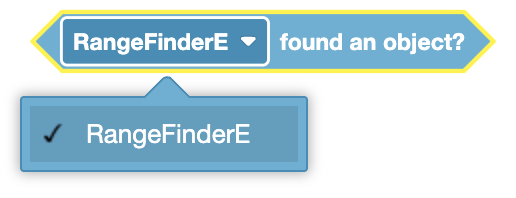
Choose which Ultrasonic Range Finder Sensor to use.
In this example, every .25 seconds the Range Finder will check if it detects an object, and if so, will print the distance between it and the object to the Brain’s Screen.
  when started
  forever
  clear all rows on [Brain v]
  set cursor to row (1) column (1) on Brain
  [Check if the Range Finder found an object.]
  if <[RangeFinderE v] found an object?> then
  [Print the distance to the object.]
  print ([RangeFinderE v] distance in [mm v]) on [Brain v] ◀ and set cursor to next row
  end
  [Repeat the process every .25 seconds.]
  wait (0.25) seconds
  end
Range Finder Distance#
The Range Finder Distance block is used to report the distance of the nearest object from the Ultrasonic Range Finder Sensor.
([RangeFinderE v] distance in [mm v])
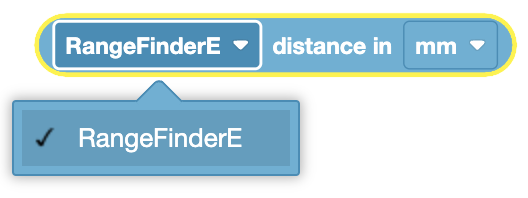
Choose which Ultrasonic Range Finder Sensor to use.
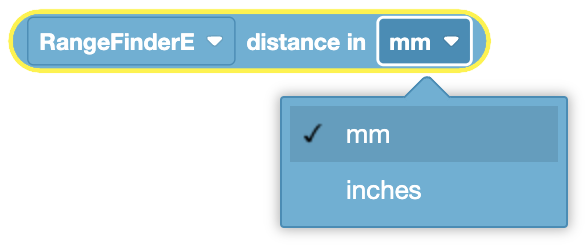
Choose which unit to report in: millimeters (mm) or inches.
In this example, every .25 seconds the Range Finder will check if it detects an object, and if so, will print the distance between it and the object to the Brain’s Screen.
  when started
  forever
  clear all rows on [Brain v]
  set cursor to row (1) column (1) on Brain
  [Check if the Range Finder found an object.]
  if <[RangeFinderE v] found an object?> then
  [Print the distance to the object.]
  print ([RangeFinderE v] distance in [mm v]) on [Brain v] ◀ and set cursor to next row
  end
  [Repeat the process every .25 seconds.]
  wait (0.25) seconds
  end
Digital In Sensing#
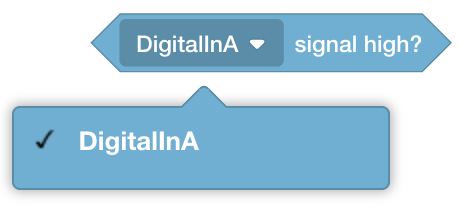
Digital In#
The Digital In block is used to report if the Digital In signal is high.
[DigitalInA v] signal high?
The 3-Wire ports function at a 5V logic signal voltage level.
The Digital In block reports True when the digital input signal is high.
The Digital In block reports False when the digital input signal is low.
Choose which Digital In device to use.
Digital Out Sensing#
Digital Out#
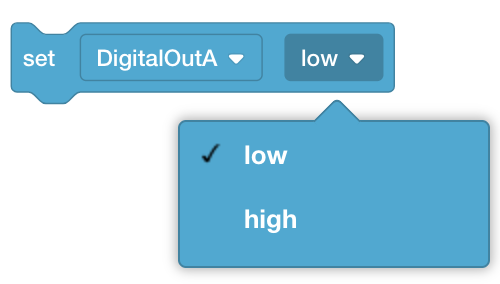
The Digital Out block is used to set the logic level of a digital out 3-Wire port.
set [DigitalInA v] [low v] :: custom-sensing
The 3-Wire ports function at a 5V logic signal voltage level.
Choose which Digital Out port to use.
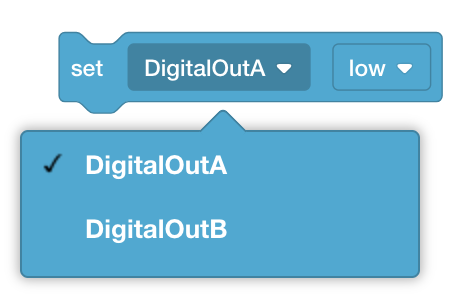
Choose what to output: a low or high digital logic signal.