控制器#
介绍#
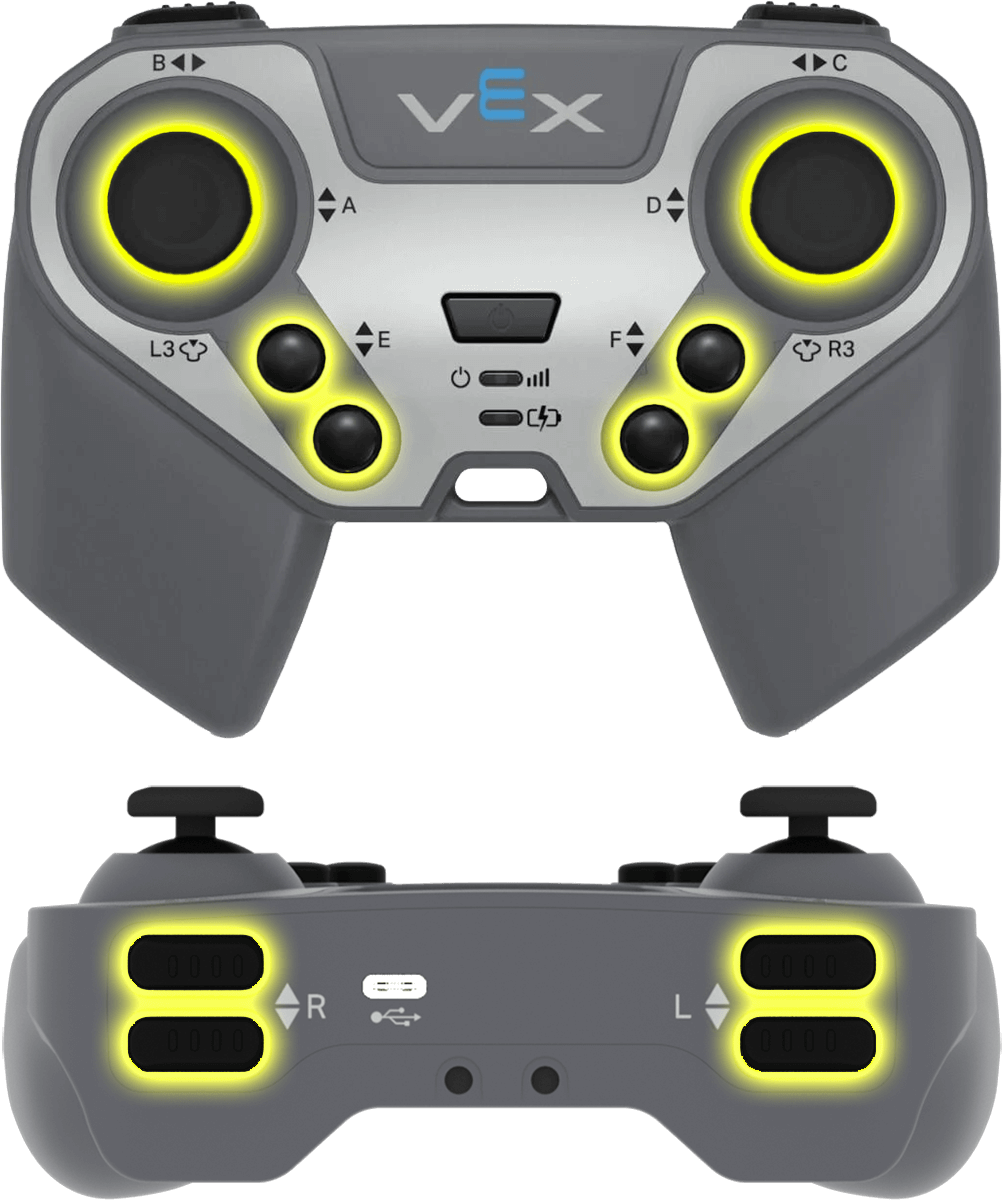
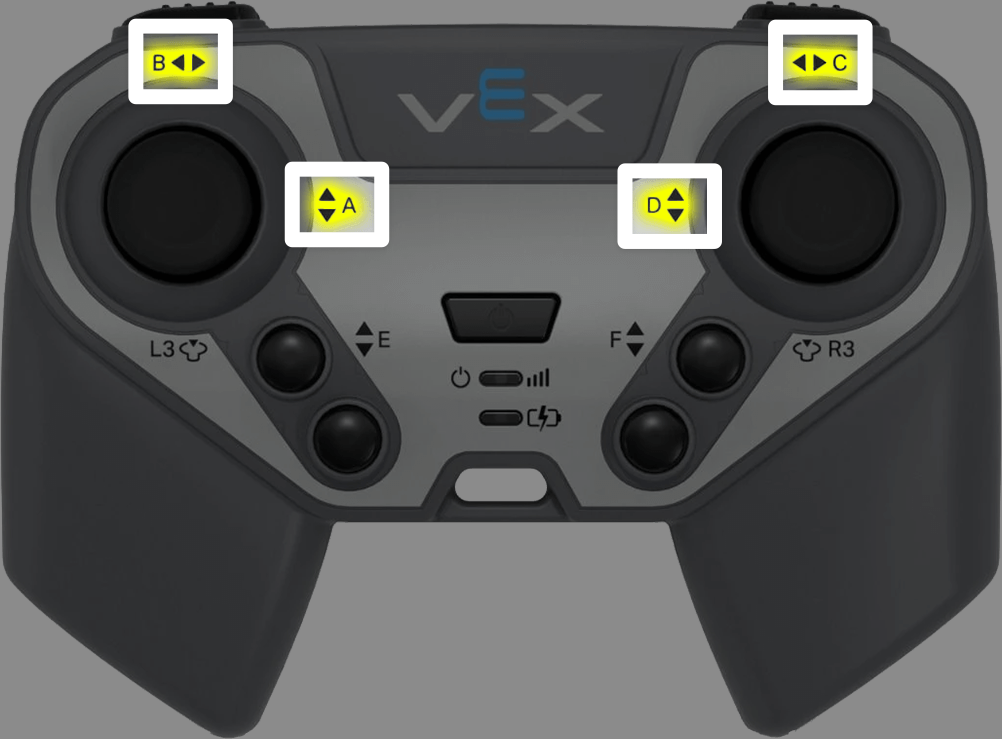
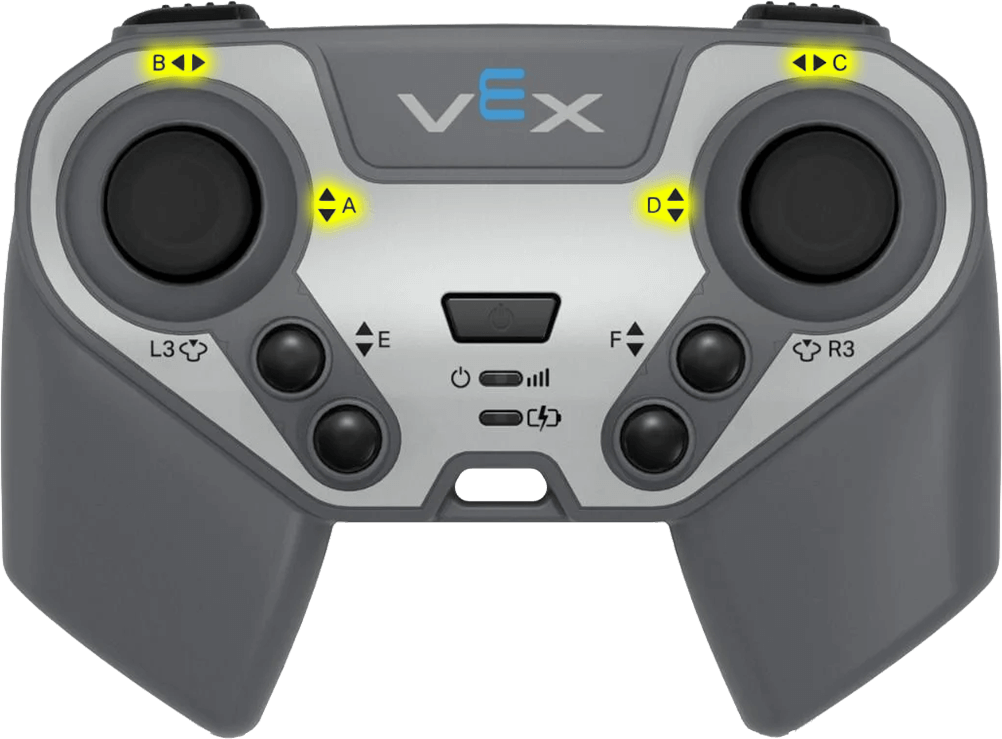
第二代 IQ 大脑可以连接到第二代 IQ 控制器或第一代 IQ 控制器。两个控制器都配有两个模拟摇杆和多个按钮Sensing/Brain.md大脑可以利用这些按钮来检测动作和按压。
This page uses Controller as the example controller name. Replace it with your own configured name as needed.
以下是所有方法的列表:
操作 — 开启或关闭控制器配置的操作。
RemoteControlCodeEnabled— Enables or disables controller configured actions.
获取器 — 返回控制器摇杆和按钮的值。
pressing— Returns whether the specified button is being pressed.position— Returns the position of the joystick’s specified axis.
回调——通过回调方法与控制器交互。
pressed— Registers a function to be called when the specified button is pressed.released— Registers a function to be called when the specified button is released.changed— Registers a function to be called when the joystick’s axis changes.
构造函数——手动初始化控制器。
controller— Create a controller.
行动#
RemoteControlCodeEnabled#
RemoteControlCodeEnabled is a variable that can be set to a Boolean that enables or disables controller configured actions from the Devices menu. The controller is enabled by default. It can be set to either of the following:
true— Enable controller configured actions.false— Disable controller configured actions.
Usage:
RemoteControlCodeEnabled = false;
int main() {
  // Initializing Robot Configuration. DO NOT REMOVE!
  vexcodeInit();

  // Drive forward or backward using the left joystick
  RemoteControlCodeEnabled = false;

  while (true) {
    if (Controller.AxisA.position() > 0) {
      Drivetrain.drive(forward);
    } else if (Controller.AxisA.position() < 0) {
      Drivetrain.drive(reverse);
    // Press E ▲ to use the controller configured actions
    } else if (Controller.ButtonEUp.pressing()) {
      break;
    } else {
      Drivetrain.stop();
    }
    wait(20, msec);
  }

  RemoteControlCodeEnabled = true;
}
吸气剂#
pressing#
pressing returns an integer indicating whether a specific button on the controller is currently being pressed. This method must be called on a specific button object, such as ButtonEDown (see full list of button objects below).
1— The specified button is being pressed.0— The specified button is not being pressed.
用法:
十个可用按钮对象之一可用于此方法,如下所示:
按钮 |
命令 |
|---|---|
|
|
|
|
|
|
|
|
|
|
|
|
|
|
|
|
|
|
|
|
参数 |
描述 |
|---|---|
该方法没有参数。 |
int main() {
  // Initializing Robot Configuration. DO NOT REMOVE!
  vexcodeInit();

  // Turn right while E Up is held
  while (true) {
    if (Controller.ButtonEUp.pressing()) {
      Drivetrain.turn(right);
    } else {
      Drivetrain.stop();
    }
    wait(20, msec);
  }
}
position#
position returns the position of the joystick’s specified axis as an integer from –100 to 100, representing a percentage. This method must be called on a specific axis object, such as AxisA (see full list of axis objects below).
用法:
可以使用此方法的四个可用轴之一,如下所示:
轴 |
命令 |
|---|---|
|
|
|
|
|
|
|
|
参数 |
描述 |
|---|---|
该方法没有参数。 |
int main() {
  // Initializing Robot Configuration. DO NOT REMOVE!
  vexcodeInit();

  // Turn with the left joystick
  RemoteControlCodeEnabled = false;

  while (true) {
    if (Controller.AxisB.position() > 10) {
      Drivetrain.turn(right);
    } else if (Controller.AxisB.position() < -10) {
      Drivetrain.turn(left);
    } else {
      Drivetrain.stop();
    }
    wait(20, msec);
  }
}
打回来#
pressed#
pressed registers a function to be called when a specific button on the controller is pressed. This method must be called on a specific button object, such as ButtonEDown — (see full list of button objects below).
用法:
十个可用按钮对象之一可用于此方法,如下所示:
按钮 |
命令 |
|---|---|
|
|
|
|
|
|
|
|
|
|
|
|
|
|
|
|
|
|
|
|
范围 |
描述 |
|---|---|
|
一个预先定义好的函数,当按下指定的按钮时执行。 |
// Drive forward when E Up is pressed
void driveForward() {
  Drivetrain.driveFor(forward, 100, mm);
}

int main() {
  // Initializing Robot Configuration. DO NOT REMOVE!
  vexcodeInit();

  Controller.ButtonEUp.pressed(driveForward);
}
released#
released registers a function to be called when a specific button on the controller is released. This method must be called on a specific button object, such as ButtonEDown – (see full list of button objects below).
用法:
十个可用按钮对象之一可用于此方法,如下所示:
按钮 |
命令 |
|---|---|
|
|
|
|
|
|
|
|
|
|
|
|
|
|
|
|
|
|
|
|
范围 |
描述 |
|---|---|
|
一个预先定义好的函数,当指定的按钮被释放时执行。 |
// Drive backward when F Down is released
void backUp() {
  Drivetrain.driveFor(reverse, 100, mm);
}

int main() {
  // Initializing Robot Configuration. DO NOT REMOVE!
  vexcodeInit();

  Controller.ButtonFDown.released(backUp);
}
changed#
changed registers a function to be called when the joystick’s position changes. This method must be called on a specific axis object, such as AxisA (see full list of axis objects below).
用法:
可以使用此方法的四个可用轴之一,如下所示:
轴 |
命令 |
|---|---|
|
|
|
|
|
|
|
|
参数 |
描述 |
|---|---|
|
先前定义的当轴的值发生变化时执行的函数。 |
// Play a sound when the right joystick moves
void beep() {
  Brain.playSound(tada);
  wait(1, seconds);
}

int main() {
  // Initializing Robot Configuration. DO NOT REMOVE!
  vexcodeInit();

  Controller.AxisD.changed(beep);
}
构造函数#
controller#
controller creates a controller object.
Usage:
controller Controller = controller();
范围 |
描述 |
|---|---|
该方法没有参数。 |
int main() {
  // Initializing Robot Configuration. DO NOT REMOVE!
  vexcodeInit();

  // Create a Controller object
  controller Controller = controller();

  // Drive forward while R Up is held
  while (true) {
    if (Controller.ButtonRUp.pressing()) {
      Drivetrain.drive(forward);
    } else {
      Drivetrain.stop();
    }
    wait(20, msec);
  }
}