Robot Specific Blocks#
All standard VEXcode VR Blocks are available for use in the V5RC Virtual Skills - High Stakes Playground.
Motion#
This Playground’s Blocks will have access to the Arm Motor and Pusher Motor parameters for all Motion blocks.
When selecting a direction for Motion blocks, up will spin the Arm forward and down spins the Arm in reverse.
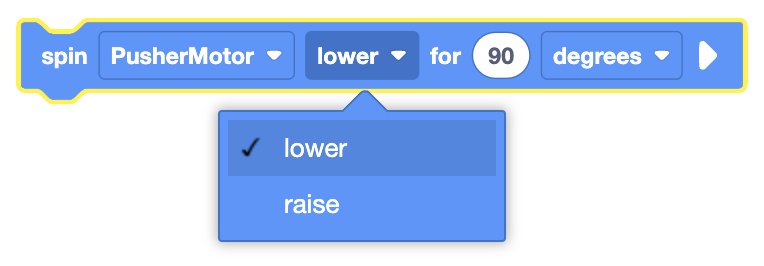
For the Pusher Motor, lower will spin the Pusher Motor forward and raise spins the Pusher Motor in reverse.
Spin#
The Spin block is used to spin a motor indefinitely.
This is a non-waiting block and allows any subsequent blocks to execute without delay.
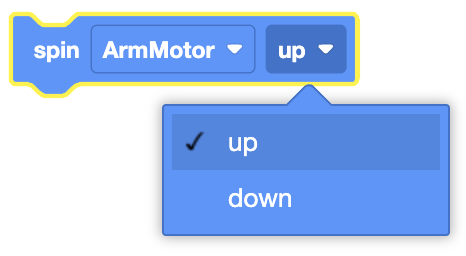
spin [ArmMotor v] [up v]
Select which motor to use.
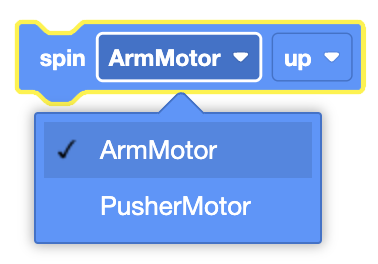
Select which direction for the motor to move in.
The Arm Motor can spin in the up or down directions.
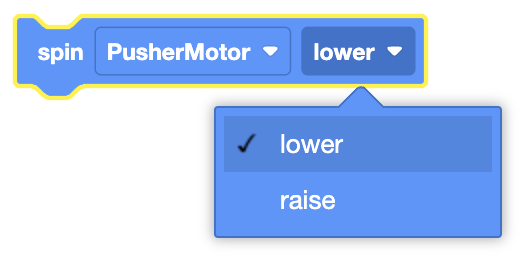
The Pusher Motor can spin in the lower or raise directions.
In this example, the Arm Motor will spin up for 1 second to move it in preparation to score.
    when started
    [Lift the Arm before moving to a Mobile Goal.]
    spin [ArmMotor v] [up v]
    wait (1) seconds
    stop [ArmMotor v]
Spin for#
The Spin for block is used to spin a motor for a given distance.
This is can be a non-waiting or waiting block depending on if the and don’t wait option is used.
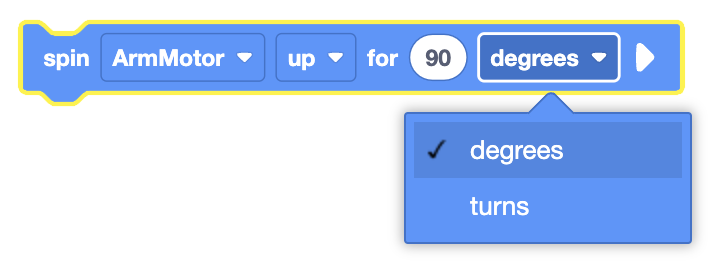
spin [ArmMotor v] [up v] for [90] [degrees v] ▶
Select which motor to use.

Select which direction for the motor to move in.
The Arm Motor can spin in the up or down directions.
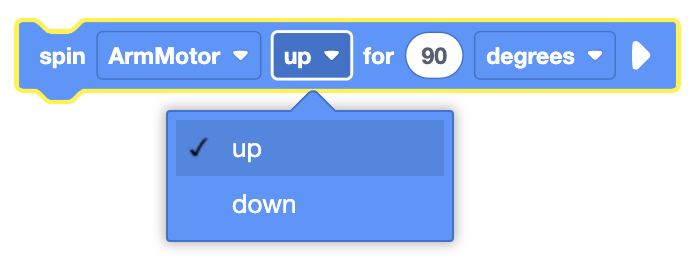
The Pusher Motor can spin in the lower or raise directions.
Set how far the motor will spin by entering a value, and choosing the unit of measurement (degrees or turns).
By default, the Spin for block will block any subsequent blocks from executing until it’s finished. By expanding the Spin for block to show and don’t wait, blocks will continue to execute while the motor is moving.
spin [ArmMotor v] [up v] for [90] [degrees v] ◀ and don't wait
In this example, the Arm Motor will spin up by 350 degrees to not block the AI Vision Sensor.
  when started
  [Lift the Arm to not block the AI Vision Sensor.]
  spin [ArmMotor v] [up v] for [200] [degrees v] ▶
Spin to position#
The Spin to position block is used to spin a motor to a set position.
This is can be a non-waiting or waiting block depending on if the and don’t wait option is used.
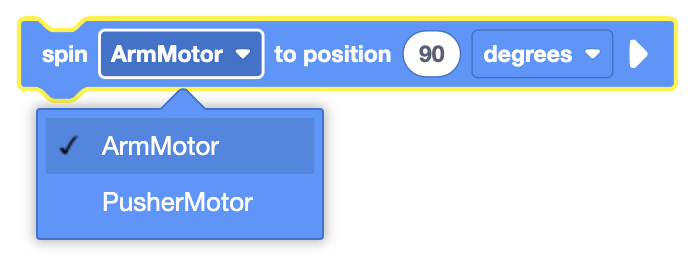
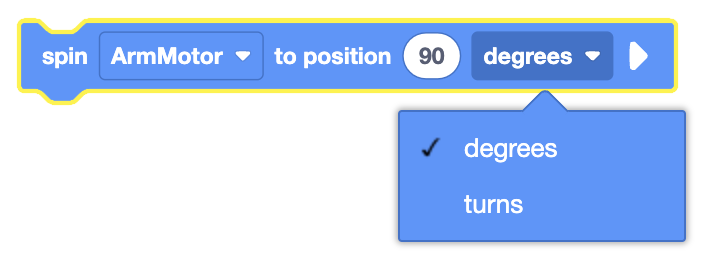
spin [ArmMotor v] to position [90] [degrees v] ▶
Select which motor to use.
Set how far the motor will spin by entering a value, and choosing the unit of measurement (degrees or turns).
By default, the Spin to position block will block any subsequent blocks from executing until it’s finished. By expanding the Spin to position block to show and don’t wait, blocks will continue to execute while the motor is moving.
spin [ArmMotor v] to position [90] [degrees v] ◀ and don't wait
In this example, the Arm Motor will spin to the 350 degrees position to not block the AI Vision Sensor.
  when started
  [Lift the Arm to not block the AI Vision Sensor]
  spin [ArmMotor v] to position [350] [degrees v] ▶
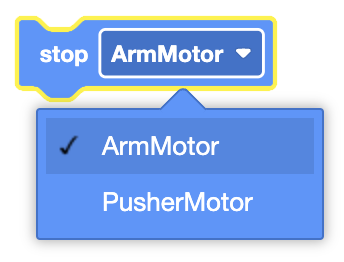
Stop Motor#
The Stop Motor block is used to stop the motor from moving.
This is a non-waiting block and allows any subsequent blocks to execute without delay.
stop [ArmMotor v]
Select which motor to use.
In this example, the Arm Motor will spin up for 1 second to move it in preparation to score.
  when started
  [Lift the Arm before moving to a Mobile Goal.]
  spin [ArmMotor v] [up v]
  wait (1) seconds
  stop [ArmMotor v]
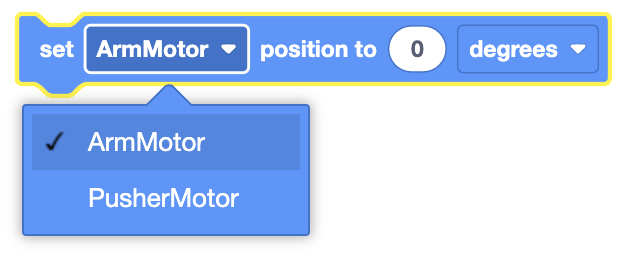
Set Motor position#
The Set Motor position block is used to set a motor’s encoder position(s) to the entered value.
This is a non-waiting block and allows any subsequent blocks to execute without delay.
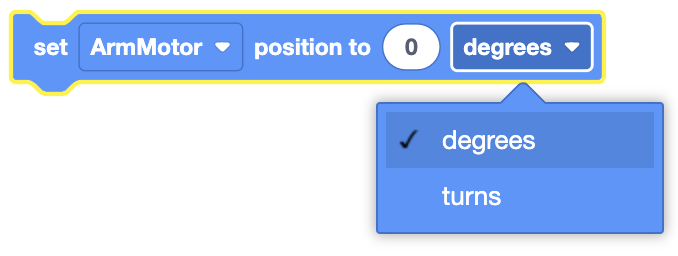
set [ArmMotor v] position to [0] [degrees v]
Select which motor to use.
Set the unit of measurement to use, degrees or turns.
In this example, the Arm is raised to the 350 degrees position, and sets that as its new 0 degrees position.
  when started
  [Make the raised Arm position the new 0 degrees position.]
  spin [ArmMotor v] to position [350] [degrees v] ▶
  set [ArmMotor v] position to [0] [degrees v]
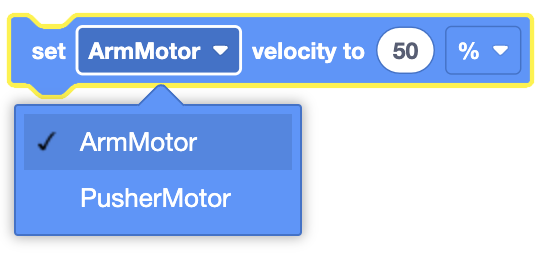
Set Motor velocity#
The Set Motor velocity block is used to set the speed of a motor.
This is a non-waiting block and allows any subsequent blocks to execute without delay.
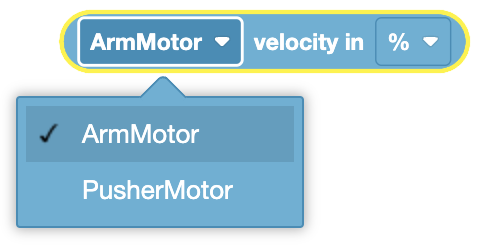
set [ArmMotor v] velocity to [50] [% v]
Select which motor to use.
The Set Motor velocity block will accept a range of -100% to 100%.
In this example, the Motor’s velocity is set to 100% before the Arm raises.
  when started
  [Raise Arm to not block the AI Vision Sensor.]
  set [ArmMotor v] velocity to [100] [% v]
  spin [ArmMotor v] [up v] for [350] [degrees v] ▶
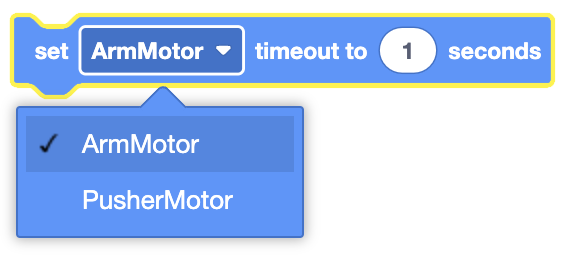
Set Motor timeout#
The Set Motor timeout block is used to set a time limit for Motor movement blocks.
This prevents Motion blocks that do not reach their intended position from preventing subsequent blocks from running.
This is a non-waiting command and allows any subsequent commands to execute without delay.
set [ArmMotor v] timeout to [1] seconds
Select which motor to use.
In this example, the motor timeout is set to 1 second before the Arm raises.
  when started
  [Raise Arm to not block the AI Vision Sensor.]
  set [ArmMotor v] timeout to [1] seconds
  spin [ArmMotor v] [up v] for [5] [turns v] ▶
Sensing#
Axel has access to the standard Brain, Drivetrain, Bumper, Distance Sensing Blocks.
Eye Sensing has been renamed to Optical Sensing to match the Front Optical Sensor.
Motor Sensing#
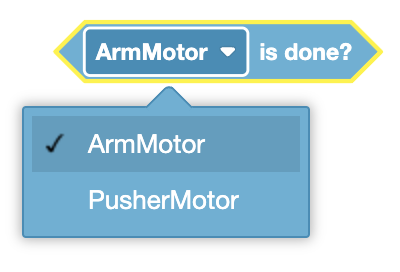
Motor is done#
The Motor is done block is used to report if the selected Motor or Motor Group has completed its movement.
<[ArmMotor v] is done?>
Select which Motor or Motor Group to use.
The Motor is done block reports True when the selected Motor or Motor Group has completed its movement.
The Motor is done block reports False when the selected Motor or Motor Group has not completed its movement.
The Motor is done block is used in blocks with hexagonal (six-sided) spaces.
Motor is spinning#
The Motor is spinning block is used to report if the selected Motor or Motor Group is moving.
<[ArmMotor v] is spinning?>
Select which Motor or Motor Group to use.

The Motor is spinning block reports True when the selected Motor or Motor Group is moving.
The Motor is spinning block reports False when the selected Motor or Motor Group is not moving.
The Motor is spinning block is used in blocks with hexagonal (six-sided) spaces.
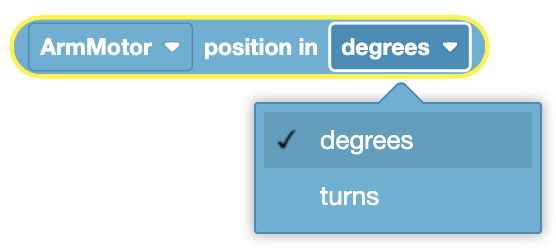
Position of motor#
The Position of motor block is used to report the position of a Motor or the first motor in a Motor Group.
([ArmMotor v] position in [degrees v])
Select which Motor or Motor Group to use.
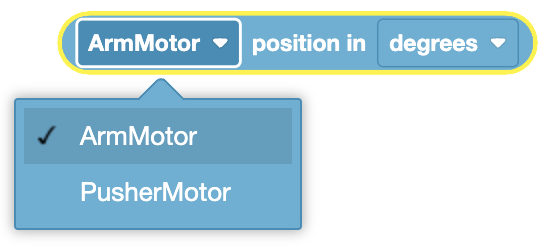
Select when unit to use, degrees or turns.
The Position of motor block is used in blocks with circular spaces.
In this example, the Arm will raise until its position is greater than 300 degrees.
  when started
  [Raise Arm to not block the AI Vision Sensor.]
  spin [ArmMotor v] [up v]
  wait until <([ArmMotor v] position in [degrees v]) [math_greater_than v] [300]>
  stop [ArmMotor v]
Velocity of motor#
The Velocity of motor block is used to report the current velocity of a Motor or the first motor in a Motor Group.
([ArmMotor v] velocity in [% v] :: custom-motion)
Select which Motor or Motor Group to use.
The Velocity of motor block is used in blocks with circular spaces.
Rotation Sensing#
Set Rotation Position#
The Set Rotation Position block is used to set the Pusher Motor’s current rotation position to a new value.
set [PusherRotation v] position to [0] degrees
In this example, the rotation that will pushes the Ring off the Arm will be set to 0 degrees.
  when started
  [Make lower Pusher position the new 0 degrees rotation position.]
  spin [PusherMotor v] [lower v] for [270] [degrees v] ▶
  set [PusherRotation v] position to [0] degrees
Rotation Angle#
The Rotation Angle block is used to report the Pusher Motor’s current rotation angle in degrees.
([PusherRotation v] angle in degrees)
In this example, the Pusher will push the Ring off the Arm, and then report the rotation angle of the motors.
  when started
  [Make lower Pusher position the new 0 degrees rotation position.]
  spin [PusherMotor v] [lower v] for [270] [degrees v] ▶
  print ([PusherRotation v] angle in degrees) ▶
Rotation Position#
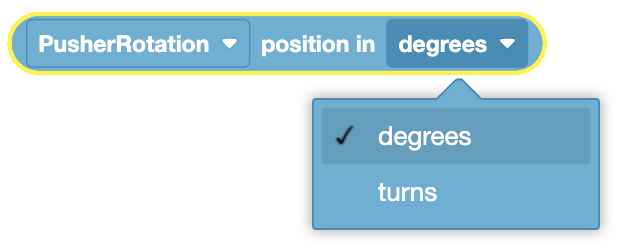
The Rotation Position block is used to report the Pusher Motor’s current position.
([PusherRotation v] position in [degrees v] :: custom-sensing)
Select which unit to report in, degrees or turns.
In this example, the Pusher will push the Ring off the Arm, and then report the position of the motors in degrees.
  when started
  [Make lower Pusher position the new 0 degrees rotation position.]
  spin [PusherMotor v] [lower v] for [270] [degrees v] ▶
  print ([PusherRotation v] position in [degrees v] :: custom-sensing) ▶
GPS Sensing#
GPS position#
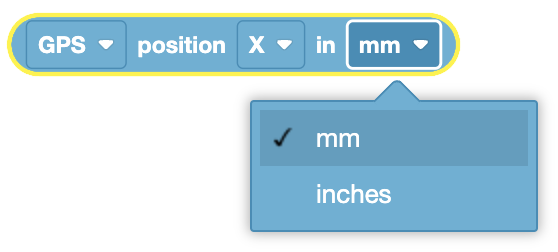
The GPS position block uses the GPS (Game Positioning System™) Sensor to report the positional offset of the robot’s turning reference point from the center of a field.
([PusherRotation v] position [X v] in [mm v])
Select either the X or Y axis to report.
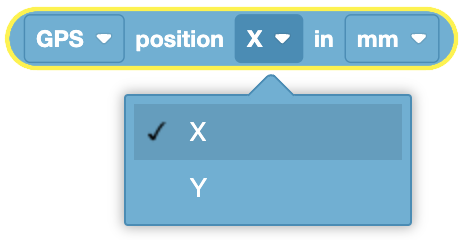
Select what unit to report the offset value in, millimeters (MM) or inches.
GPS heading#
The GPS heading block uses the GPS (Game Positioning System™) Sensor to report the heading that a robot is currently facing based on a GPS Sensor’s readings from the VEX GPS Field Code.
GPS heading reports a range from 0.00 to 359.99 degrees.
([GPS v] heading in degrees)
AI Vision Sensing#
Take Snapshot#
The Take snapshot block will capture the current image from the AI Vision Sensor to be processed and analyzed for AI Classifications.
AI Classifications are Mobile Goals, Red Rings, and Blue Rings.
take a [AIVision v] snapshot of [AI Classifications v]
All subsequent AI Vision Sensor blocks rely on data from the most recent snapshot taken. To ensure you’re working with the most up-to-date information, it’s important to take new snapshots regularly. Each new snapshot refreshes the data available to all AI Vision Sensor blocks, allowing them to process the latest visual information from the sensor’s environment.
Before attempting to access data stored from the last snapshot, you should always check if AI Classifications were detected. To do this:
Wrap your AI Vision blocks after a Take Snapshot with an If block.
Use the Object exists? block as the condition for the If block.
This will check if an AI Classification was detected before attempting to pull any data from the last taken snapshot.
In this example a snapshot is taken and the largest detected AI Classification’s width and height are printed to the Print Console.
By default, objects are indexed by size, with the largest object at index 1.
The AI Vision Sensor automatically selects the largest object (index 1) after a snapshot.
    when started
    [Spin the Arm Motor up so that the AI Vision Sensor is not blocked.]
    spin [ArmMotor v] [up v] for [270] [degrees v] ▶
    take a [AIVision v] snapshot of [AI Classifications v]
    [Check if any AI Classifications were detected in the last snapshot.]
    if <[AIVision v] object exists?> then
    [Only if an AI Classification is detected, then print data from the largest AI Classification.]
    print [Largest object's width:] ▶
    print ([AIVision v] object [width v]) ◀ and set cursor to next row
    end
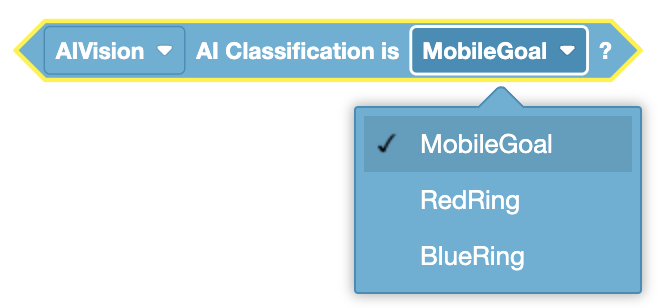
AI Classification is#
The AI Classification is block will report if the specified AI Classification has been detected.
<[AIVision v] AI Classification is [MobileGoal v]?>
Choose what AI Classification to detect in the last snapshot.
Before attempting to access data stored from the last snapshot, you should always check if AI Classifications were detected. To do this:
Wrap your AI Vision blocks after a Take Snapshot with an If block.
Use the Object exists? block as the condition for the If block.
This will check if an AI Classification was detected before attempting to pull any data from the last taken snapshot.
In this example, after a snapshot is taken, the code will check if any Mobile Goals were detected.
    when started
    [Spin the Arm Motor up so that the AI Vision Sensor is not blocked.]
    spin [ArmMotor v] [up v] for [270] [degrees v] ▶
    take a [AIVision v] snapshot of [AI Classifications v]
    [Check if any AI Classifications were detected in the last snapshot.]
    if <[AIVision v] object exists?> then
    [If any AI Classification is detected, check if any of them are a Mobile Goal.]
    if <[AIVision v] AI Classification is [MobileGoal v]?> then
    print [Mobile Goal is detected.] ▶
    else
    print [Mobile Goal is not detected.] ▶
    end
    end
Set Object Item#
The Set Object Item block will set the object item (of the object you want to learn more information about) from the objects detected. By default, the Object item is set to 1 at the start of a project.
set [AIVision v] object item to [1]
Before attempting to access data stored from the last snapshot, you should always check if AI Classifications were detected. To do this:
Wrap your AI Vision blocks after a Take Snapshot with an If block.
Use the Object exists? block as the condition for the If block.
This will check if an AI Classification was detected before attempting to pull any data from the last taken snapshot.
In this example, after a snapshot is taken, the current object index is set to the second-largest detected object and its height is printed to the Print Console.
    when started
    [Spin the Arm Motor up so that the AI Vision Sensor is not blocked.]
    spin [ArmMotor v] [up v] for [270] [degrees v] ▶
    take a [AIVision v] snapshot of [AI Classifications v]
    [Check if any AI Classifications were detected in the last snapshot.]
    if <[AIVision v] object exists?> then
    [Print the second-largest object's height.]
    set [AIVision v] object item to [2]
    print ([AIVision v] object [height v]) ◀ and set cursor to next row
    end
Object Count#
The Object Count block will set the object item (of the object you want to learn more information about) from the objects detected. By default, the Object item is set to 1 at the start of a project.
([AIVision v] object count)
Before attempting to access data stored from the last snapshot, you should always check if AI Classifications were detected. To do this:
Wrap your AI Vision blocks after a Take Snapshot with an If block.
Use the Object exists? block as the condition for the If block.
This will check if an AI Classification was detected before attempting to pull any data from the last taken snapshot.
In this example, the code will check if an AI Classification is detected after a snapshot, and if any are detected, will print how many AI Classifications were detected.
    when started
    [Spin the Arm Motor up so that the AI Vision Sensor is not blocked.]
    spin [ArmMotor v] [up v] for [270] [degrees v] ▶
    take a [AIVision v] snapshot of [AI Classifications v]
    [Check if any AI Classifications were detected in the last snapshot.]
    if <[AIVision v] object exists?> then
    print ([AIVision v] object count) ◀ and set cursor to next row
    end
Object Exists#
The Object Exists block will report if the AI Vision Sensor detects an AI Classification.
<[AIVision v] object exists?>
Before attempting to access data stored from the last snapshot, you should always check if AI Classifications were detected. To do this:
Wrap your AI Vision blocks after a Take Snapshot with an If block.
Use the Object exists? block as the condition for the If block.
This will check if an AI Classification was detected before attempting to pull any data from the last taken snapshot.
In this example, the code will check if an AI Classification is detected after a snapshot, and if any are detected, will print how many AI Classifications were detected.
    when started
    [Spin the Arm Motor up so that the AI Vision Sensor is not blocked.]
    spin [ArmMotor v] [up v] for [270] [degrees v] ▶
    take a [AIVision v] snapshot of [AI Classifications v]
    [Check if any AI Classifications were detected in the last snapshot.]
    if <[AIVision v] object exists?> then
    print ([AIVision v] object count) ◀ and set cursor to next row
    end
AI Vision Object#
The AI Vision Object block will report information about an AI Classification from the last use of the Take Snapshot block.
([AIVision v] object [width v])
Choose what property to report about the AI Classification:
width: How wide the AI Classification is in pixels.
height: How tall the AI Classification is in pixels.
centerX: The X coordinate at the exact center of the AI Classification.
centerY: The Y coordinate at the exact center of the AI Classification.
originX: The X coordinate at the top-left corner of the AI Classification.
originY: The Y coordinate at the top-left corner of the AI Classification.

Before attempting to access data stored from the last snapshot, you should always check if AI Classifications were detected. To do this:
Wrap your AI Vision blocks after a Take Snapshot with an If block.
Use the Object exists? block as the condition for the If block.
This will check if an AI Classification was detected before attempting to pull any data from the last taken snapshot.
    when started
    [Spin the Arm Motor up so that the AI Vision Sensor is not blocked.]
    spin [ArmMotor v] [up v] for [270] [degrees v] ▶
    take a [AIVision v] snapshot of [AI Classifications v]
    [Check if any AI Classifications were detected in the last snapshot.]
    if <[AIVision v] object exists?> then
    [Only if an AI Classification is detected, then print data from the largest AI Classification.]
    print [Largest object's width:] ▶
    print ([AIVision v] object [width v]) ◀ and set cursor to next row
    end