Uso del simulador de vuelo VEX AIR#
Accediendo al Simulador#
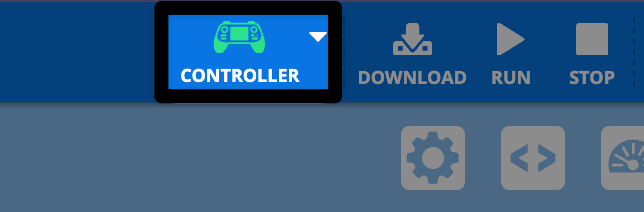
Conecte el controlador VEX AIR a VEXcode AIR.
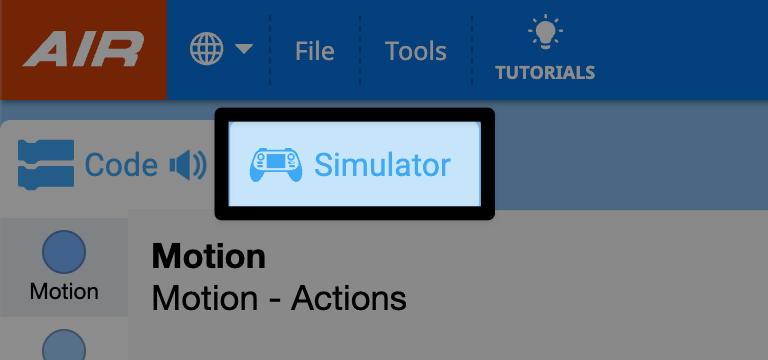
Seleccione la pestaña Simulador.
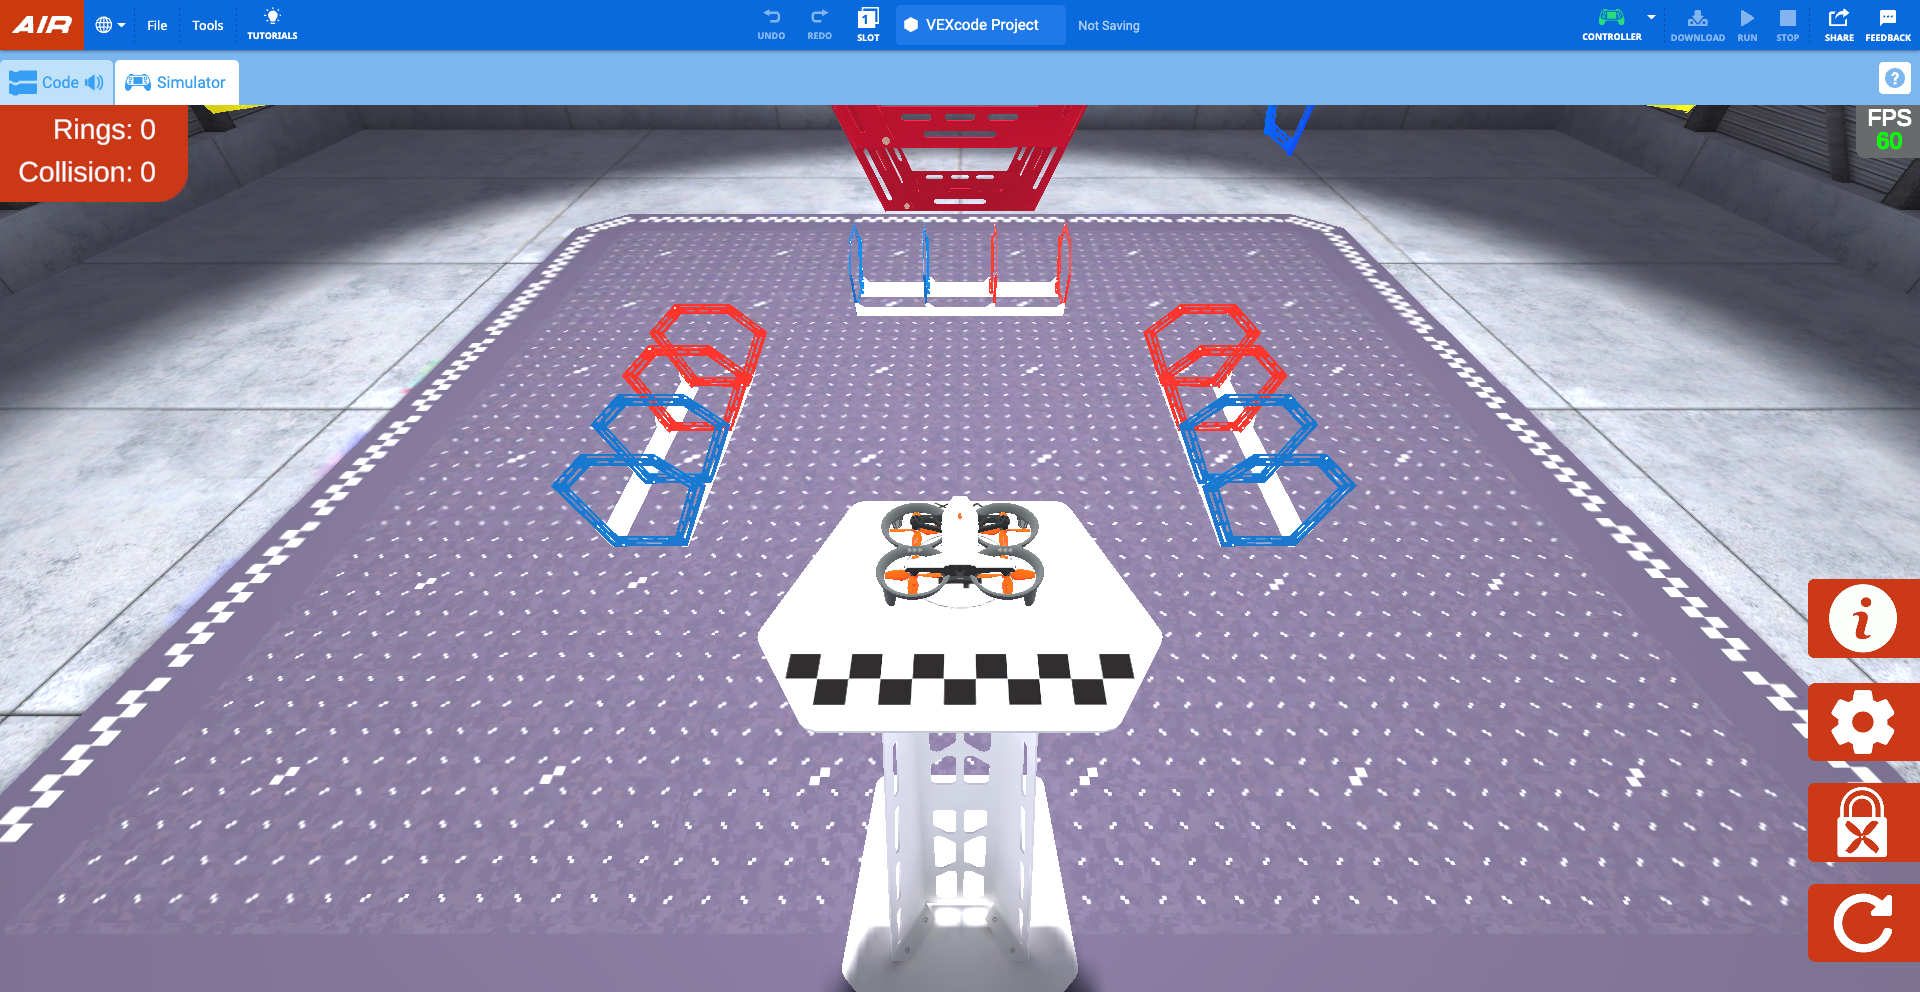
En VEXcode, el simulador se abrirá en el diseño de Anillos, mostrando la Vista del Piloto.
Cuando se abre el simulador, el controlador emitirá un sonido y aparecerá un mensaje en la pantalla del controlador indicando que hay un dron conectado y que el bloqueo de hélice está habilitado.
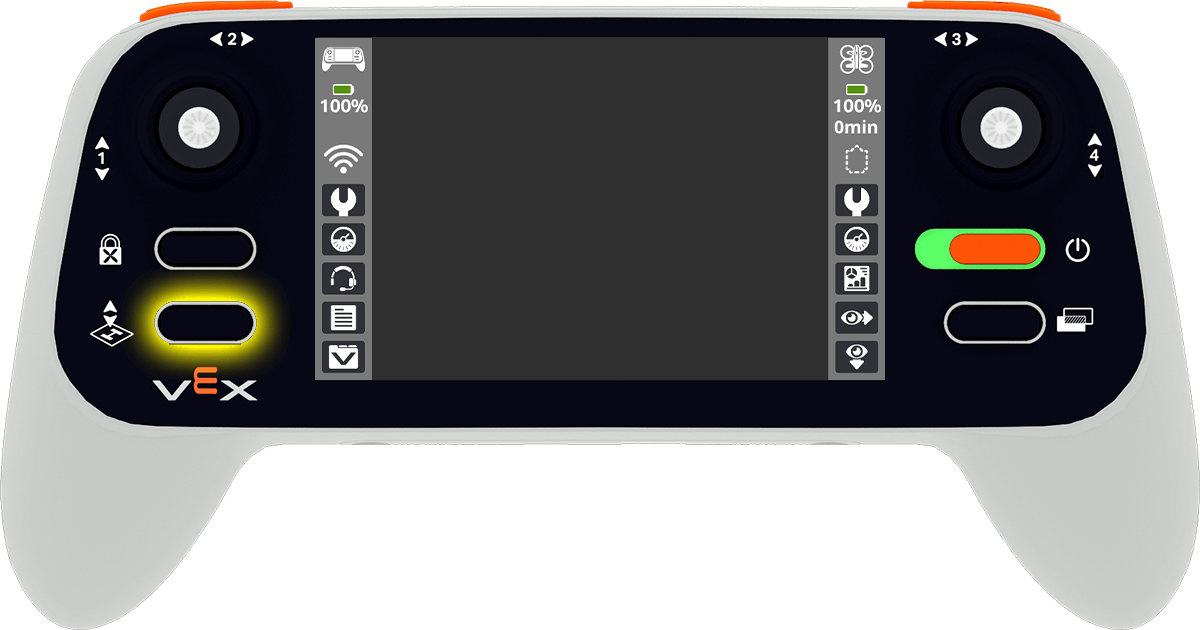
Bloqueo de la hélice#
Por defecto, el bloqueo de hélices está activado al abrir el simulador. El bloqueo de hélices del dron VEX AIR es una importante función de seguridad que ayuda a garantizar un funcionamiento seguro del dron.
El dron no puede despegar cuando el bloqueo de hélices está activado. Al igual que en el dron físico, las hélices se bloquearán cada vez que se reinicie el simulador o se modifique la configuración.
Mientras el bloqueo de hélices esté activado, el botón de encendido del dron virtual en el simulador parpadeará en azul, como se muestra en este video. El botón de encendido del control remoto físico también parpadeará en azul.
Seleccione el botón de encendido del dron virtual en el cuadro de diálogo para desactivar el bloqueo de las hélices, como se muestra en este video. De esta forma, las hélices se desbloquearán y el dron estará listo para volar.
Uso del controlador con el simulador#
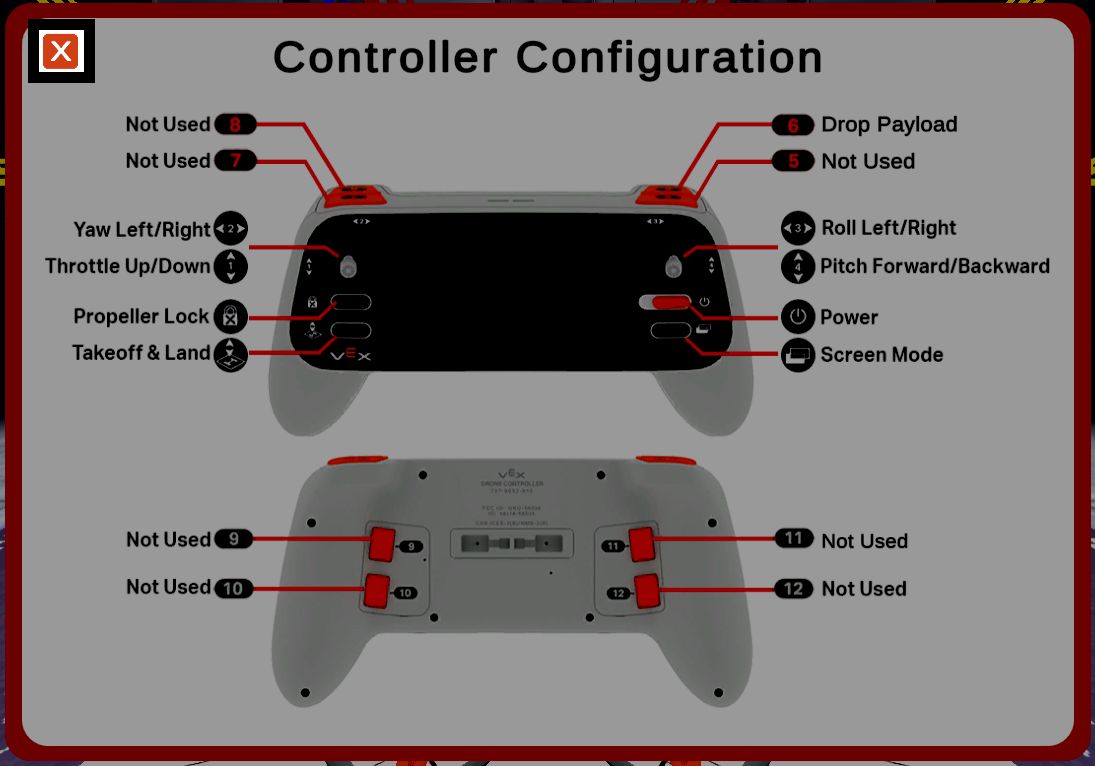
Con el bloqueo de hélice desactivado, el dron puede volarse con los mismos controles que en un vuelo real. El simulador utiliza los mismos controles que el proyecto default_fly.
Volando en el simulador#
Despega usando el botón Despegue y Aterrizaje del mando. Pulsa el botón para abrir el menú del proyecto. Mantenlo pulsado hasta que el dron despegue de la plataforma.
Al pulsar el botón Despegar y aterrizar mientras vuelas en el simulador, el dron aterrizará. Pulsa el botón para abrir el menú. Luego, vuelve a pulsarlo o toca el botón Aterrizar en la pantalla del mando para aterrizar el dron en su posición actual.
El movimiento del dron se controla mediante los joysticks. El siguiente video muestra cómo el joystick izquierdo se mueve hacia adelante a lo largo del Eje 1 para elevar el dron, y luego hacia abajo a lo largo del mismo eje para descenderlo.
Opciones de cámara#
Para cambiar la vista de la cámara del dron, seleccione el botón Cambiar vista en el controlador.
Esto rotará entre las siguientes opciones de cámara:
Vista del Piloto: Muestra el dron desde la posición del piloto fuera del campo, como en una competición. Esta vista ayuda a desarrollar la percepción espacial y a practicar el vuelo con línea de visión.
Cámara Frontal: Muestra la cámara frontal (similar a la cámara frontal del dron) para mostrar lo que el dron ve directamente. Es útil para sortear obstáculos o alinearse con objetivos.
Cámara hacia abajo: muestra la vista de la cámara hacia abajo (que coincide con la cámara hacia abajo del dron). Esto es útil para alinear con objetos y puntuar elementos.
Vista de Seguimiento: Sigue al dron en movimiento. Esta vista ofrece una perspectiva dinámica que ayuda a visualizar las trayectorias de vuelo y los cambios de dirección.
Pantalla dividida 1: combina la Vista del piloto en la parte superior y la Cámara frontal en la parte inferior.
Pantalla dividida 2: combina la Vista del piloto en la parte superior y la Cámara inferior en la parte inferior.
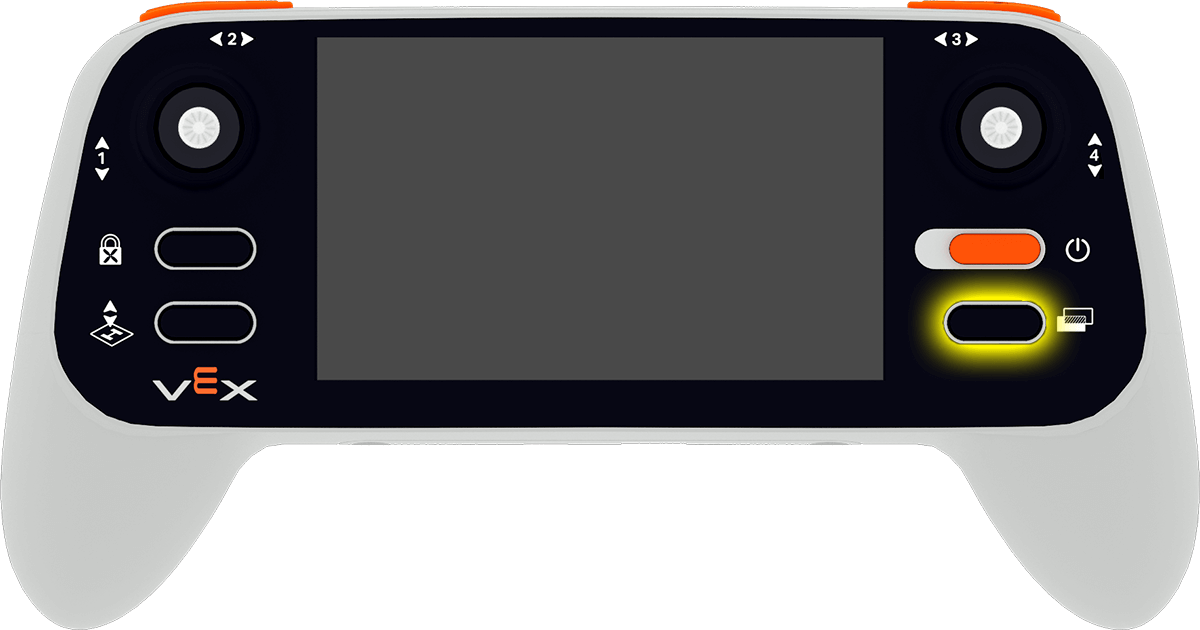
Configuración del controlador#
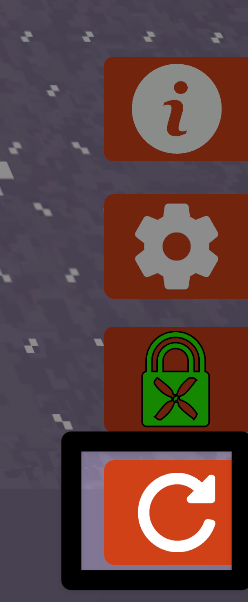
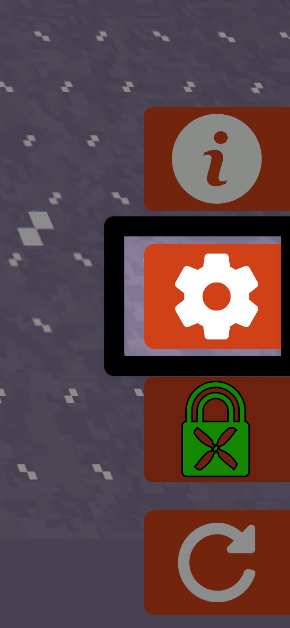
Seleccione el botón Información en la parte inferior derecha de la pantalla para ver la configuración del controlador.
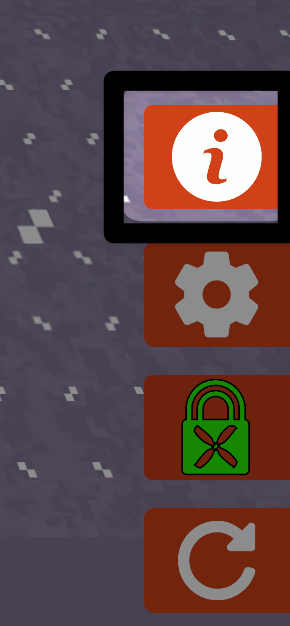
Seleccione el botón X en la esquina superior izquierda para cerrar la configuración y regresar al campo.
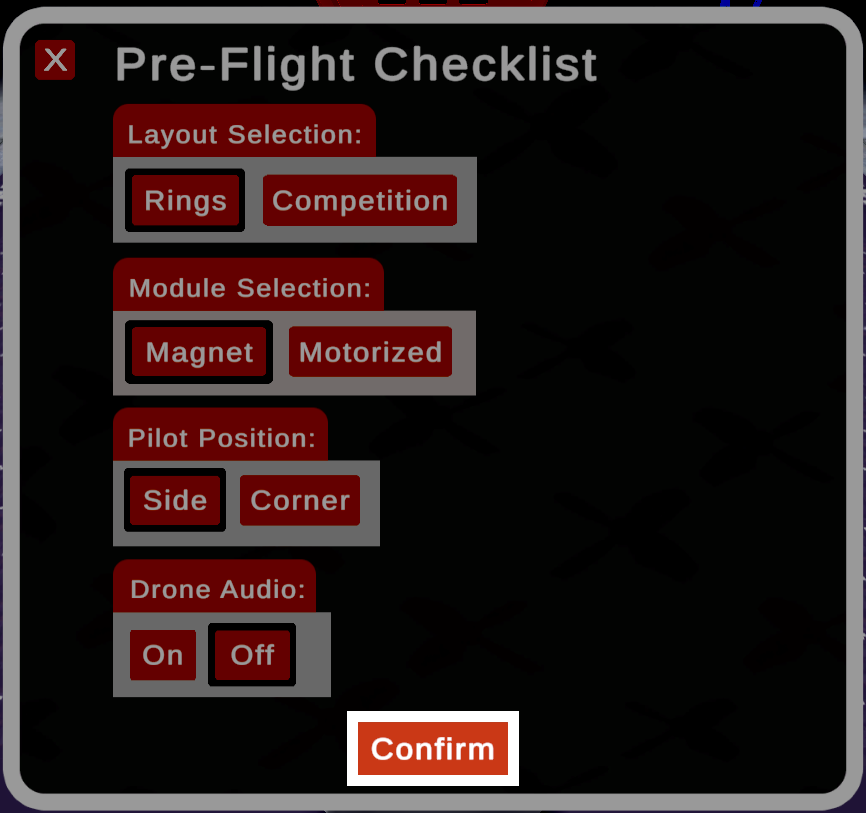
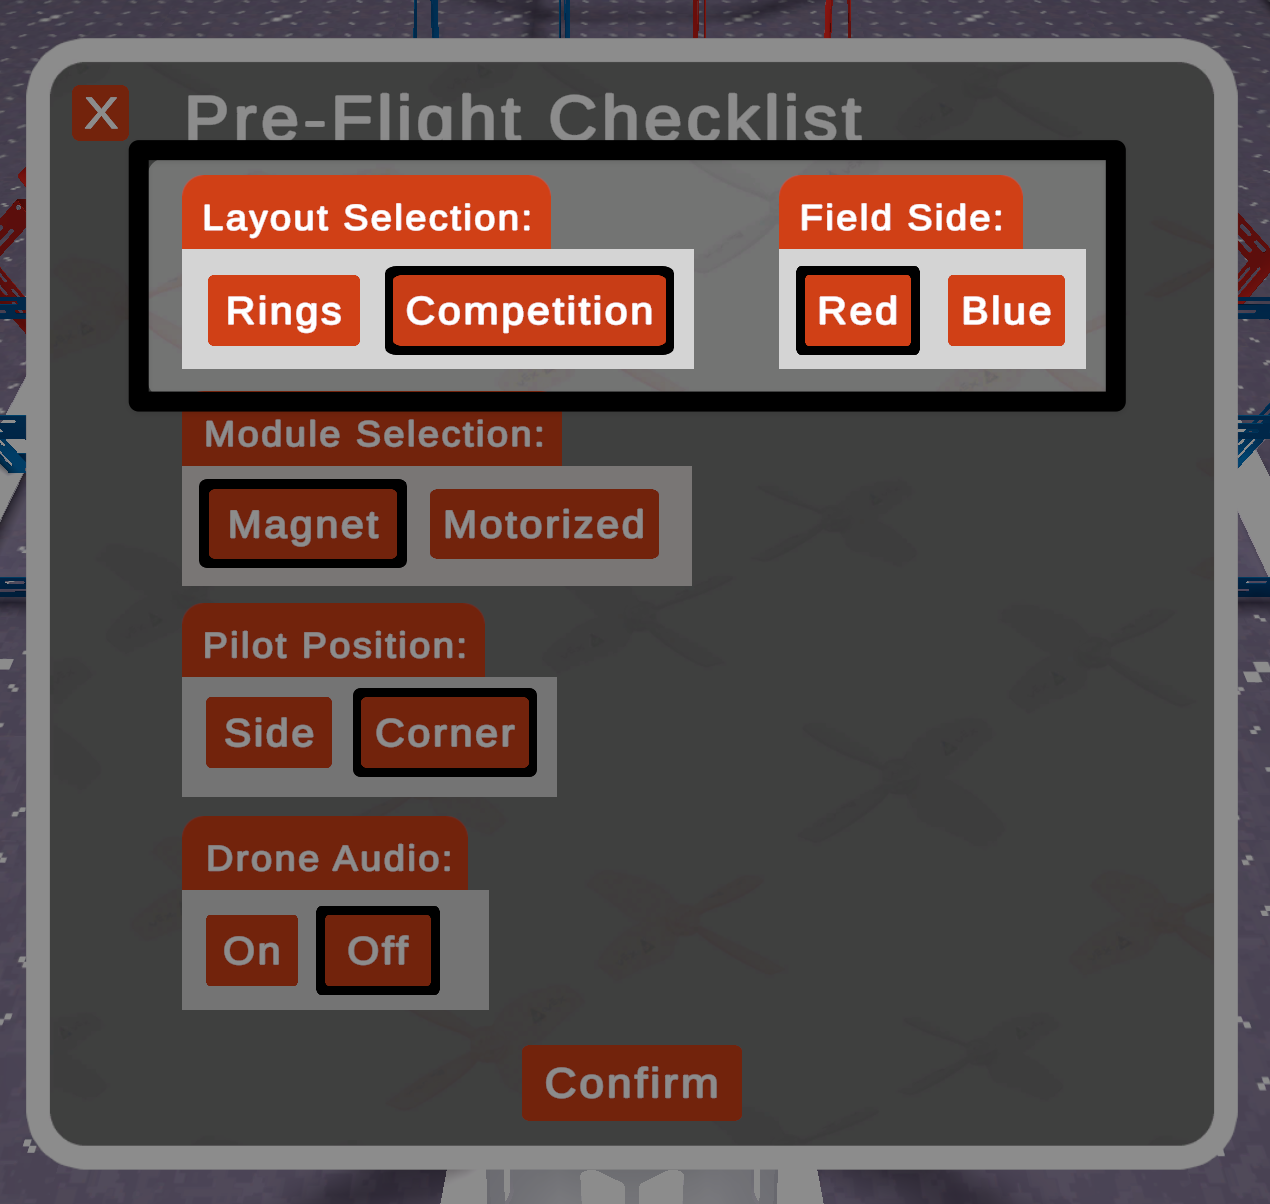
Menú de lista de verificación previa al vuelo#
Seleccione el ícono Engranaje en la parte inferior derecha de la pantalla para abrir la Lista de verificación previa al vuelo.
Seleccione el botón Confirmar en la parte inferior de la ventana para guardar sus selecciones. Si selecciona el botón X en la esquina superior izquierda, se cerrará la lista de verificación sin guardar sus elecciones.
Cuando se selecciona el diseño Competencia, aparece la opción adicional Lado del campo.
Tanteo#
En el diseño Anillos, el contador indica la cantidad de anillos que se atraviesan y la cantidad de veces que el dron choca con un anillo.

En el diseño Competencia, el contador indica la cantidad de anillos recorridos y la cantidad de objetos de juego colocados en o sobre cada uno de los elementos del juego.

Reinicio#
Seleccione el botón Reiniciar en la esquina inferior derecha de la pantalla para reiniciar el campo y devolver el dron a la posición inicial en la plataforma, con el bloqueo de hélices activado.