使用 VEX AIR 飞行模拟器#
访问模拟器#
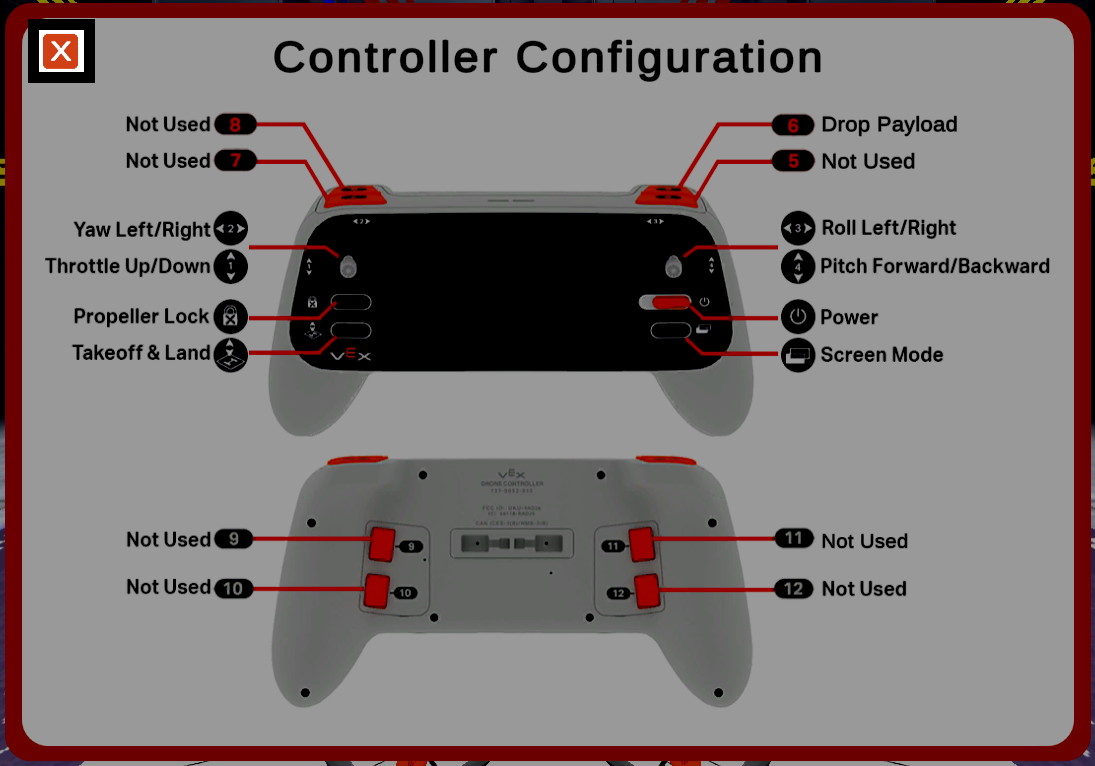
将 VEX AIR 控制器连接到 VEXcode AIR。

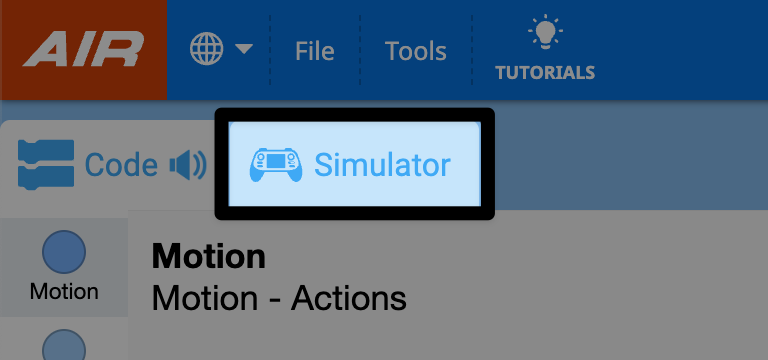
选择“模拟器”选项卡。
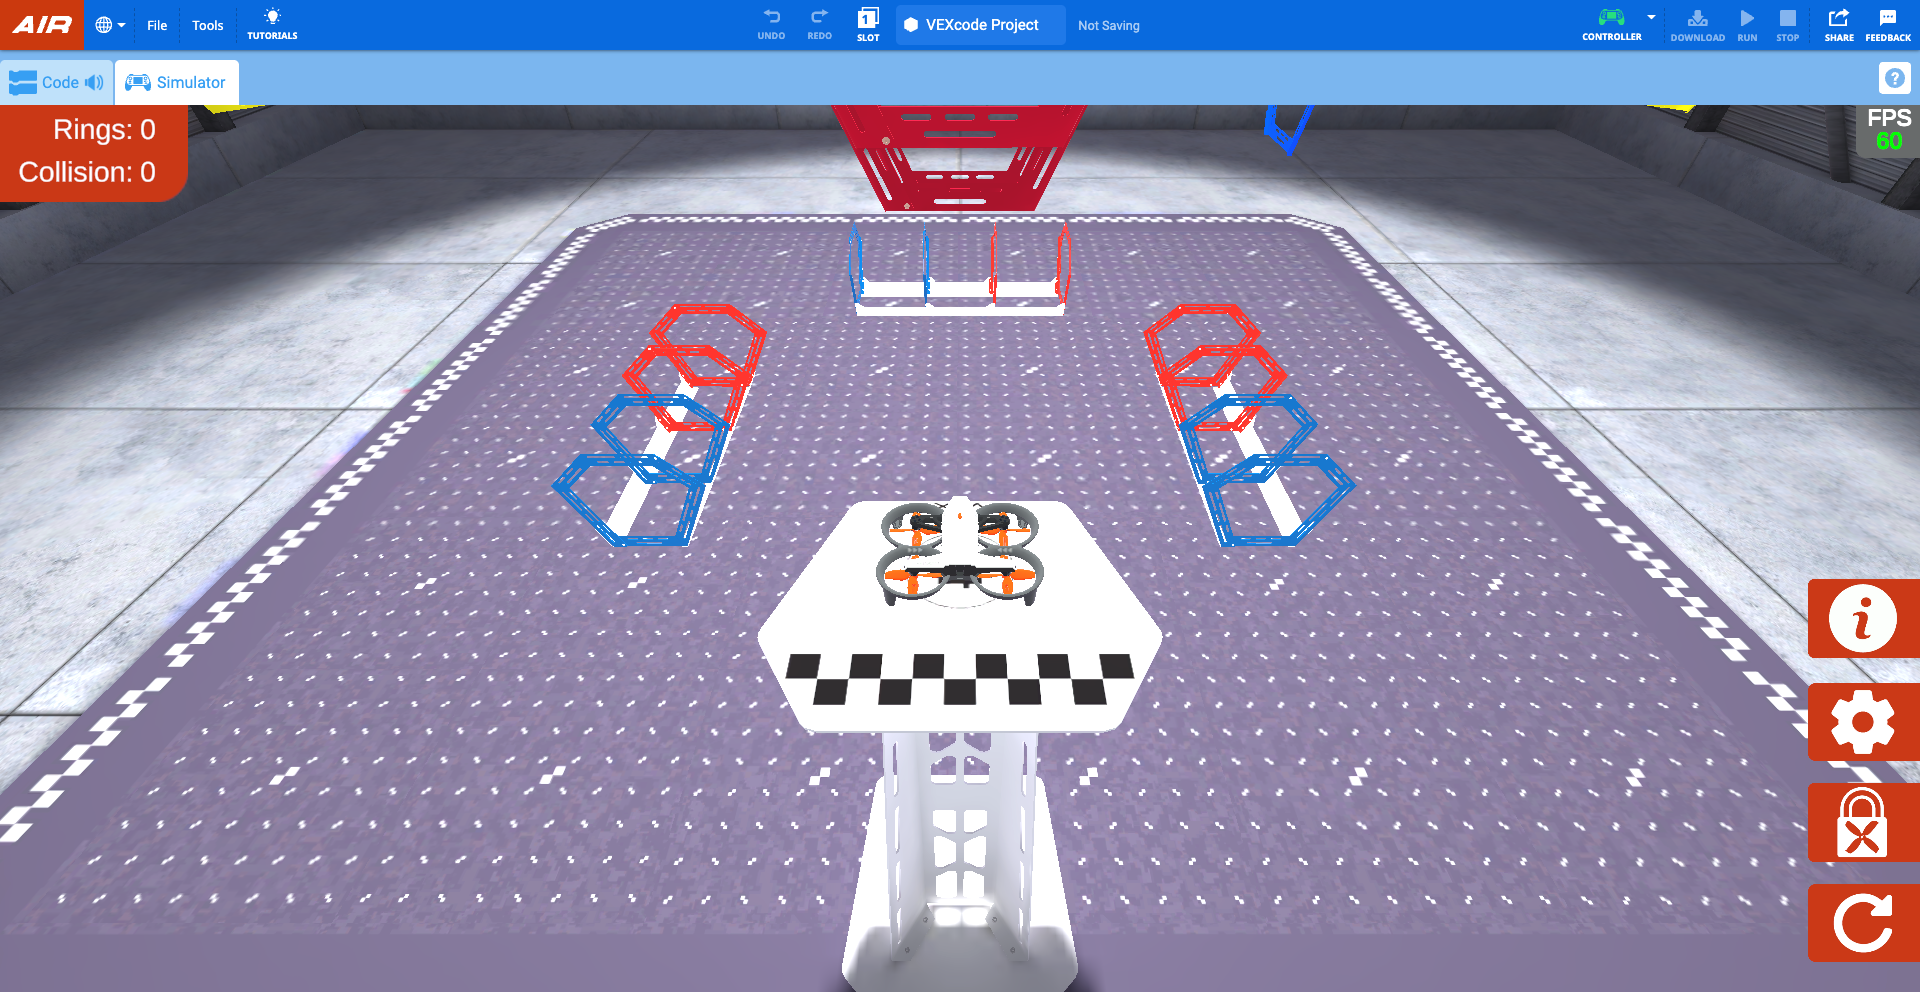
在 VEXcode 中,模拟器将打开环形布局,显示飞行员视图。
当模拟器打开时,控制器会发出声音,并且控制器屏幕上会出现一条消息,表明无人机已连接且螺旋桨锁定已启用。
螺旋桨锁#
默认情况下,模拟器启动时螺旋桨锁定功能已启用。VEX AIR 无人机的螺旋桨锁定功能是一项重要的安全功能,有助于确保无人机安全运行。
当螺旋桨锁定功能启用时,无人机无法起飞。与真实无人机上的螺旋桨锁定功能类似,模拟器重置或布局更改时,螺旋桨都会锁定。
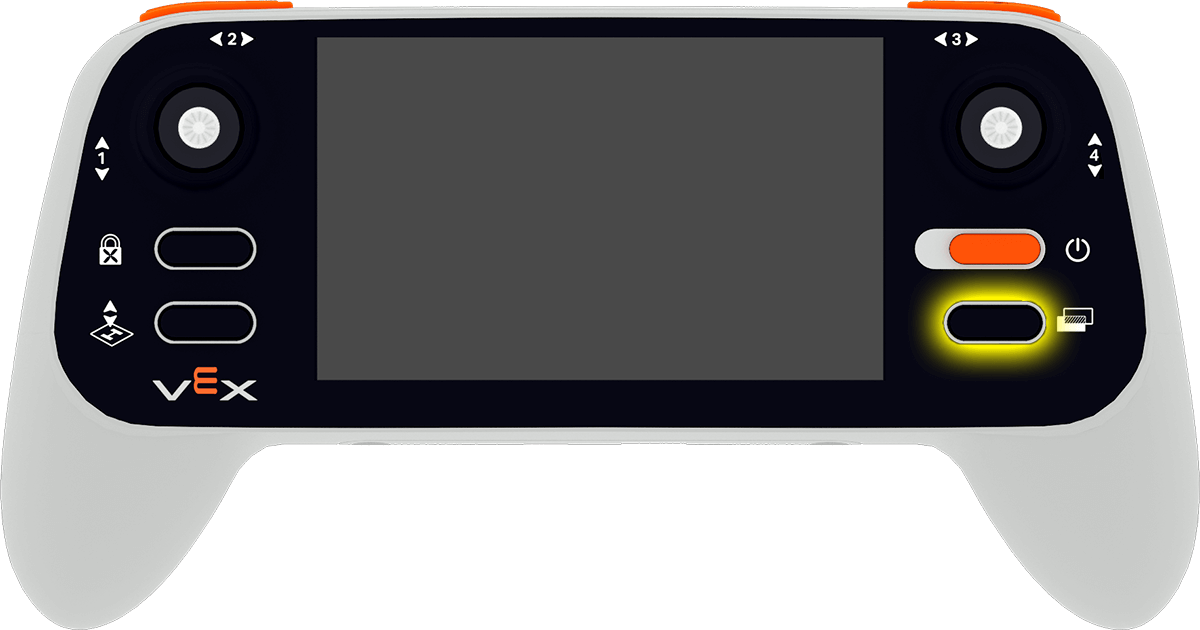
当螺旋桨锁定功能启用时,模拟器中虚拟无人机的电源按钮会像视频中显示的那样闪烁蓝色。实体遥控器上的电源按钮也会闪烁蓝色。
如视频所示,在对话框中选择虚拟无人机上的电源按钮以解除螺旋桨锁定。然后螺旋桨将被解锁,无人机即可飞行。
将控制器与模拟器一起使用#
关闭螺旋桨锁定后,即可使用与真实飞行相同的控制方式操控无人机!该模拟器采用与 default_fly 项目相同的控制方式。
模拟器飞行#
使用遥控器上的“起飞/降落”按钮起飞。按下该按钮打开项目菜单。然后按住该按钮,直到无人机从平台上起飞。
在模拟器中飞行时,按下“起飞/降落”按钮即可降落无人机。按下该按钮打开菜单。然后再次按下该按钮,或触摸控制器屏幕上的“降落”按钮,即可将无人机降落在当前位置。
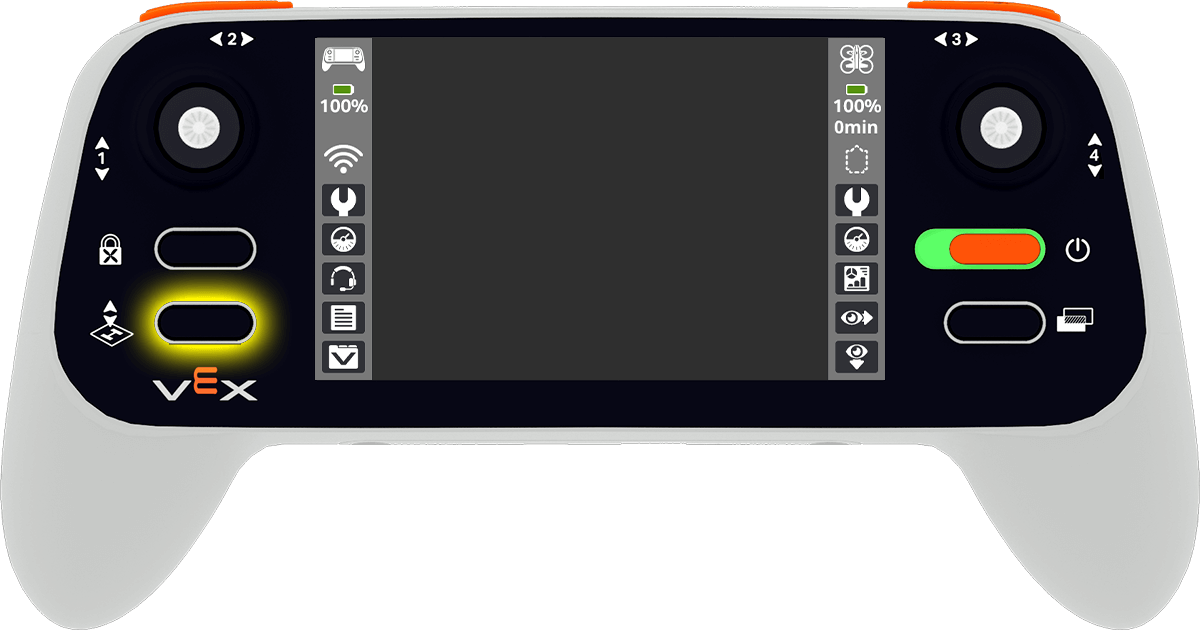
无人机的飞行由操纵杆控制。下面的视频显示,左操纵杆沿轴1向前移动可使无人机向上飞行,然后沿同一轴向下移动可使无人机向下飞行。
相机选项#
要更改无人机的相机视图,请选择控制器上的更改视图按钮。
这将轮播显示以下相机选项:
飞行员视角 - 像比赛一样,从飞行员在场地外的位置显示无人机。此视角有助于培养空间感知能力和练习视距飞行。
前置摄像头 - 显示前方摄像头(与无人机的前置摄像头匹配)的画面,以显示无人机正前方“看到”的景象。这有助于避开障碍物或对准目标。
下视摄像头 - 显示向下拍摄的摄像头画面(与无人机自身的下视摄像头画面一致)。这有助于对准物体和评分元素。
追随视角 - 跟随无人机飞行。此视角提供动态视角,有助于可视化飞行路径和方向变化。
分屏 1 - 将顶部的飞行员视角和底部的前置摄像头结合起来。
分屏 2 - 将顶部的飞行员视角和底部的俯视视角结合起来。
控制器设置#
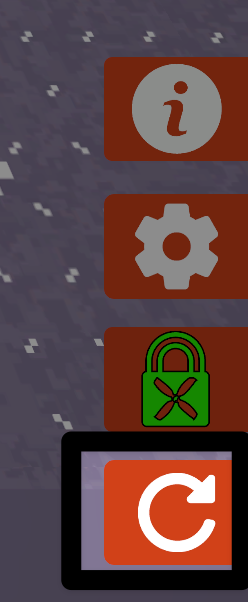
选择屏幕右下角的信息按钮,查看控制器配置。
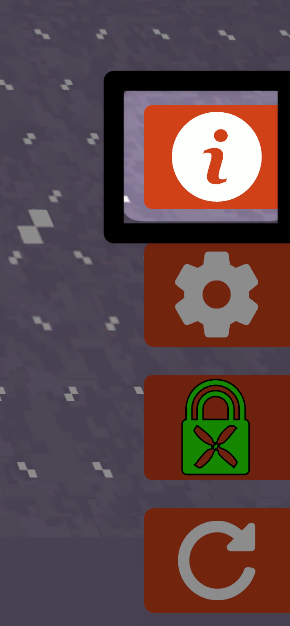
选择左上角的X按钮关闭配置并返回字段。
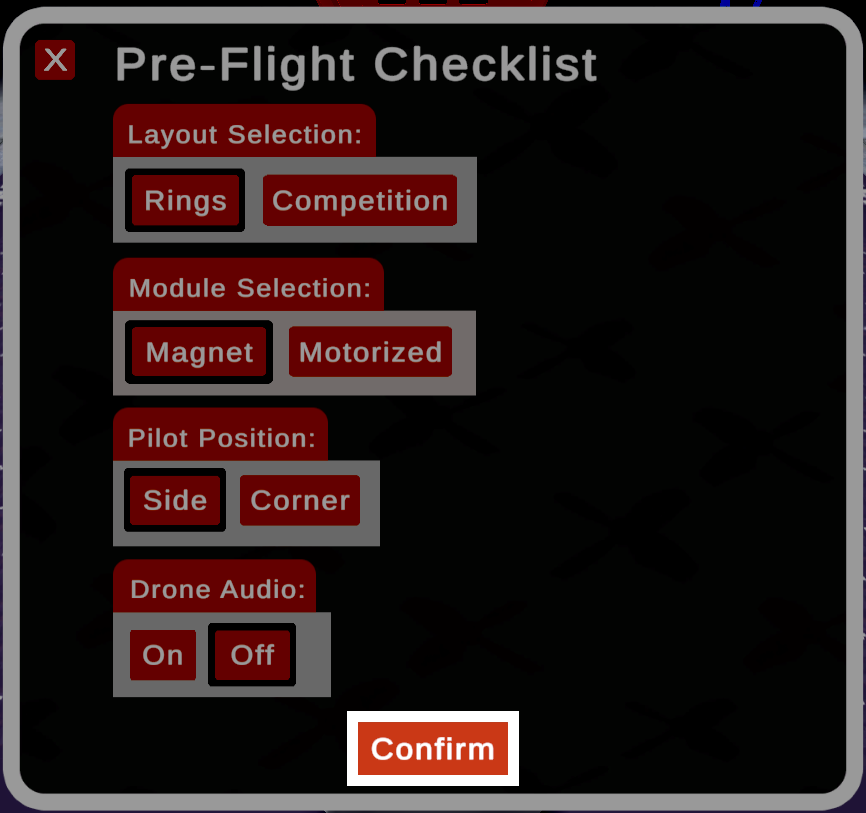
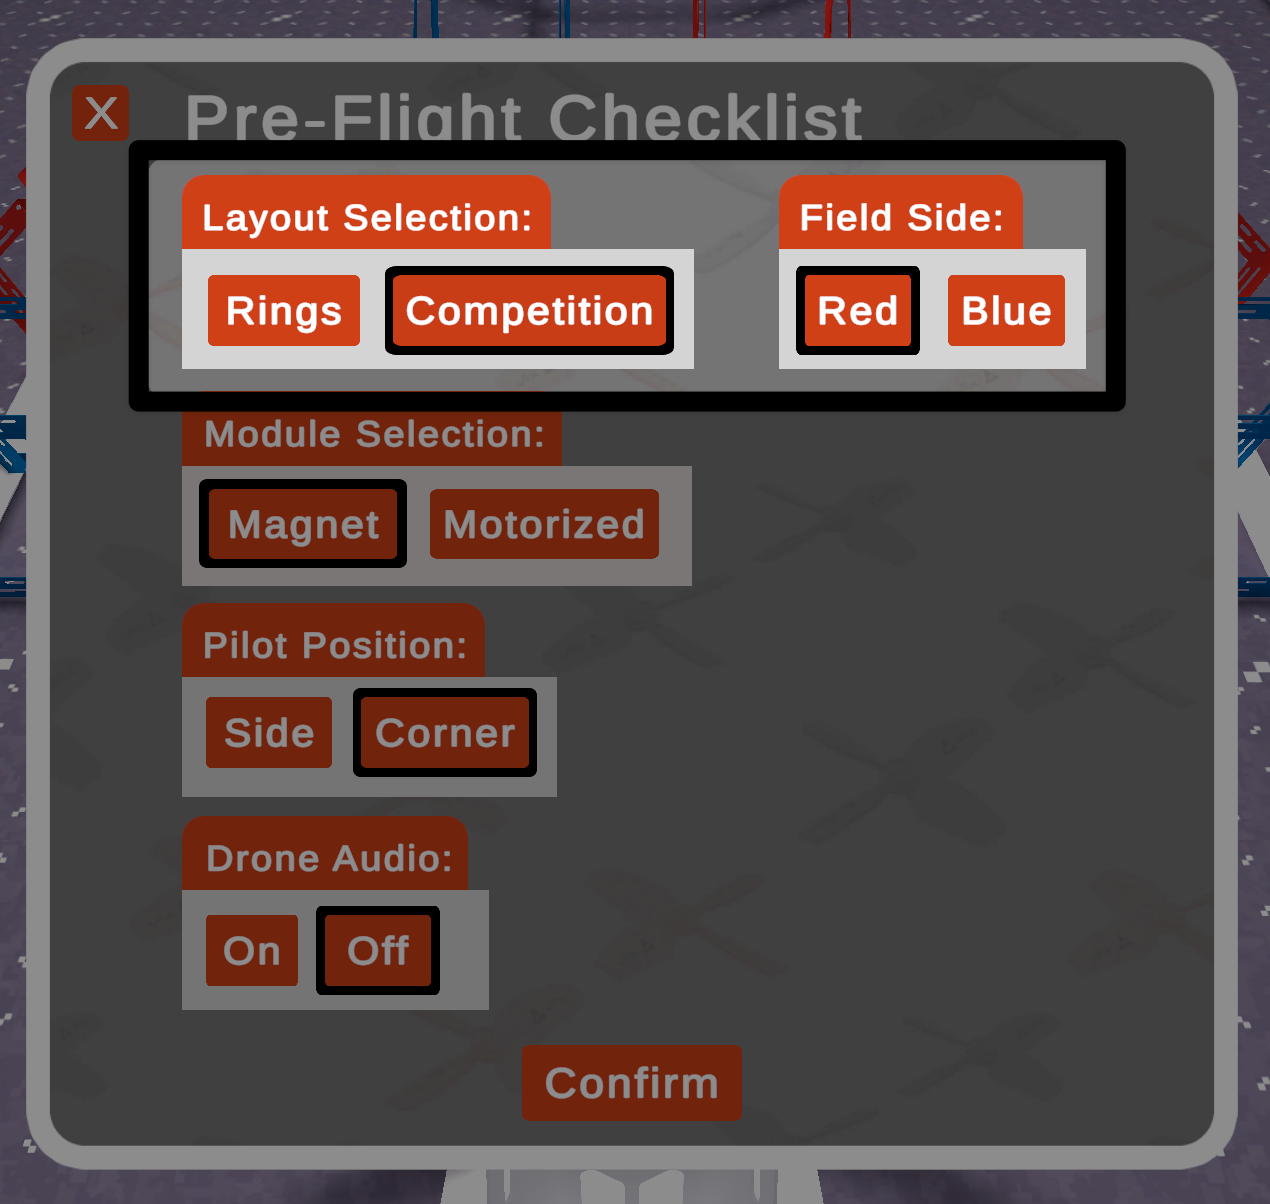
飞行前检查清单菜单#
选择屏幕右下角的齿轮图标,打开飞行前检查清单。
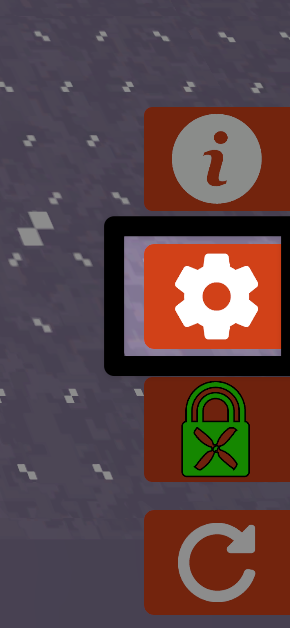
点击窗口底部的“确认”按钮保存您的选择。点击左上角的“X”按钮将关闭清单,而不保存您的选择。
选择“比赛布局”时,会出现“场地侧”这一附加选项。
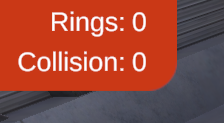
得分#
在环形布局中,计数器指示飞越的环的数量,以及无人机与环碰撞的次数。
在比赛布局中,计数器指示飞过的圆环数量,以及放置在每个游戏元素中或上面的游戏对象数量。

重置#
选择屏幕右下角的重置按钮,重置场地并将无人机返回平台上的起始位置,同时启用螺旋桨锁定。