
Detección de objetos#
Detecting Objects
This tutorial walks you through using the Eye Sensor to detect an object. By the end, you’ll have a project that prints a message once an object is detected.
Make sure your robot has an Eye Sensor connected. See Configuring Devices if you haven’t added one yet.
Attach a wait until block below the when started block.
An empty wait until block, below when started.#
cuando inicie :: hat events
esperar hasta <>
Drag the Eye Sensor’s found an object? Boolean block into the wait until block’s condition slot.
Wait until the Eye Sensor detects an object.#
cuando inicie :: hat events
esperar hasta <¿sensor encontró un objeto?>
Attach a print block below the wait until block.
The print block, below wait until.#
cuando inicie :: hat events
esperar hasta <¿sensor encontró un objeto?>
imprimir [VEXcode] ▶
Change its text to Object detected!.
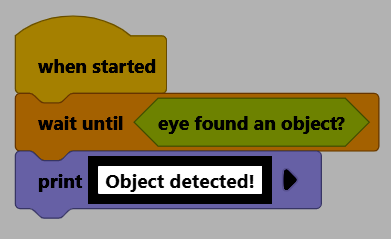
Make sure your robot is connected to VEXcode. See Connecting to Your Robot if it isn’t connected yet.

Select Start to run the project, then hold an object in front of the Eye Sensor. Once it’s detected, Object detected! will print to the Console.
