Configuring a Drivetrain#

Configuring a Drivetrain

This tutorial walks you through configuring a Drivetrain in VEXcode V5. By the end, you’ll have added and configured a Drivetrain.

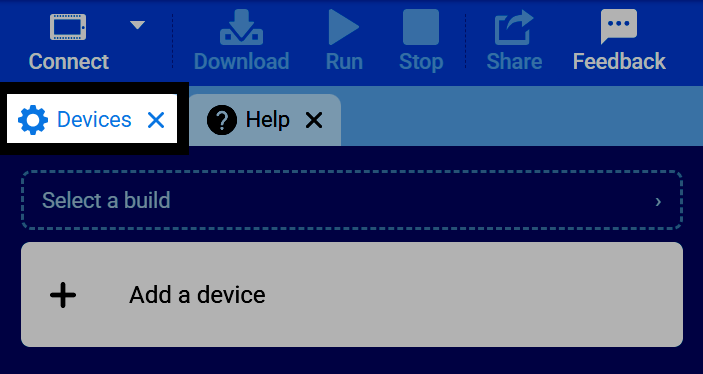
  1. Select the Devices tab.

Screenshot of VEXcode's tab bar, with the Devices tab highlighted.
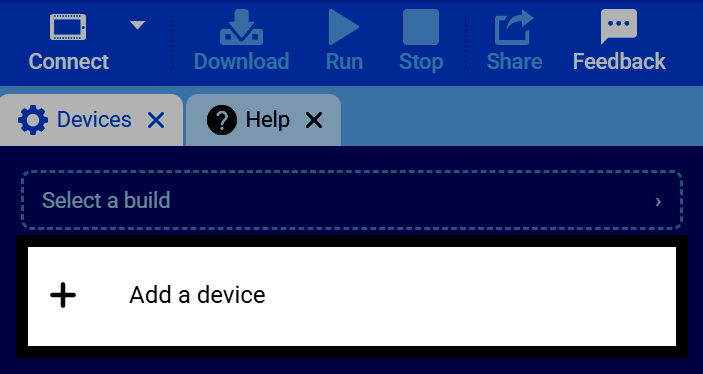
  1. Select Add a Device.

Screenshot of the Devices tab, with the Add a Device button highlighted.
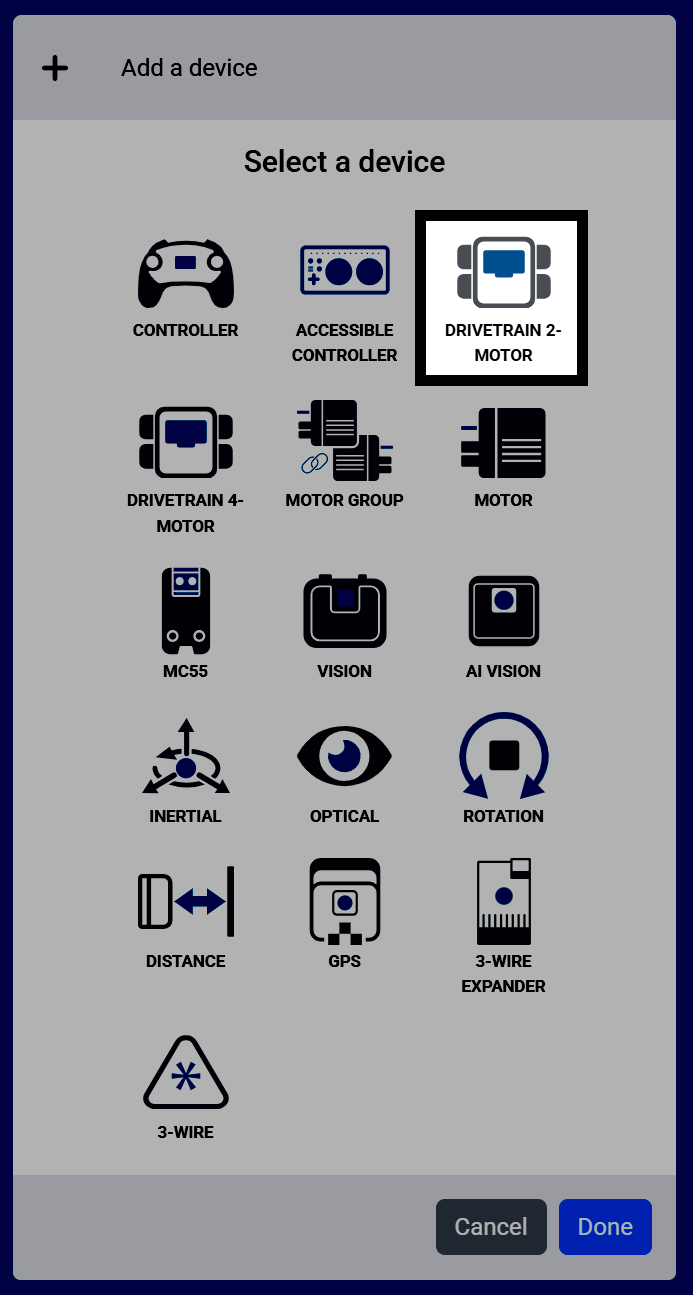
  1. Select Drivetrain 2-Motor.

Screenshot of the Select a device screen, with Drivetrain 2-Motor highlighted among the other device options.
  1. Select the port that the left motor is connected to.
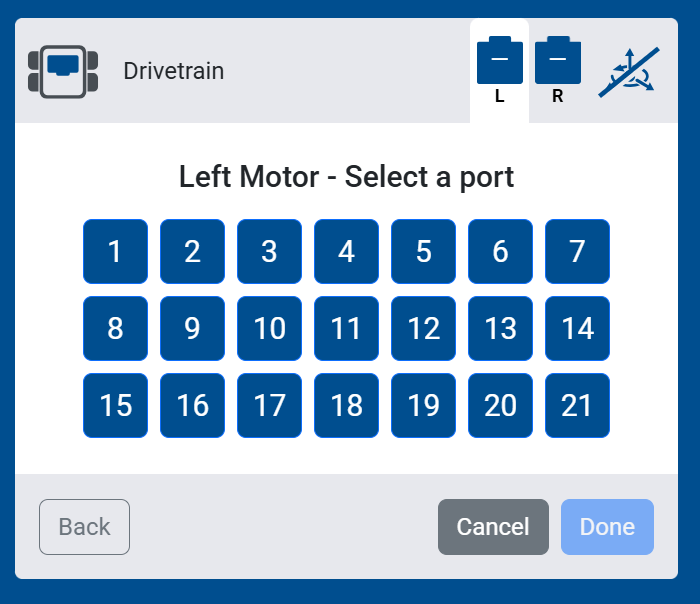
Screenshot of the Left Motor port selection screen, showing ports 1 through 21 to choose from.
  1. Select the port that the right motor is connected to.
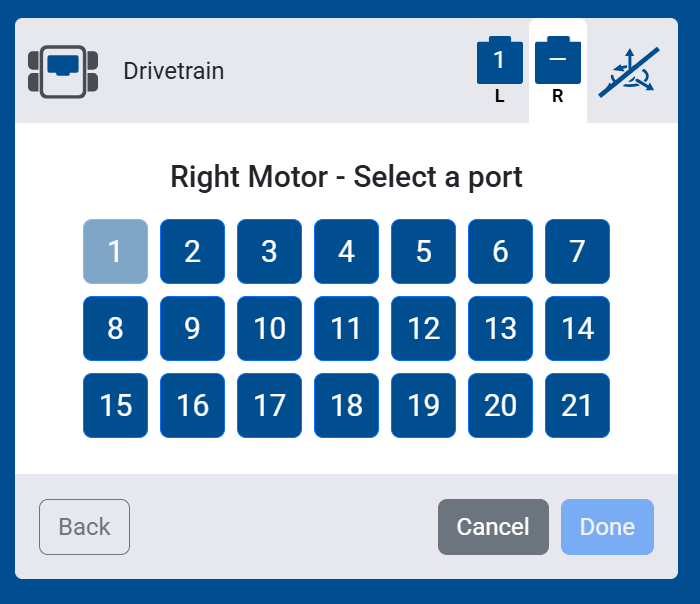
Screenshot of the Right Motor port selection screen, showing ports 1 through 21 to choose from.
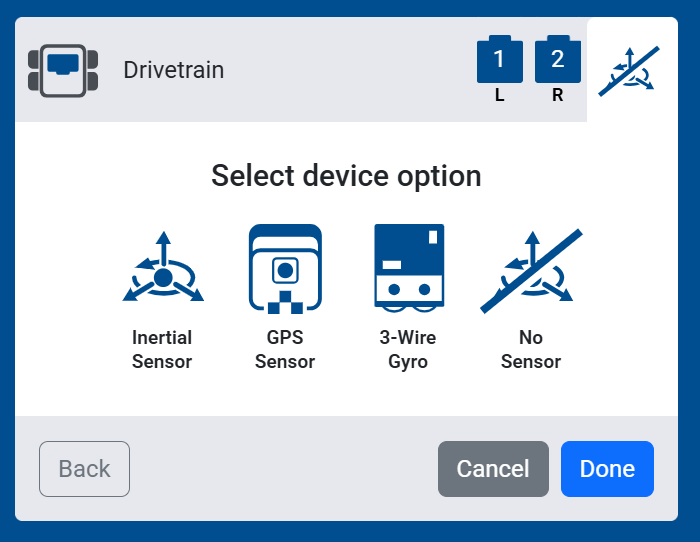
  1. Select No Sensor.

Screenshot of the Select device option screen, with No Sensor highlighted among the Inertial Sensor, GPS Sensor, and 3-Wire Gyro options.
  1. Select Done to add the Drivetrain to your robot.
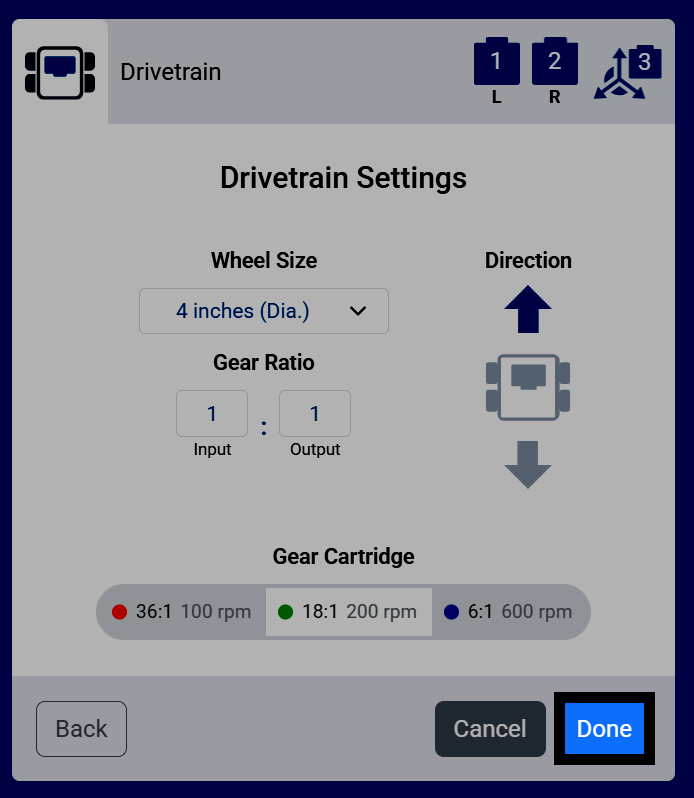
Screenshot of the Drivetrain Settings screen, with the Done button highlighted.
  1. The Drivetrain will now appear in your list of Devices.
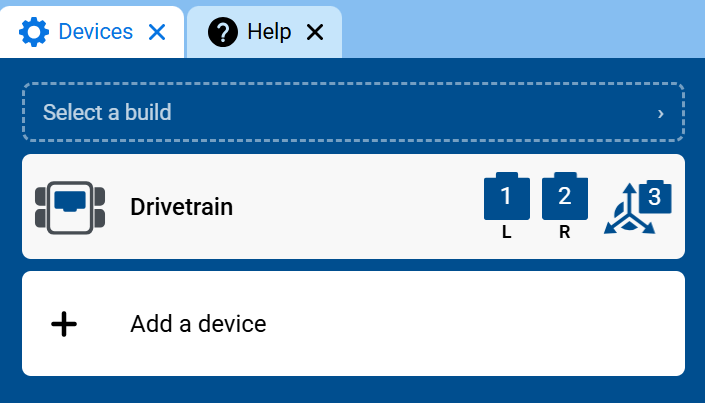
Screenshot of the Devices tab, showing Drivetrain in the list of devices with its left and right motor ports.
  1. The Drivetrain category will now appear in the toolbox, containing its blocks.
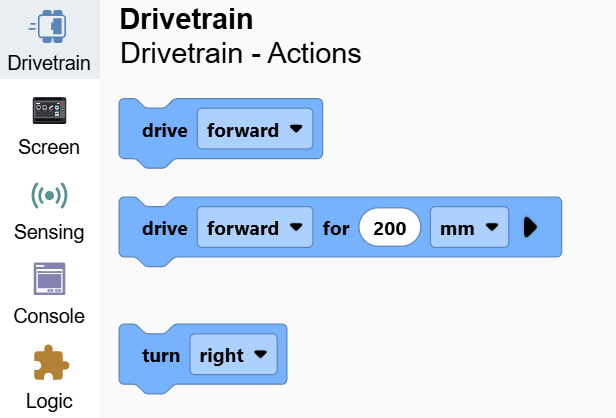
Screenshot of the toolbox with the Drivetrain category open, showing the drive and turn blocks.