屏幕#
介绍#
屏幕模块控制 V5 大脑的触摸屏,使你的机器人能够显示文本、数字和图形,并响应触摸输入。
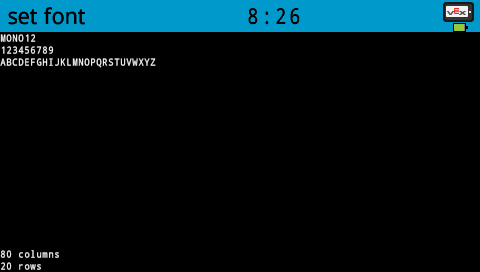
默认情况下,打印到大脑的字体是等宽小号,它有 12 行 48 列。
大脑的绘图分辨率为 480 x 240 像素。
V5 大脑屏幕,红色网格线显示了总共 12 行 48 列的布局。像素尺寸为 479 宽 x 239 高。左上角起始于 (0,0) 像素,位于第 1 行第 1 列;右下角结束于 (479, 239) 像素,位于第 12 行第/_static/img/screen/brain-resolution.png列。
以下是可用模块列表:
光标打印 – 显示文本并管理打印光标。
在屏幕上打印 – 在 Brain 屏幕上打印文本、数字或变量值。
将光标设置到屏幕上的行列 – 将光标移动到指定的行和列。
将光标移至屏幕上的下一行 – 将光标移至下一行的第 1 列。
清除屏幕上的行 – 清除指定的一行文本。
屏幕光标列 – 报告文本将打印到的列号。
屏幕光标行 – 报告文本将打印到的行号。
设置 – 更改文本和图形的外观。
清除屏幕 – 清除屏幕上的所有文字和图画。
设置屏幕字体 – 更改文本显示的字体类型和大小。
设置屏幕上的打印精度 – 设置打印数字时显示的小数位数。
设置屏幕上的笔宽 – 设置绘制线条和形状轮廓的粗细。
设置屏幕上的笔/字体颜色 – 设置文本、像素、线条和形状轮廓的颜色。
设置屏幕填充颜色 – 设置绘制形状的填充颜色。
绘图 – 在大脑屏幕上创建形状、线条和图形。
触摸 – 检测大脑屏幕上的触摸输入。
光标打印#
屏幕打印#
在屏幕上打印堆栈块会在 Brain 屏幕上以当前光标位置和字体打印文本、数字或变量值。
当开始
在屏幕上打印 [VEXcode]▶
参数 |
描述 |
|---|---|
价值 |
要在屏幕上显示的文本、数字或变量值。 |
并将光标移至下一行 |
选择箭头(▶)展开块,显示并将光标设置到下一行,这样打印后光标将移动到下一行的第 1 列。 |
例子
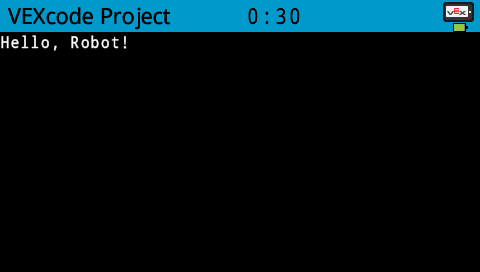
当开始
[Display a message at the starting cursor position.]
在屏幕上打印 [Hello, Robot!]▶
将光标设置到屏幕上的行列#
“将光标设置到屏幕上的行列”堆栈块会将光标移动到 Brain 屏幕上的特定行和列。下一个“在屏幕上打印”块将从该位置开始打印。可容纳#print-on-screen行数和列数取决于所选字体。使用默认的等宽中等字体,最多可以清晰显示 8 行和 13 列。超出此范围的文本可能会被截断或难以阅读。
等宽字体的所有字符宽度相同,因此文本位置保持一致。相比之下,比例字体的字符宽度各不相同,因此有些字母占用的空间比其他字母大。但是,无论使用哪种字体,set cursor to row column on screen 堆栈块都会根据行和列的大小(而不是字体样式)来定位光标。可以使用 set font on screen 堆栈块来调整字体大小。
在屏幕上设定光标至 [1] 行 [1] 列
参数 |
描述 |
|---|---|
排 |
要将光标移动到的行。 |
柱子 |
要将光标移动到的列。 |
例子
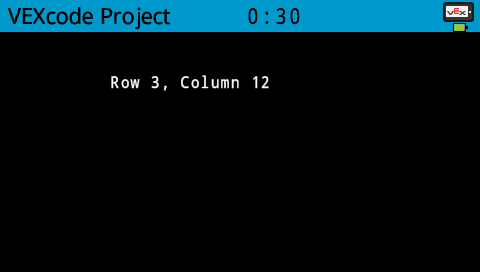
当开始
[Display text starting at Row 3 Column 12.]
在屏幕上设定光标至 [3] 行 [12] 列
在屏幕上打印 [Row 3, Column 12]▶
将光标移至屏幕上的下一行#
将光标设置到屏幕上的下一行 堆栈块将光标移动到大脑屏幕上下一行的第 1 列。
在屏幕上设定光标至下一行
参数 |
描述 |
|---|---|
此代码块没有参数。 |
例子
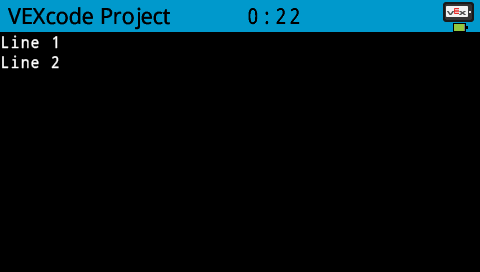
当开始
[Display two lines of text.]
在屏幕上打印 [Line 1]▶
在屏幕上设定光标至下一行
在屏幕上打印 [Line 2]▶
屏幕上的清除行#
清除屏幕上的行堆栈块清除大脑屏幕上的一行文本。
清除屏幕第 [1] 行
参数 |
描述 |
|---|---|
排 |
要清除的行号。 |
例子
当开始
[Only keep the text on row 1.]
在屏幕上打印 [This text stays]▶
在屏幕上设定光标至下一行
在屏幕上打印 [This text disappears]▶
等待 [3] 秒
清除屏幕第 [2] 行
屏幕光标列#
屏幕光标列 报告块以整数形式报告文本将要打印的列号。
(屏幕光标列数)
参数 |
描述 |
|---|---|
此代码块没有参数。 |
例子
当开始
[Display the cursor's current column.]
在屏幕上设定光标至 [3] 行 [15] 列
在屏幕上打印 (屏幕光标列数)▶
屏幕光标行#
屏幕光标行 报告块以整数形式报告文本将要打印的行号。
(屏幕光标行数)
参数 |
描述 |
|---|---|
此代码块没有参数。 |
例子
当开始
[Display the cursor's current row.]
在屏幕上设定光标至 [3] 行 [2] 列
在屏幕上打印 (屏幕光标行数)▶

设置#
清晰屏幕#
清除屏幕堆栈块会清除大脑屏幕上的所有图形和文本。
清屏
参数 |
描述 |
|---|---|
此代码块没有参数。 |
例子
当开始
[Draw a circle, and clear it after 2 seconds.]
在屏幕 [120] [120] [40] 上画圆形
等待 [2] 秒
清屏
设置屏幕上的字体#
“设置屏幕字体”堆栈块用于设置大脑屏幕上显示的文本的字体和大小。此字体将应用于之后打印的所有文本。
设定屏幕字体为 [等宽字体 v] [中 v]
参数 |
描述 |
|---|---|
风格 |
字体样式:等宽字体或等宽字体 |
尺寸 |
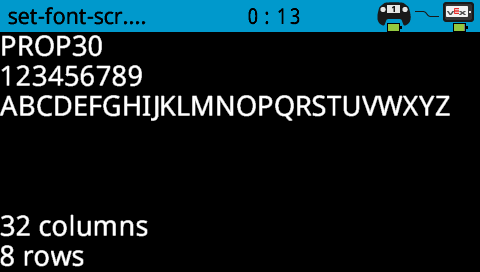
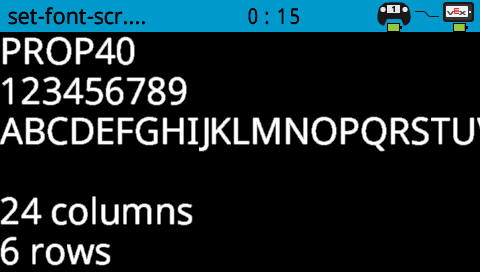
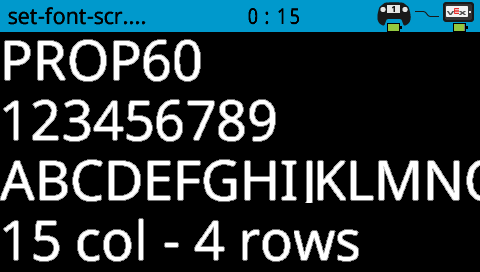
字体大小(示例如下):
|
|
与上一张图片相同,但字体为 Mono 15。图中一行显示“AZ”,几乎占据了屏幕一半的宽度。左下角显示“68 列 |
与上一张图片相同,但字体为 Mono 20。图中一行显示“AZ”,占据了屏幕宽度的近三分之二。左下角显示“48 列 |
|---|---|---|
与上一张图片相同,但字体为 Mono 30。图中一行显示 AZ,几乎占据了整个屏幕宽度。左下角显示“32 列 |
与上一张图片相同,但字体为 Mono 40。图中一行显示 AX,横跨屏幕宽度。左下角显示“24 列 |
与上一张图片相同,但字体为 Mono 60。图片中一行显示 AP 字样,横跨屏幕宽度。底部显示“16 列 |
与上一张图片相同,但字体为 Prop 20。图中一行显示“AZ”,占据了屏幕宽度的近三分之二。左下角显示“48 列 12 行”。(/_static/img/fonts/prop20.png) |
|
|
|
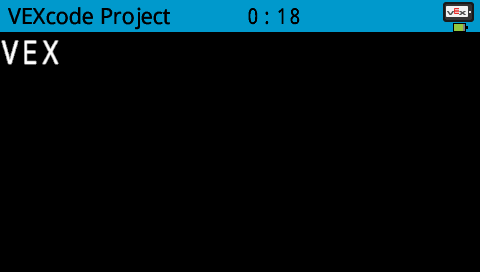
例子
当开始
[Display text using a larger font]
设定屏幕字体为 [等宽字体 v] [特大 v]
在屏幕上打印 [VEX]▶
设置屏幕打印精度#
设置屏幕打印精度 堆栈块用于设置 Brain 屏幕上打印数字时显示的小数位数。此打印精度将应用于之后打印的所有数字。
在屏幕上设定打印精度为 [0.1 v]
参数 |
描述 |
|---|---|
精确 |
打印精度:
|
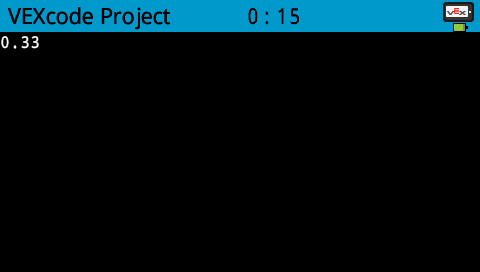
例子
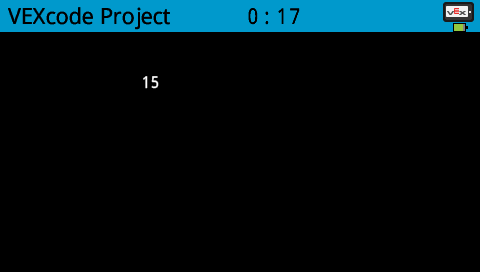
当开始
[Print 1/3 as 0.33.]
在屏幕上设定打印精度为 [0.01 v]
在屏幕上打印 ([1] [math_division v] [3])▶
设置屏幕上的笔宽#
设置屏幕上的笔宽 堆栈块用于设置绘制线条和形状轮廓的粗细。
设定屏幕笔宽为 [10]
参数 |
描述 |
|---|---|
宽度 |
笔的宽度,以像素为单位,范围从 0 到 32。 |
例子
当开始
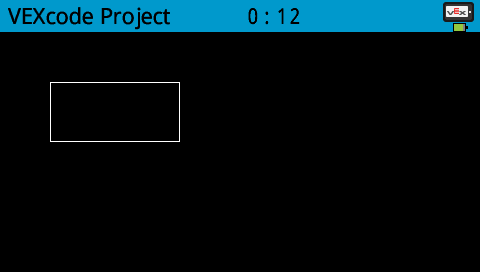
[Draw a rectangle with a pen width of 10.]
设定屏幕笔宽为 [10]
在屏幕 [50] [50] [130] [60] 上画矩形
设置屏幕上的笔/字体颜色#
设置屏幕上的笔/字体颜色 堆栈块设置文本、像素、线条和形状轮廓的颜色。
设定屏幕笔/字体颜色为 [红色 v]
参数 |
描述 |
|---|---|
颜色 |
要使用的笔和字体颜色:
|
例子
当开始
[Draw a rectangle with orange borders.]
设定屏幕笔/字体颜色为 [orange v]
在屏幕 [50] [50] [130] [60] 上画矩形

设置屏幕填充颜色#
设置屏幕填充颜色 堆栈块用于设置绘制形状时使用的填充颜色。
设定屏幕填充色为 [红色 v]
参数 |
描述 |
|---|---|
颜色 |
填充颜色:
|
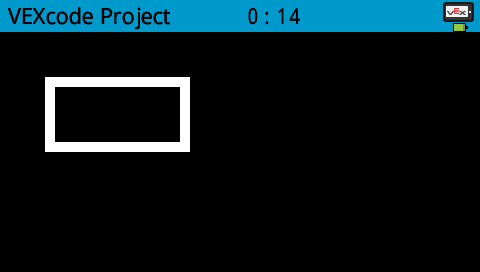
示例
当开始
[Draw a purple rectangle.]
设定屏幕填充色为 [purple v]
在屏幕 [50] [130] [100] [60] 上画矩形

画#
在屏幕上绘制像素#
在屏幕上绘制像素堆栈块使用当前的画笔颜色在选定的x和y坐标处绘制一个像素。
在屏幕 [0] [0] 上画点
参数 |
描述 |
|---|---|
x |
绘制像素的 x 坐标,范围从 0 到 479。 |
是 |
绘制像素的 y 坐标,范围从 0 到 239。 |
例子
当开始
[Draw the pixels marking the corners of a square.]
在屏幕 [250] [100] 上画点
在屏幕 [275] [100] 上画点
在屏幕 [250] [125] 上画点
在屏幕 [275] [125] 上画点
![]()
在屏幕上画线#
在屏幕上绘制线条堆栈块使用当前的笔宽和笔颜色从第一个屏幕坐标(x1, y1)到第二个屏幕坐标(x2, y2)绘制一条线。
在屏幕 [0] [0] [10] [10] 上画线段
参数 |
描述 |
|---|---|
x1 |
行首的 x 坐标(像素),范围从 0 到 479。 |
y1 |
线段起始点的 y 坐标(像素),取值范围为 0 到 239。 |
x2 |
行尾的 x 坐标(像素),范围从 0 到 479。 |
y2 |
线段末端的 y 坐标(像素),取值范围为 0 到 239。 |
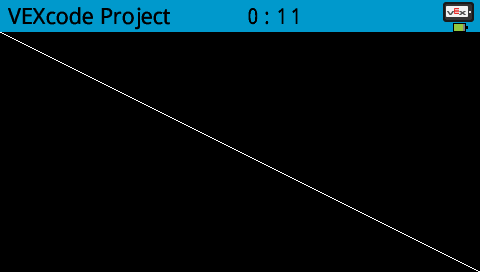
例子
当开始
[Draw a line from the top left to bottom right of the screen.]
在屏幕 [0] [0] [479] [239] 上画线段
在屏幕上绘制矩形#
在屏幕上绘制矩形堆栈块使用当前的画笔宽度、画笔颜色和填充颜色绘制矩形。
在屏幕 [0] [0] [10] [10] 上画矩形
参数 |
描述 |
|---|---|
x |
矩形左上角的 x 坐标(像素),取值范围为 0 到 479。 |
是 |
矩形左上角的 y 坐标(像素),取值范围为 0 到 239。 |
宽度 |
矩形的宽度(以像素为单位)。 |
高度 |
矩形的高度(以像素为单位)。 |
例子
当开始
[Draw a rectangle on the screen.]
在屏幕 [50] [50] [130] [60] 上画矩形
在屏幕上画一个圆#
在屏幕上绘制圆形堆栈块使用当前的画笔宽度、画笔颜色和填充颜色绘制圆形。
在屏幕 [0] [0] [10] 上画圆形
参数 |
描述 |
|---|---|
x |
圆心的 x 坐标(像素值),取值范围为 0 到 479。 |
是 |
圆心的 y 坐标(像素值),取值范围为 0 到 239。 |
半径 |
圆的半径(以像素为单位)。 |
例子
当开始
[Draw a circle on the screen.]
在屏幕 [120] [120] [40] 上画圆形

触碰#
屏幕按下#
屏幕按下布尔模块报告大脑的触摸屏当前是否被按下。
正确 – 屏幕被按下。
错误 – 屏幕没有被按下。
<屏幕按下了?>
参数 |
描述 |
|---|---|
此代码块没有参数。 |
当开始
[Change the screen's color after it's pressed.]
等到 <屏幕按下了?>
设定屏幕填充色为 [绿色 v]
在屏幕 [0] [0] [479] [239] 上画矩形
当开始
[Display different messages after the screen is pressed.]
等到 <屏幕按下了?>
在屏幕上打印 [First message!]▶
在屏幕上设定光标至下一行
[Lift finger to press the screen again.]
等到 <非 <屏幕按下了?>>
等到 <屏幕按下了?>
在屏幕上打印 [Second message!]▶
屏幕位置#
屏幕位置报告模块会报告上次屏幕按键的选定坐标。x 坐标范围为 0(左)至 479(右)。y 坐标范围为 0(上)至 239(下)。
(屏幕 [X v] 坐标)
参数 |
描述 |
|---|---|
轴 |
报告上次屏幕按键的坐标:x – 水平位置 或 y – 垂直位置 |
当开始
[Display a circle where the screen is pressed.]
等到 <屏幕按下了?>
设定屏幕填充色为 [white v]
在屏幕 (屏幕 [X v] 坐标) (屏幕 [y v] 坐标) [20] 上画圆形
屏幕#
当按下或释放 Brain 屏幕时,when screen 帽子模块会运行连接的模块堆栈。
当Brain屏幕 [pressed v] :: hat events
参数 |
描述 |
|---|---|
状态 |
何时运行附加的积木栈:pressed 在屏幕被按下时运行,released 在屏幕被释放时运行。 |
当Brain屏幕 [pressed v] :: hat events
[Color the screen with polka dots by pressing it repeatedly.]
设定屏幕填充色为 [红色 v]
在屏幕 (屏幕 [X v] 坐标) (屏幕 [y v] 坐标) [20] 上画圆形