Connecting with a Wired Connection (Windows)#
Follow these simple steps to connect your VEX AIM Coding Robot to your computer with a USB-C cable.
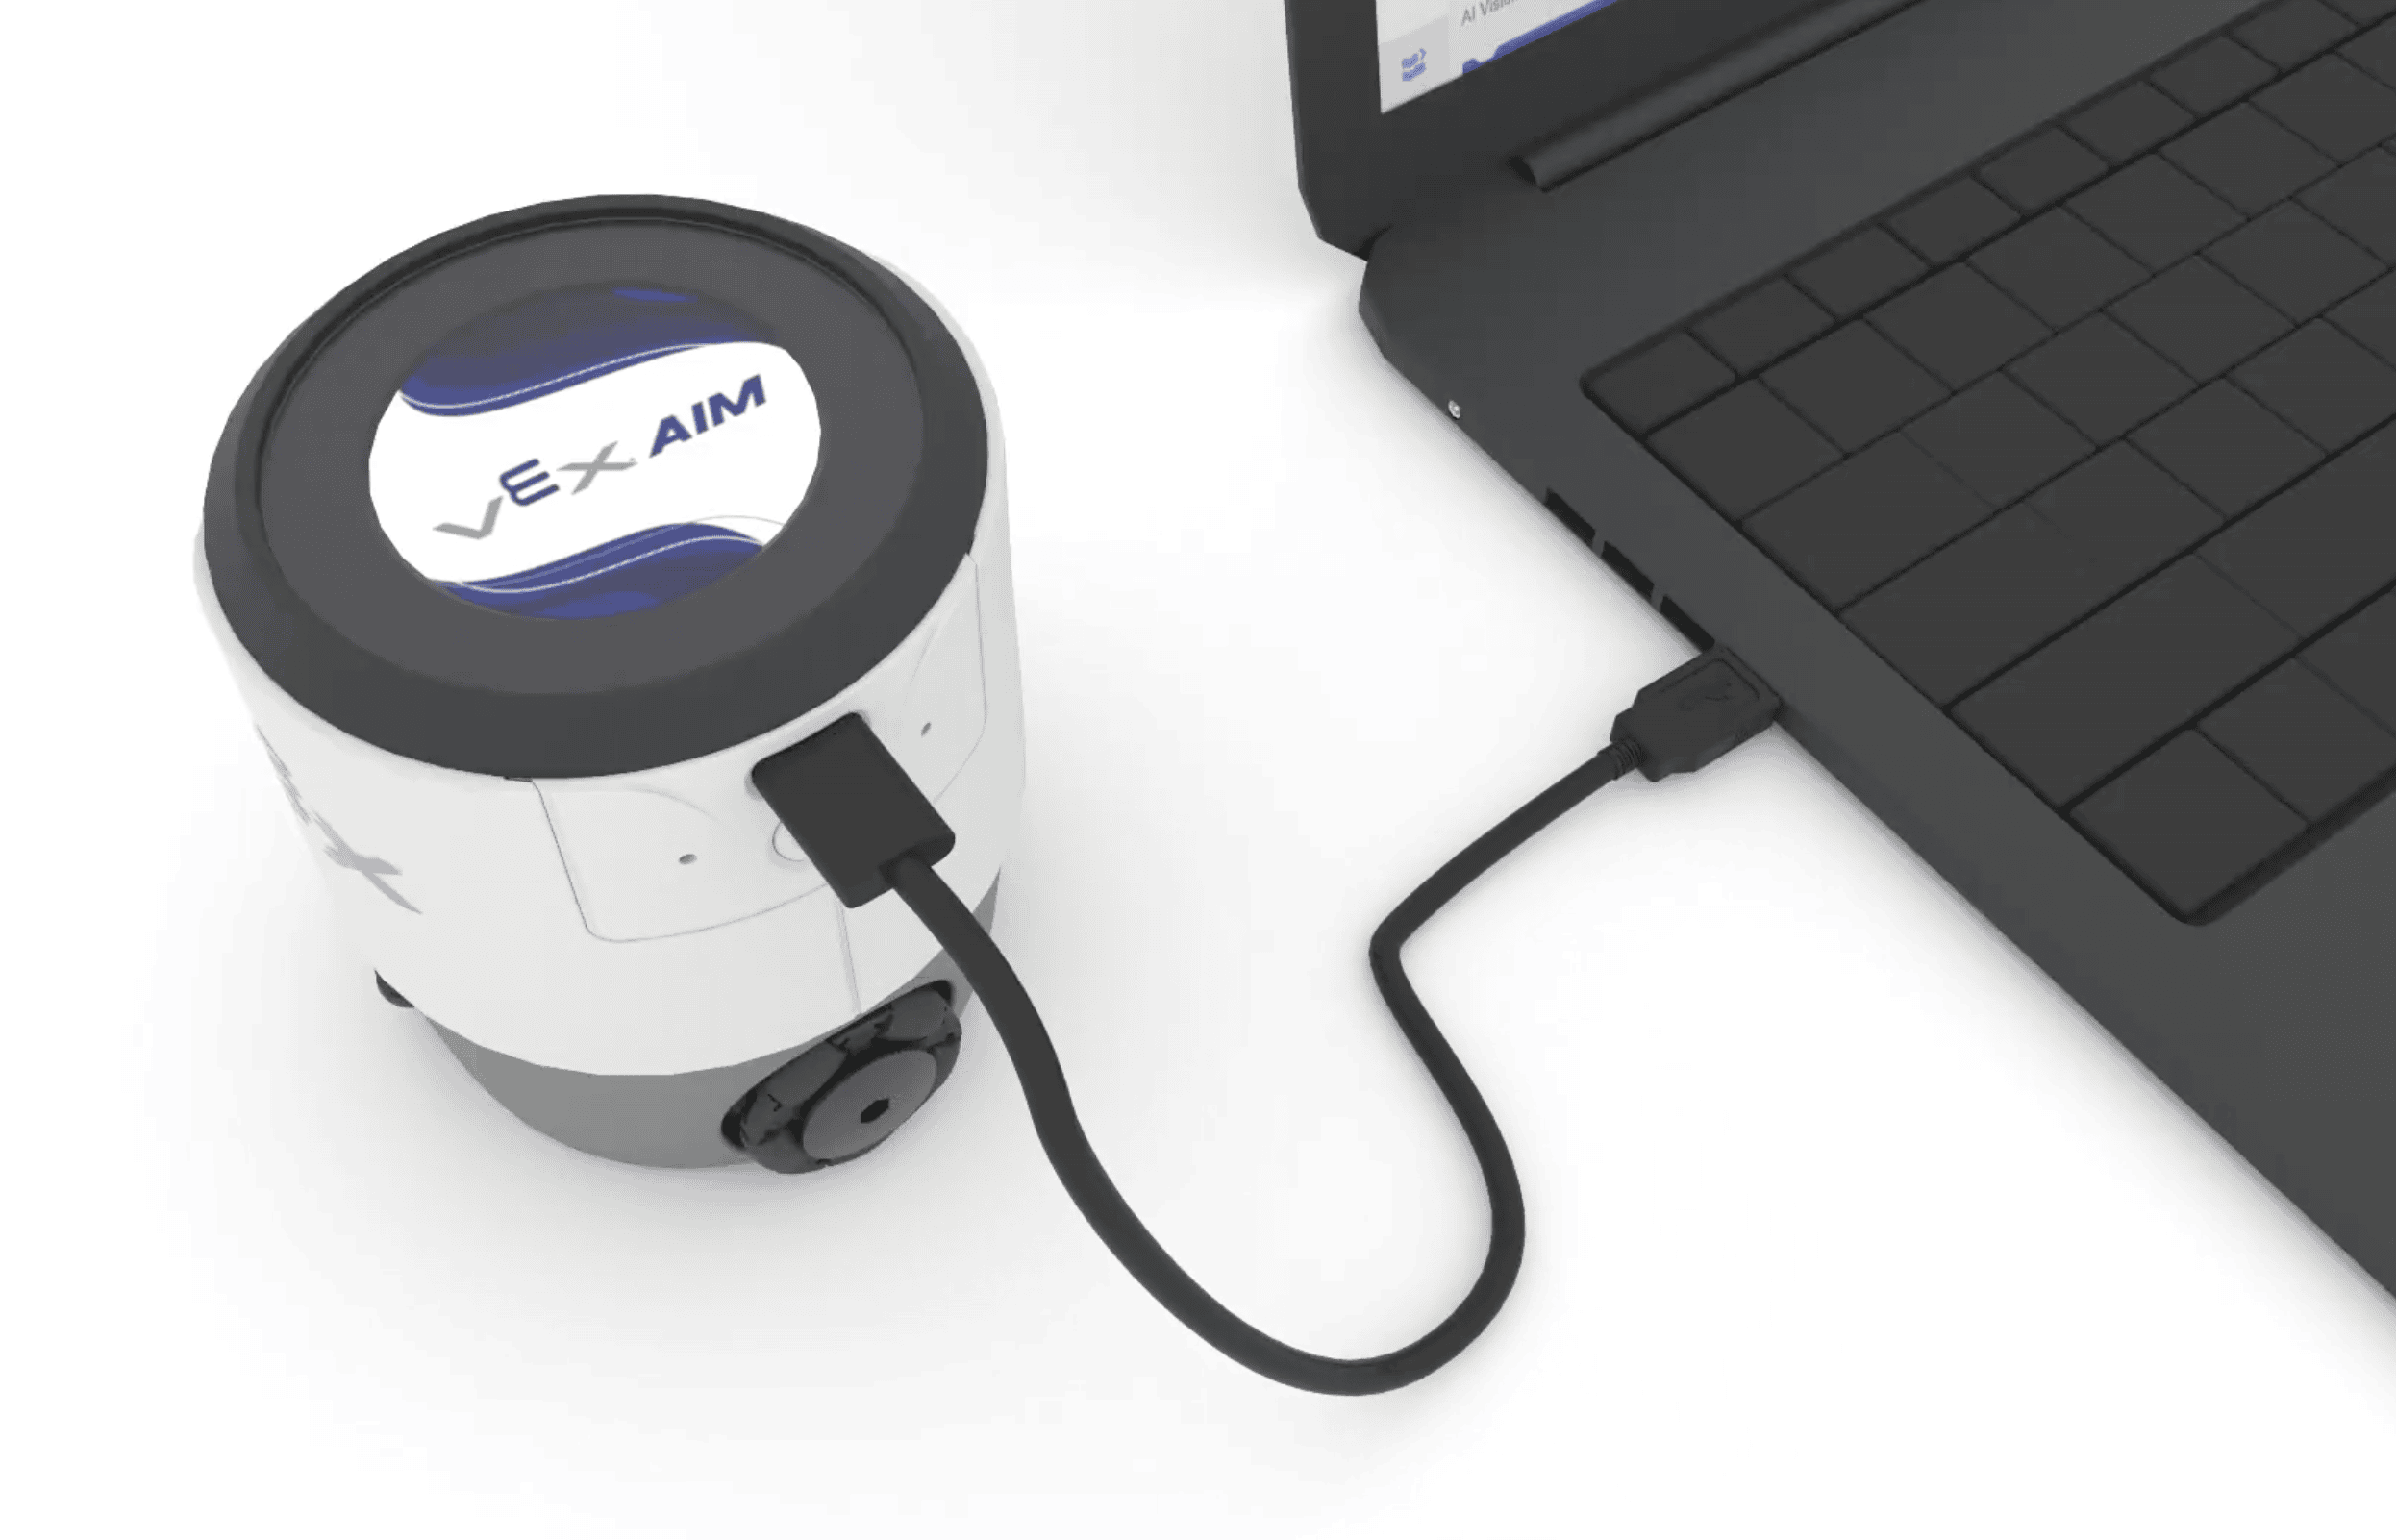
Plug in the cable#
Use a USB-C cable to connect your robot to your computer.
The robot will turn on by itself.
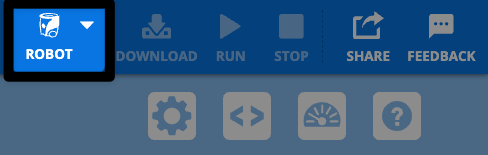
Select the Robot icon in the top-right corner#
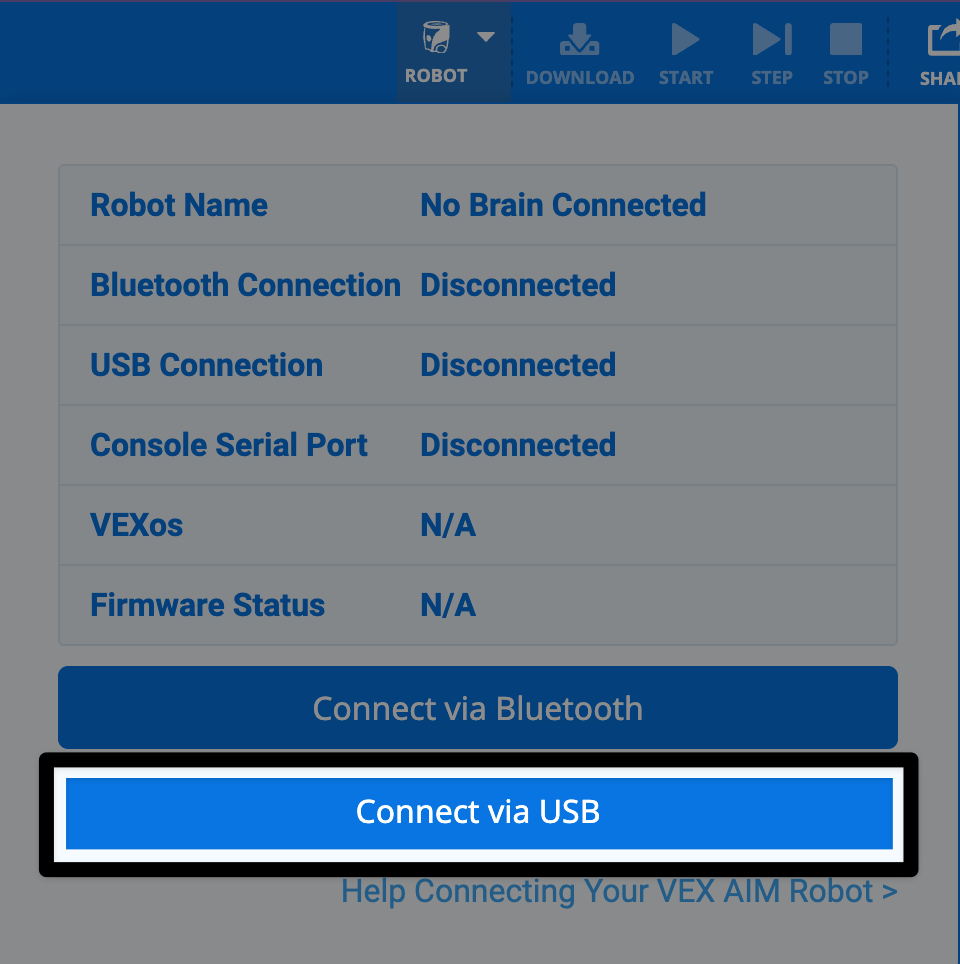
Choose USB connection#
Follow the device prompts#
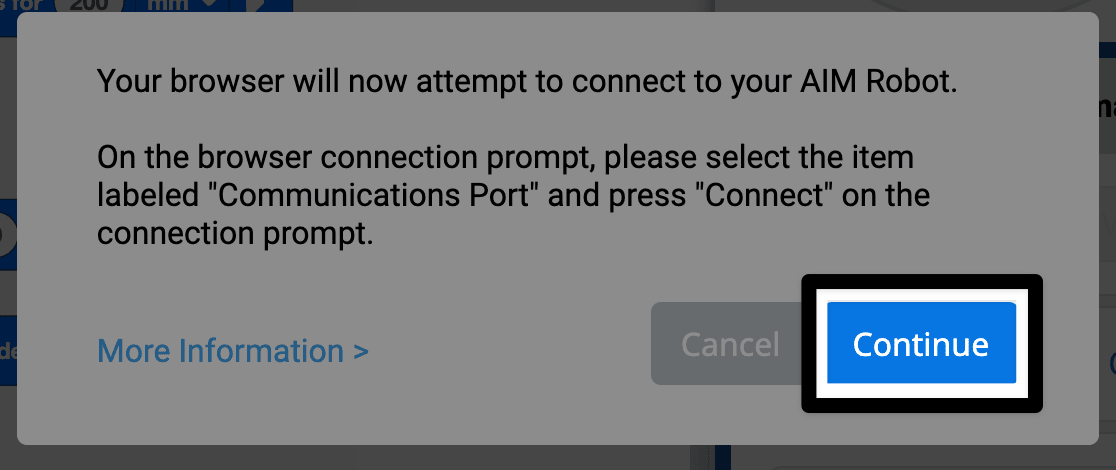
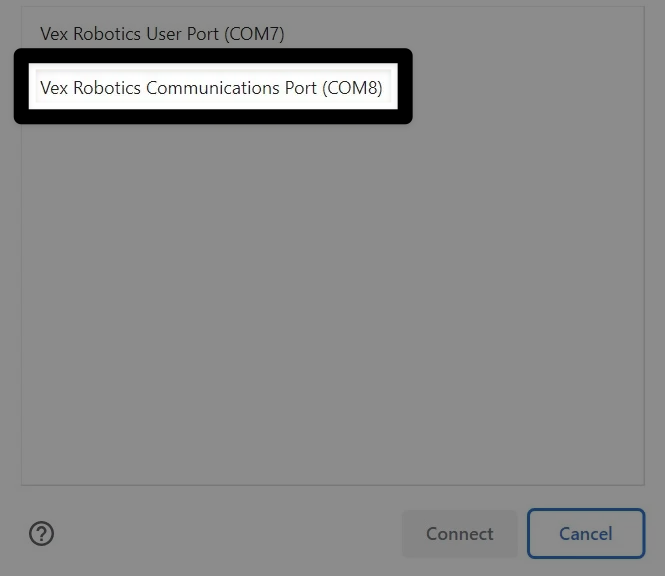
Pick the right connection option#
Select the Communications Port.
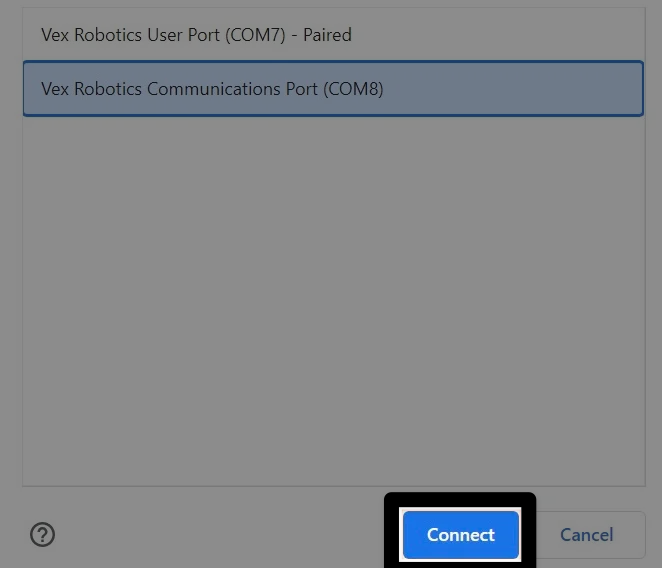
Finalize your connection#
You are now connected#
The Robot icon in the upper right corner of VEXcode AIM will now appear green.