Connecting with a Wireless Connection (App)#
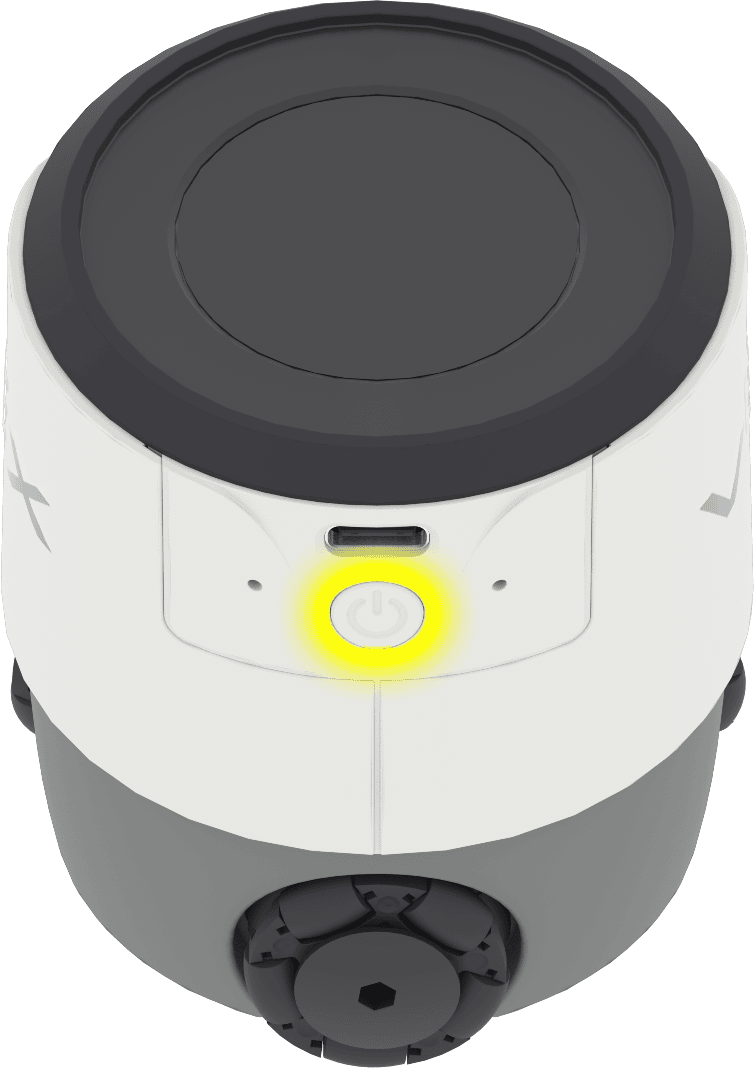
Turn on the robot#
Press the power button on the back of your VEX AIM Coding Robot.
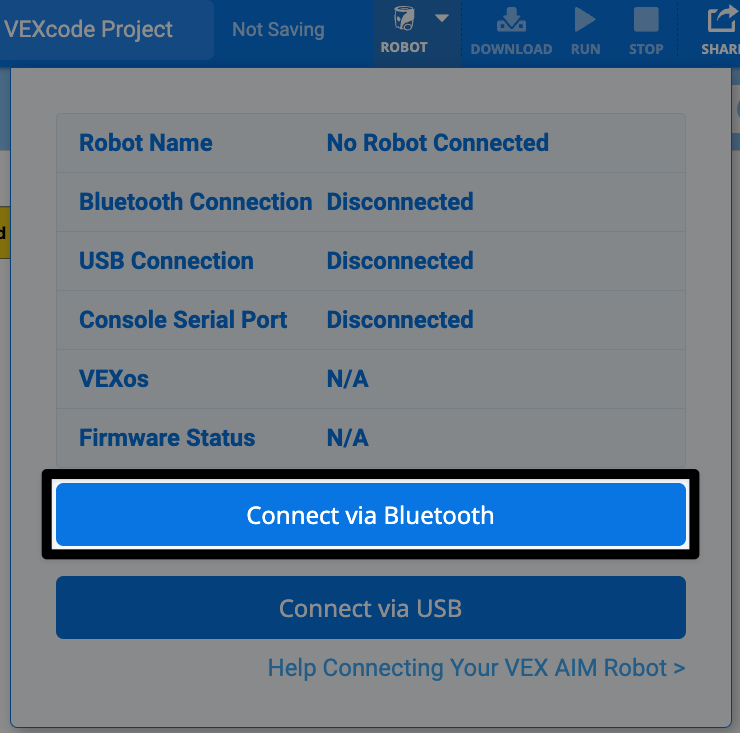
Select the Robot Icon in the top-right corner#

Select Connect via Bluetooth from the menu#
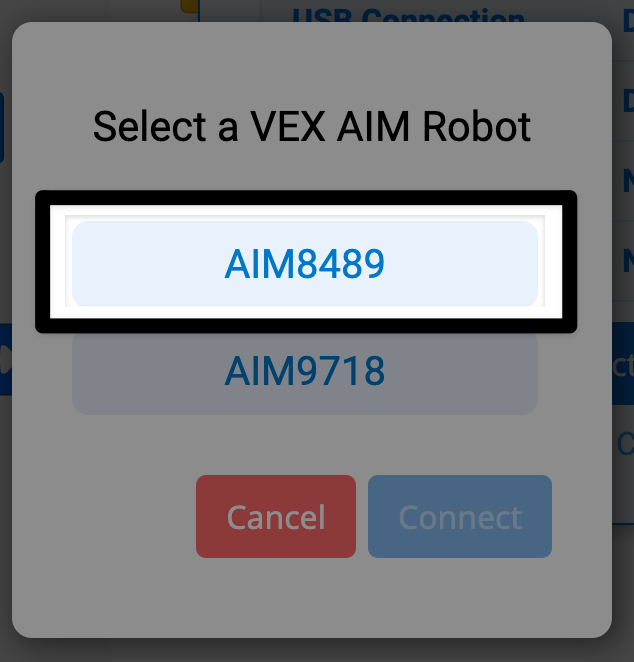
Follow the device prompts#
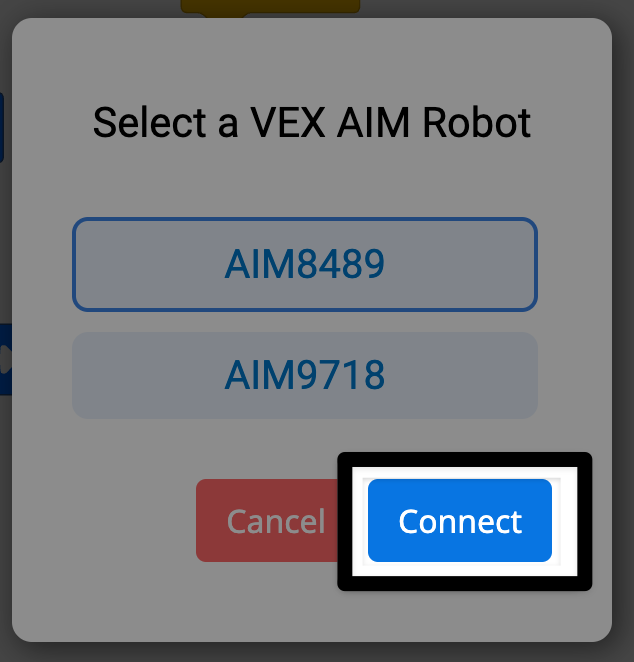
A window will pop up showing a list of robots. Select your robot from the list.
Select Connect#
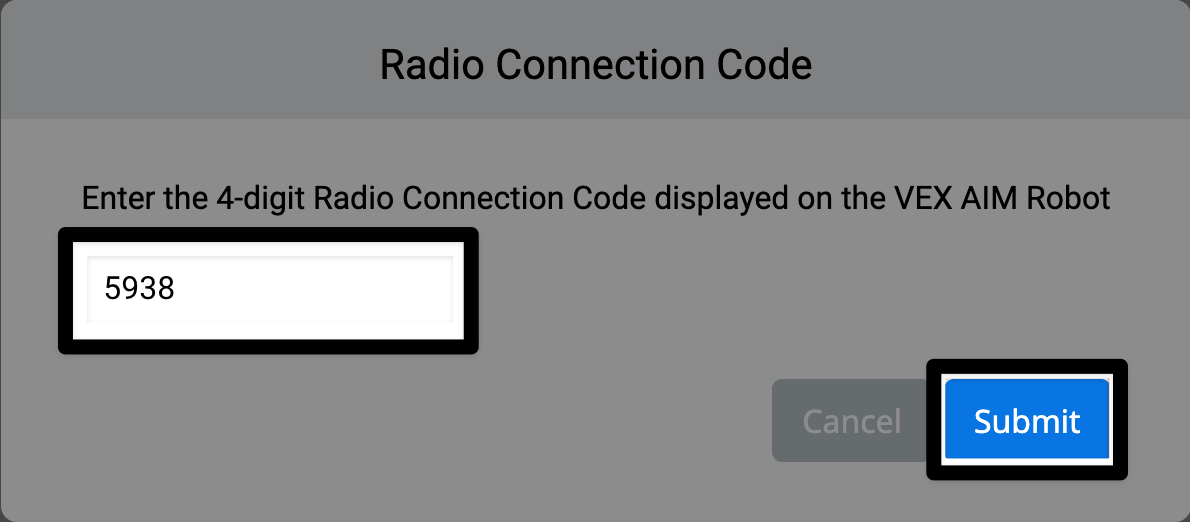
Enter the 4-digit Radio Connection Code#
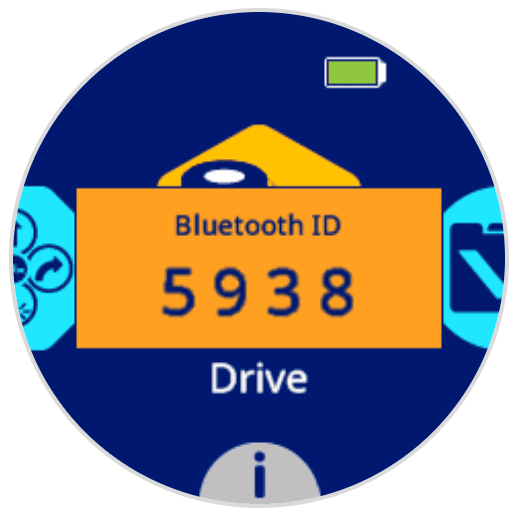
If it’s your first time connecting, a box will ask for a 4-digit code.

Look at your robot’s screen for the code and type it in. The image shown here is an example of a 4-digit code.
Submit the code to connect.
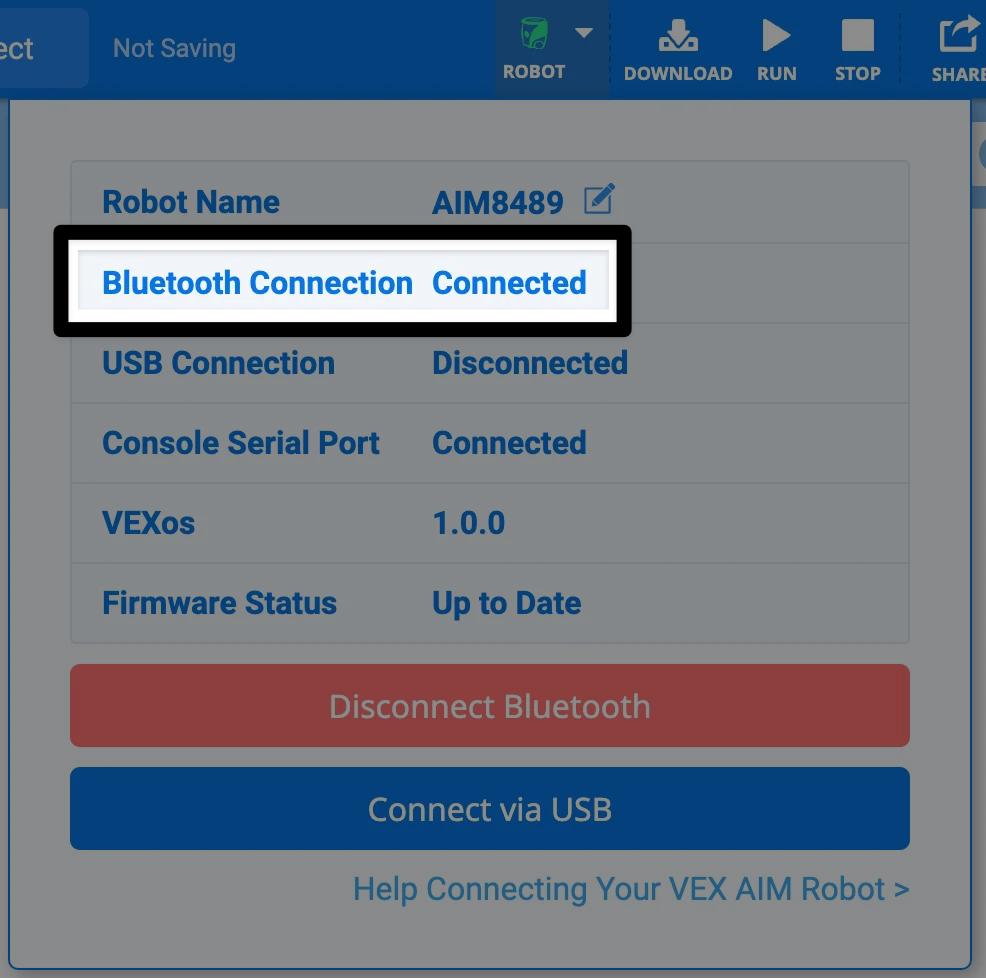
You are now connected#
Once connected, the Robot icon and the Bluetooth symbol on your robot will turn green.