Connecting with a Wireless Connection#

Connecting with a Wireless Connection

This tutorial walks you through connecting your VEX AIM Coding Robot to VEXcode AIM over Bluetooth. By the end, you’ll have your robot paired and ready to download projects to.

  1. Press the power button on the back of your robot to turn it on.
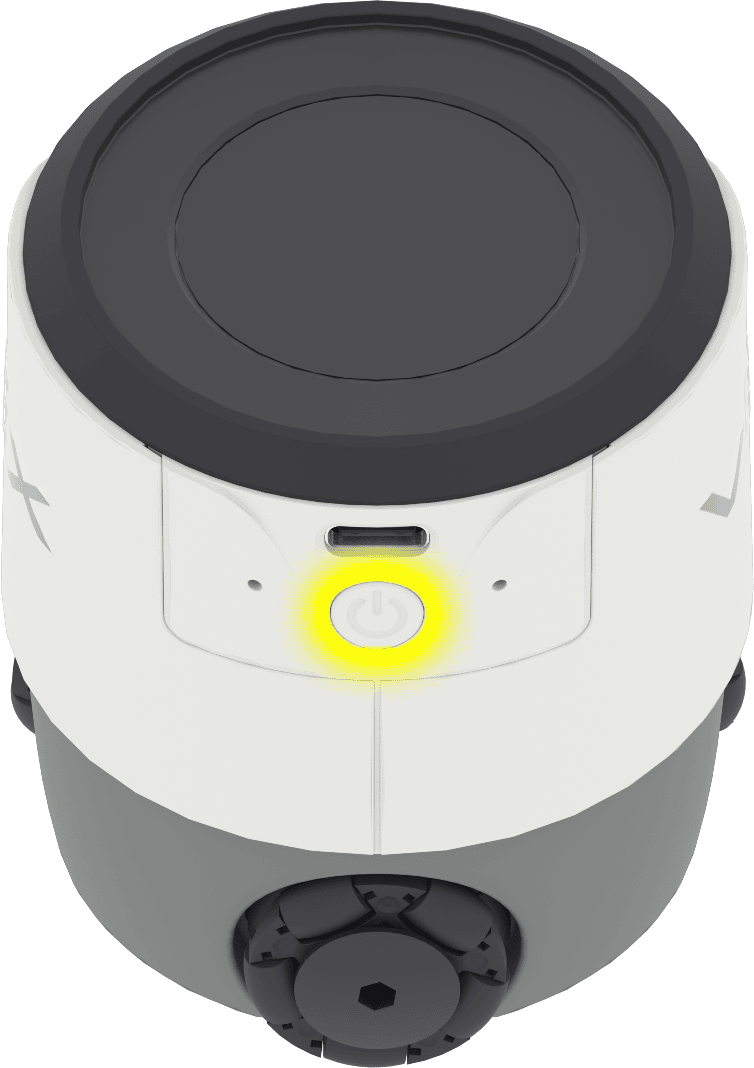
Το πίσω μέρος του ρομπότ κωδικοποίησης VEX AIM με το κουμπί λειτουργίας επισημασμένο με κίτρινο χρώμα. Το κουμπί βρίσκεται στο πίσω μέρος του ρομπότ, κάτω από τη θύρα για το καλώδιο USB-C.
  1. Select the Connect button at the top-right of VEXcode.

Screenshot of the VEXcode AIM toolbar, with the Connect button highlighted.
  1. Select Connect next to Bluetooth under Wireless Connection.
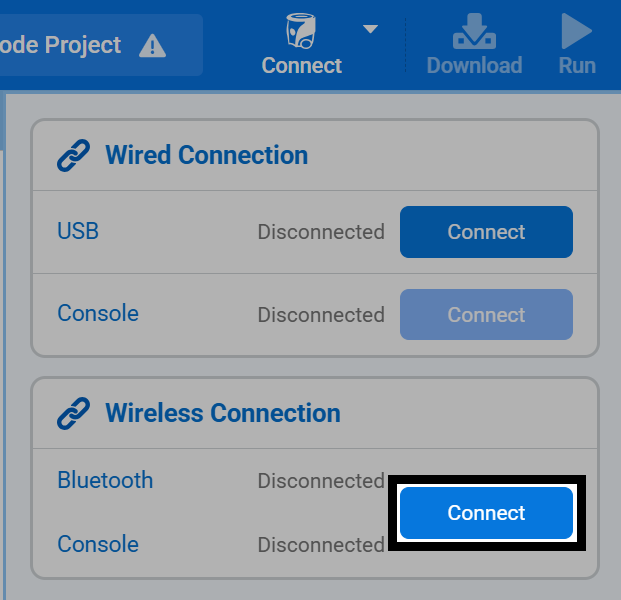
Screenshot of the Connect menu, showing the Wired Connection and Wireless Connection sections, with the Connect button next to Bluetooth highlighted.
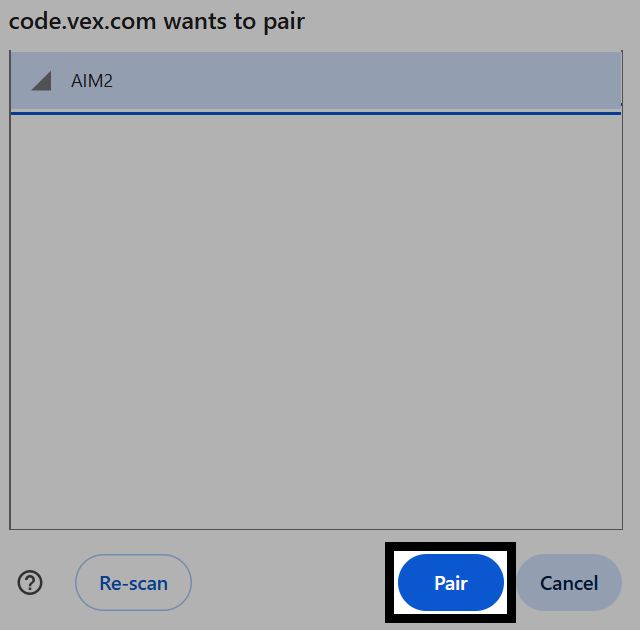
  1. Your browser will show a list of nearby robots. Select your robot.
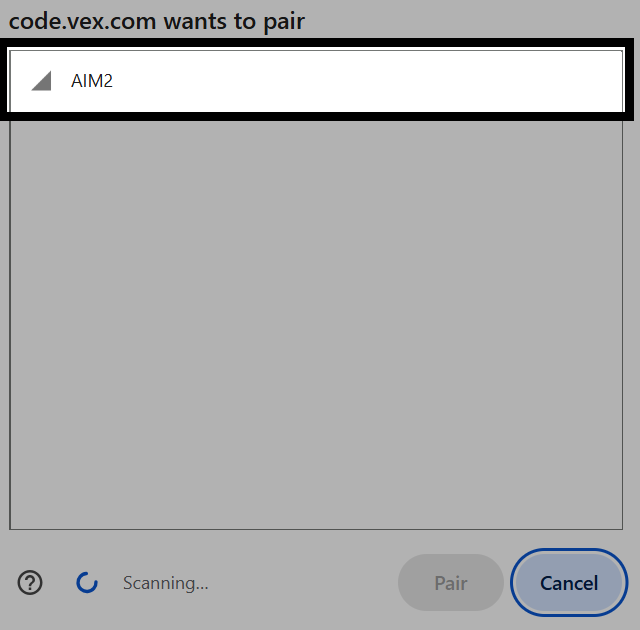
Screenshot of the browser's Bluetooth pairing dialog, with the robot named AIM2 highlighted in the list.
  1. Select Pair.

Screenshot of the browser's Bluetooth pairing dialog, with AIM2 selected and the Pair button highlighted.
  1. If this is your first time connecting, you’ll be asked for a 4-digit Bluetooth ID. Look for the ID on your robot’s screen.
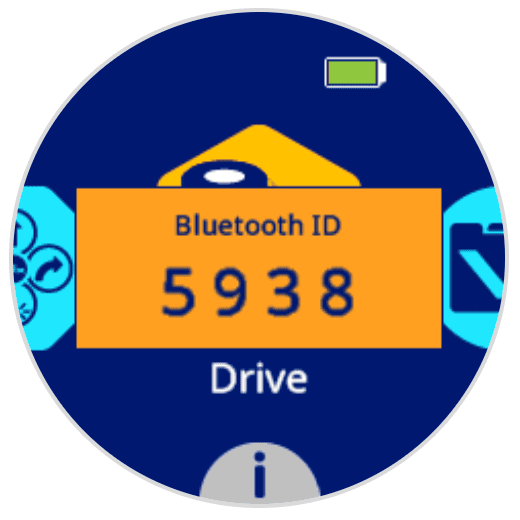
The AIM Robot screen is shown with a prompt that reads Bluetooth ID 5938.

Note: The ID shown here is only an example. Use the ID displayed on your own robot.

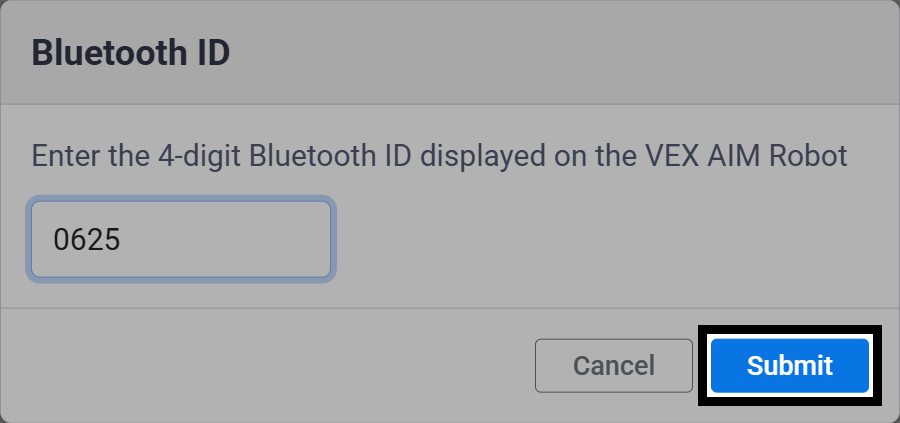
  1. Type the ID in, then select Submit.

Screenshot of the Bluetooth ID dialog, with a 4-digit ID entered and the Submit button highlighted.
  1. Once connected, Bluetooth will show as Connected, and the Robot section will appear, showing its Device Name. The robot icon in the toolbar will also turn green, and the Connect button will now read Connected.
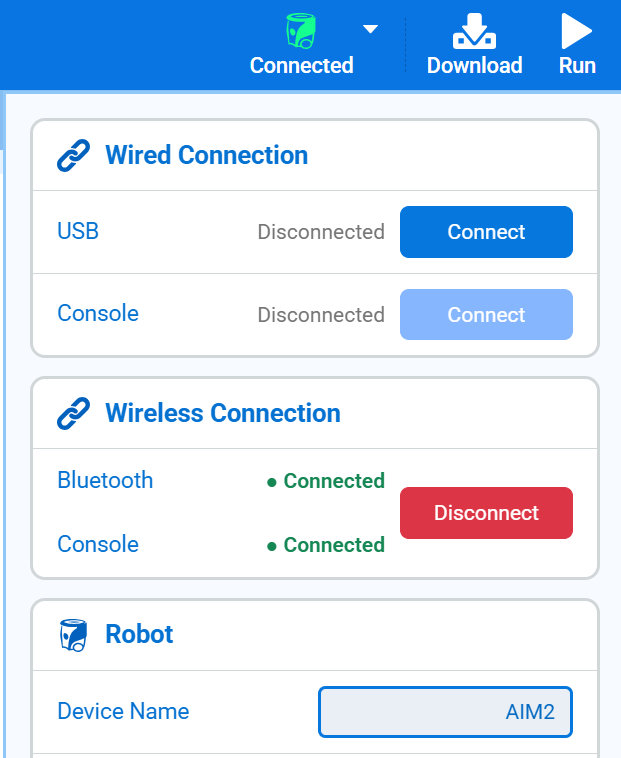
Screenshot of the Connect menu with Bluetooth shown as Connected, the green robot icon in the toolbar reading Connected, and the Robot section showing its Device Name.