Pre-Flight Checklist & Takeoff#
Before flight operations begin, a thorough pre-flight checklist should be completed to ensure all systems are ready. The VEX AIR Drone and VEX AIR Drone Controller must be charged, powered on, paired, and all safety checks must be passed.
A recommended pre-flight checklist includes:
Controller Battery > 20%
Drone is On and Linked
Drone Battery > 20%
Takeoff from a level surface
Controller Battery Check#
Ensure the controller battery is over 20%.
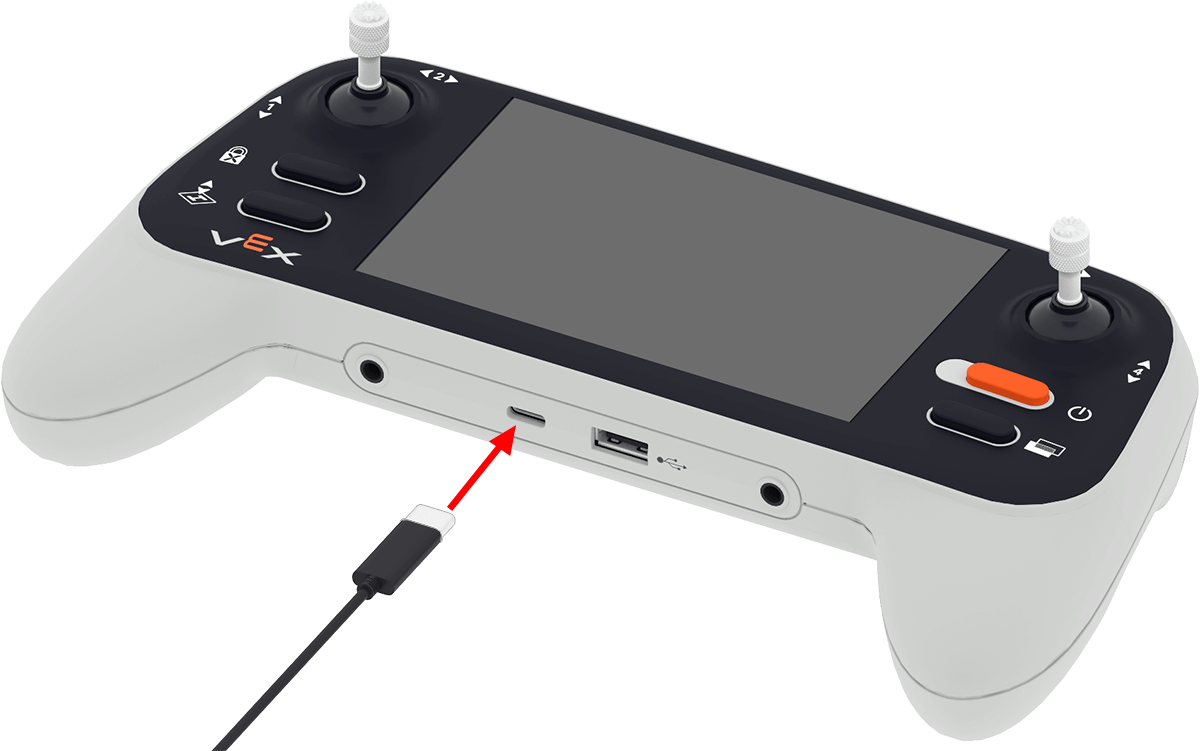
Fully charge the controller by connecting it to a power source via its USB-C port.
After the controller has charged, check its battery level. Turn on the controller by pressing and holding its power button until the indicator lights start blinking white, then release, as shown in the video above. When the controller has finished turning on, its LED indicator will change to one of two colors:
Green — The controller is above 20% battery charge, as shown in the video. This checklist item will now pass.
Red — The controller has 20% or lower battery charge. This checklist item will fail, continue charging.
Drone Power and Link Status#
The drone should be powered on, and linked to the controller.
Ensure the drone and controller are paired by connecting the controller’s USB-A port to the drone’s USB-C port. The video above shows the drone and controller in the pairing process, with the indicator on both the drone and controller blinking green together when complete. Once the devices are paired, remove all cables from the drone and controller.
Drone Battery Check#
Ensure the drone’s battery level is over 20%.
Fully charge the drone’s battery by plugging it into a power source using a cable with a USB-C connector, as shown in this animation.
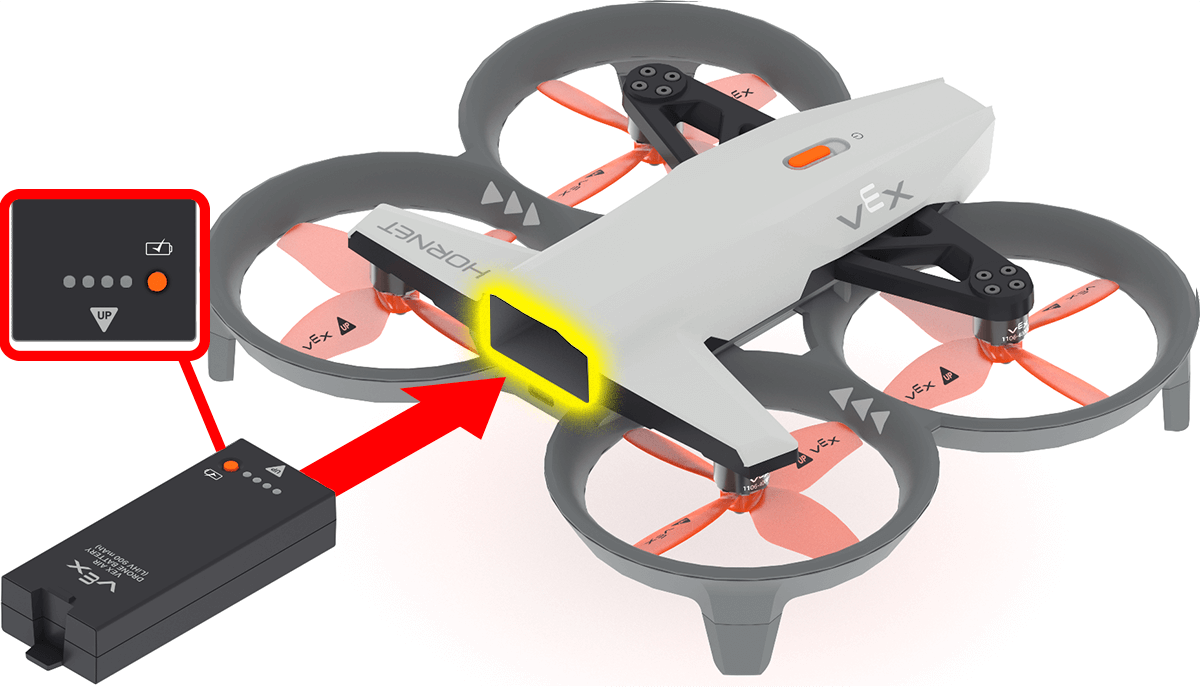
Install the battery in the drone once charging is complete. Make sure the **Up** arrow on the battery is facing upward when inserted. This will turn the drone on.
Level Surface Check#
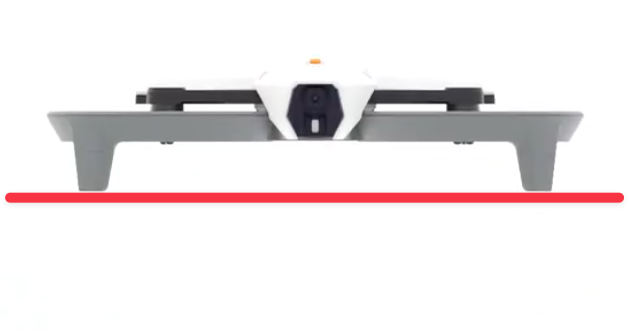
If the drone is angled in any way, and not level, this checklist item should fail. Place the drone in a safe location, and on a level surface, to correct this checklist item and ensure a safe takeoff.
Remember that the Propeller Lock will engage when it detects the drone’s movement. Turn off Propeller Lock before continuing with the safety checks.
Additional Safety Checks#
The Pre-Flight Checklist also includes helpful Safety Reminders for you to check before takeoff.
Before flying, review the following to ensure the flight area and pilot are fully prepared:
Inspect the Drone:
Check the drone’s propellers and landing feet for any damage.
Prepare the Flight Area:
Set up a safe indoor area for the drone to fly in. Do not fly the drone outside.
Ensure at least 5 feet of clear space around the drone in all directions.
Make sure there’s at least 3 feet of overhead clearance to avoid lights, ceiling fans, or other fixtures.
Remove any people, pets, or obstacles from the flight area.
Clear away any lightweight or loose items (e.g., paper, plastic cups) that could be blown by the propellers.
Get Everyone Ready:
Tie back long hair.
Keep hands clear of the drone during takeoff and flight.
Ensure the pilot(s) know how to activate the emergency stop.
In addition, be sure the Controller is ready for use.
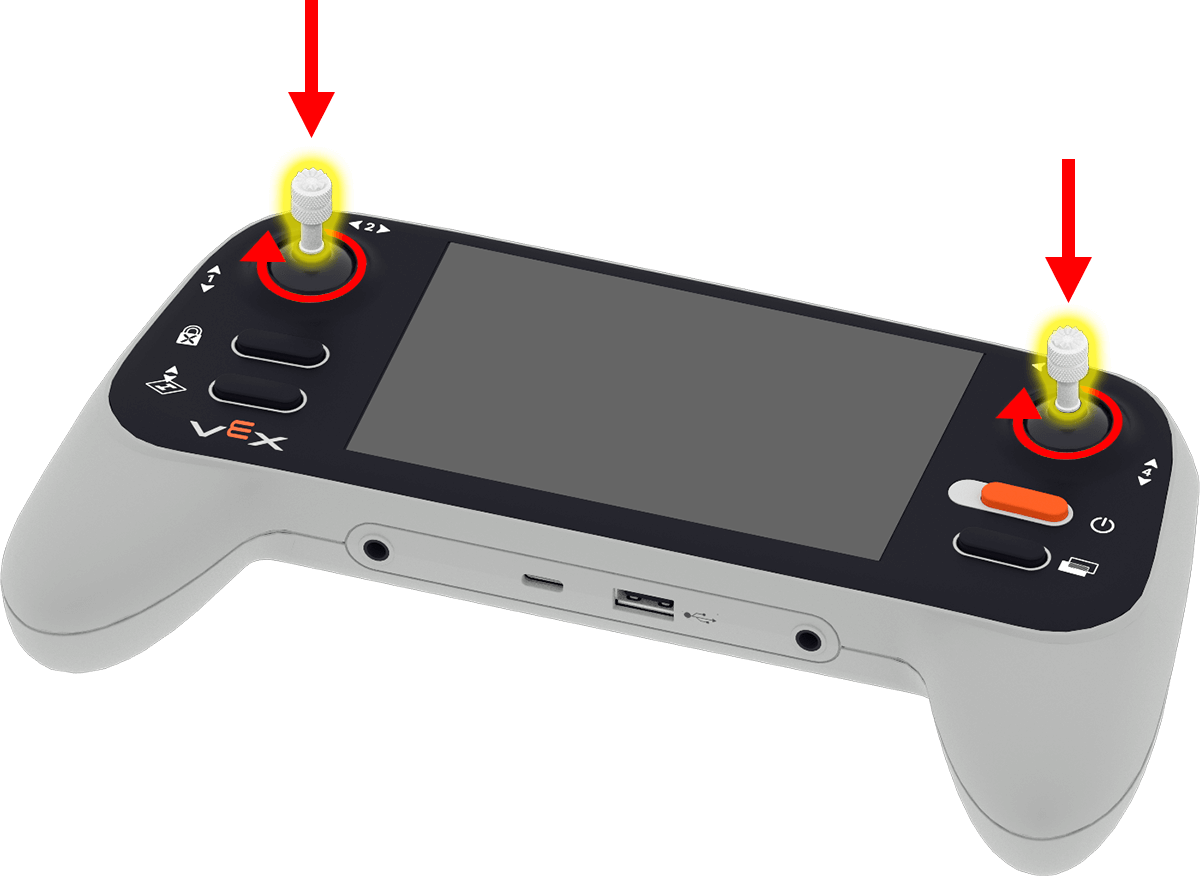
Attach the joysticks by removing them from the back of the controller and screwing them into the joystick holders on the front.
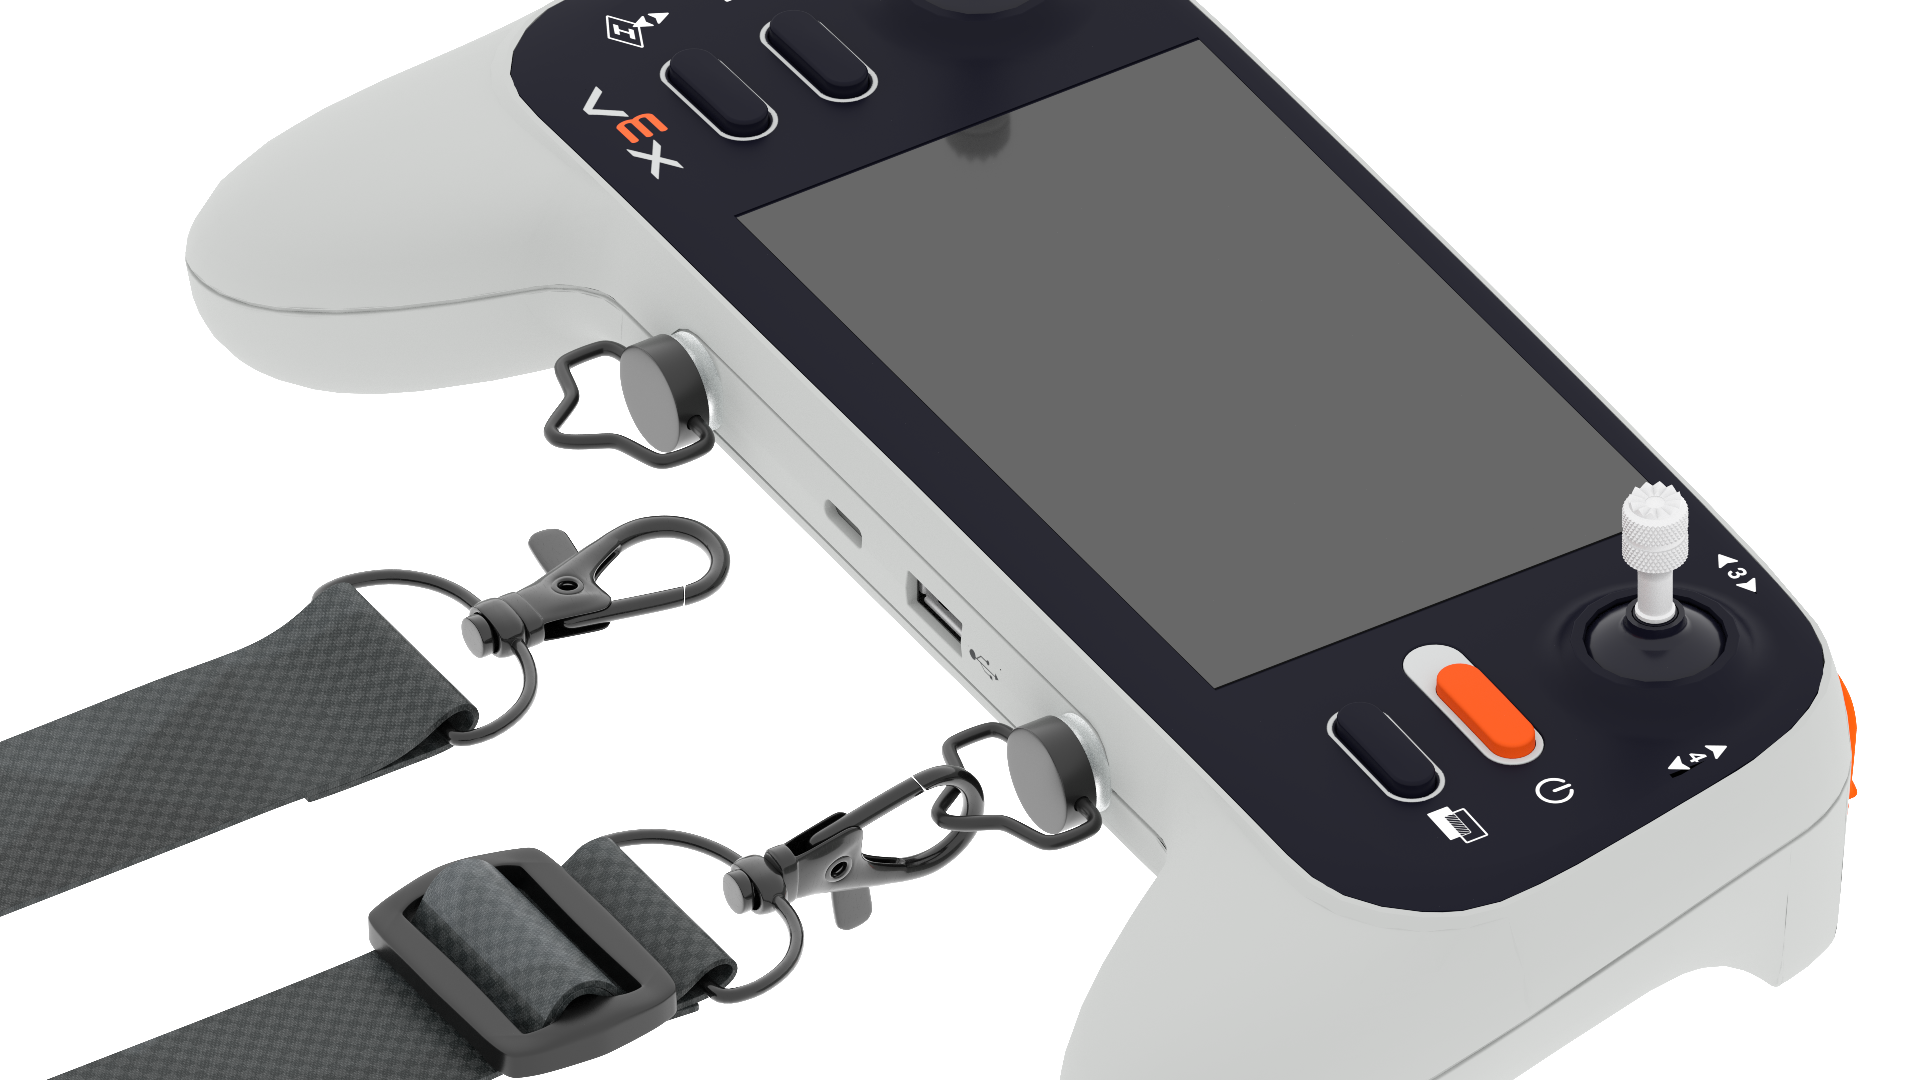
Make sure the lanyard is attached to the controller by screwing the lanyard’s pins into the controller.
Understand Basic Flight Controls#
Before taking flight with the default_fly project, ensure the pilot understands how to control the drone in the air, start a project, and land the drone manually to end a project.
Joystick Flight Controls#
The controller has two joysticks that control how the drone can move with its default fly project.
Axis 1 will raise or lower the drone, as shown in the video below.
Axis 2 will turn the drone left or right as shown in the video below.
Axis 3 will move the drone left and right, as shown in the video below.
Axis 4 will move the drone forward and backward, as shown in the video below.
Additional Controls#
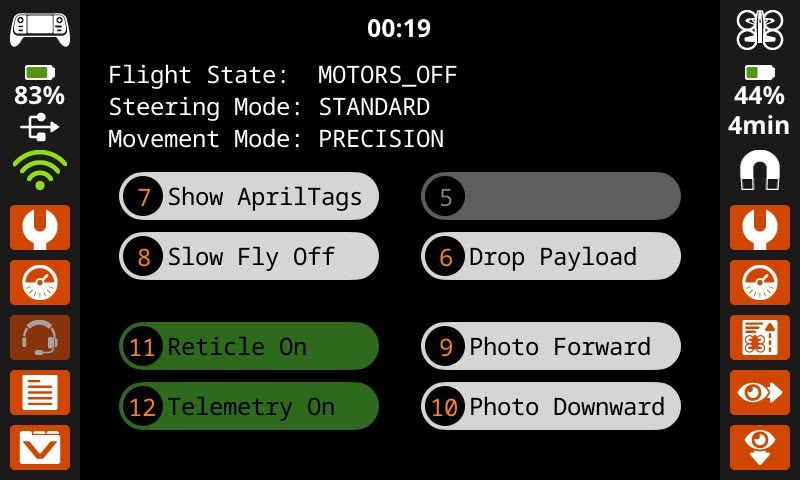
The User Screen of the default_fly project shows information and button controls for various settings and actions. Features of this screen include:
Timer - View how long the project has been running with the project run timer at the top of the screen.
Current Settings - The current flight state, steering mode, and movement mode are shown below the timer.
Buttons - Press the on-screen button or the numbered controller button, for each of the listed actions, or to toggle the option on or off.
Taking Off#
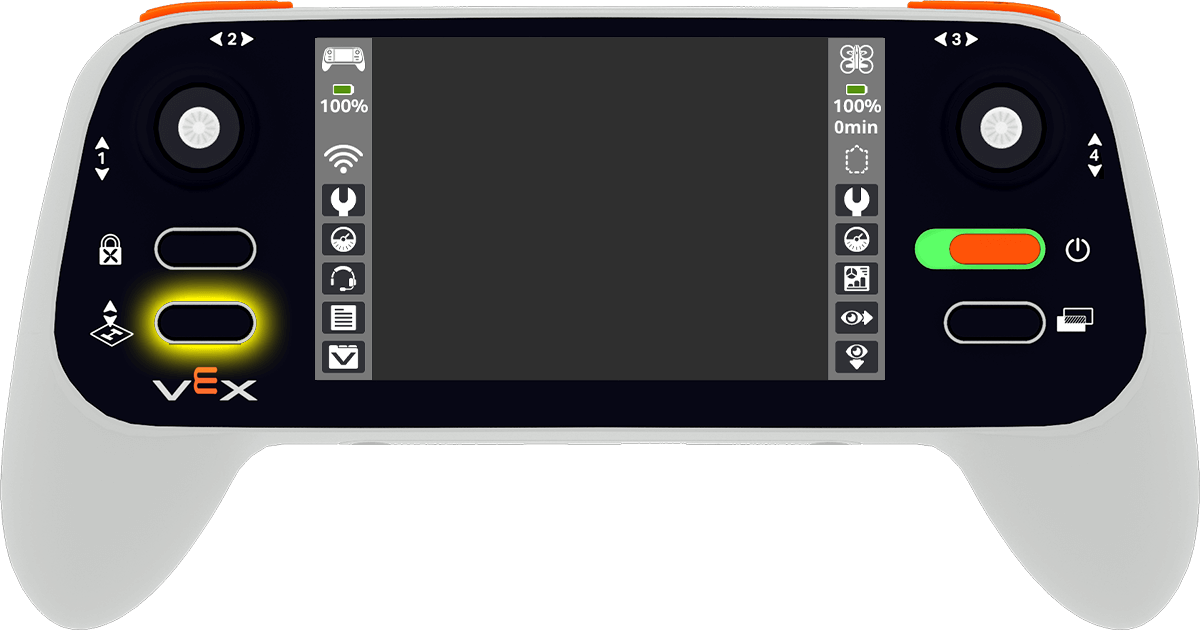
To begin a project, press the Takeoff & Land button on the controller.
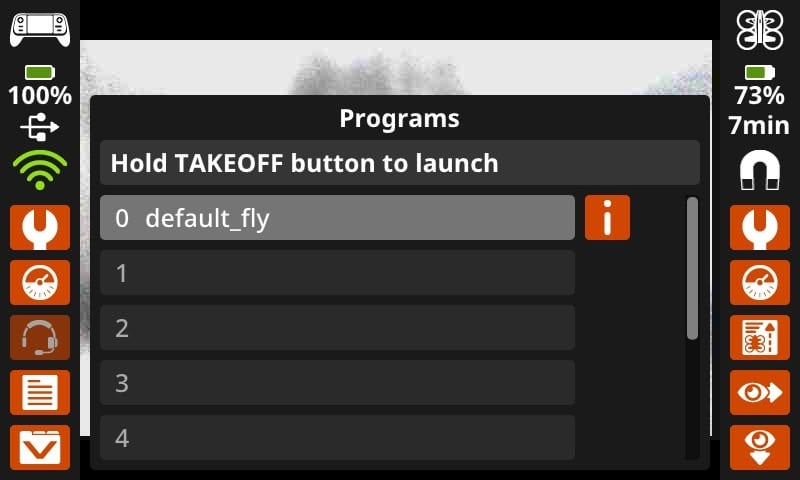
A menu will appear on the screen showing all current projects loaded on the controller.
Press the project that you want to use. The default_fly project allows you to fly the drone directly with the controller.
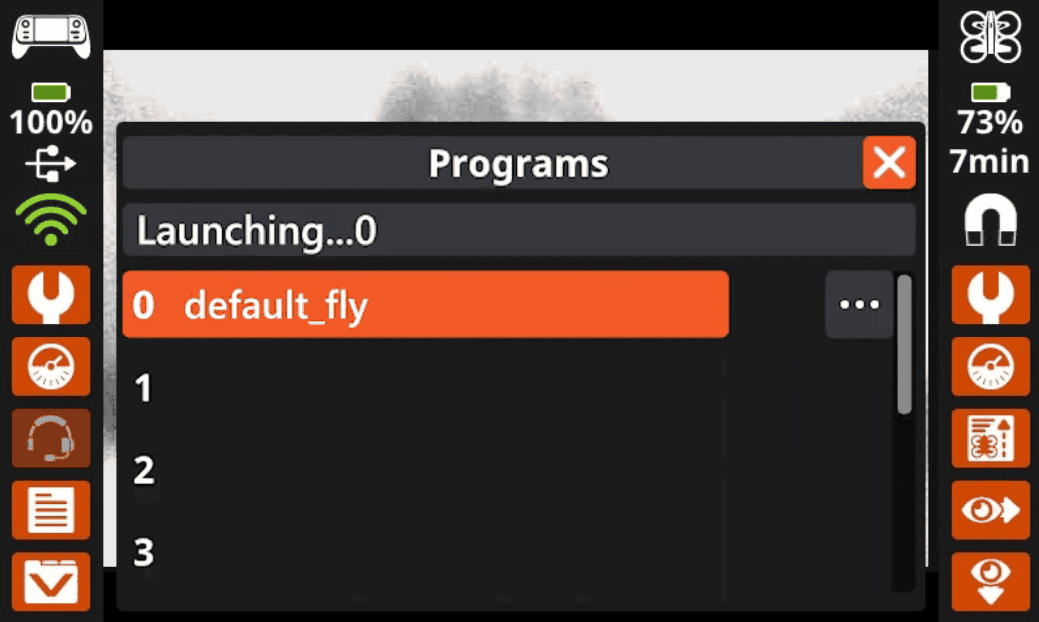
Once the project is selected, hold down the Takeoff & Land button until the project slot is filled with the color orange. Then, release the button to begin the project.
Landing#

To land the drone manually, press the Takeoff & Land button while a project is running. A pop-up will appear in the middle of the controller’s screen. Pressing Land will stop the project and land the drone.