Connecting with a Wired Connection (Windows)#

Follow these simple steps to connect your VEX AIR Drone Controller to your computer with a USB-C cable.

Turn on the controller#

Turn on the controller by holding down the power button and releasing when it begins flashing white. The video below shows the power button being pressed until it starts flashing white. The button continues flashing as the screen turns on, and turns green when the controller is ready for use.

Plug in the cable#

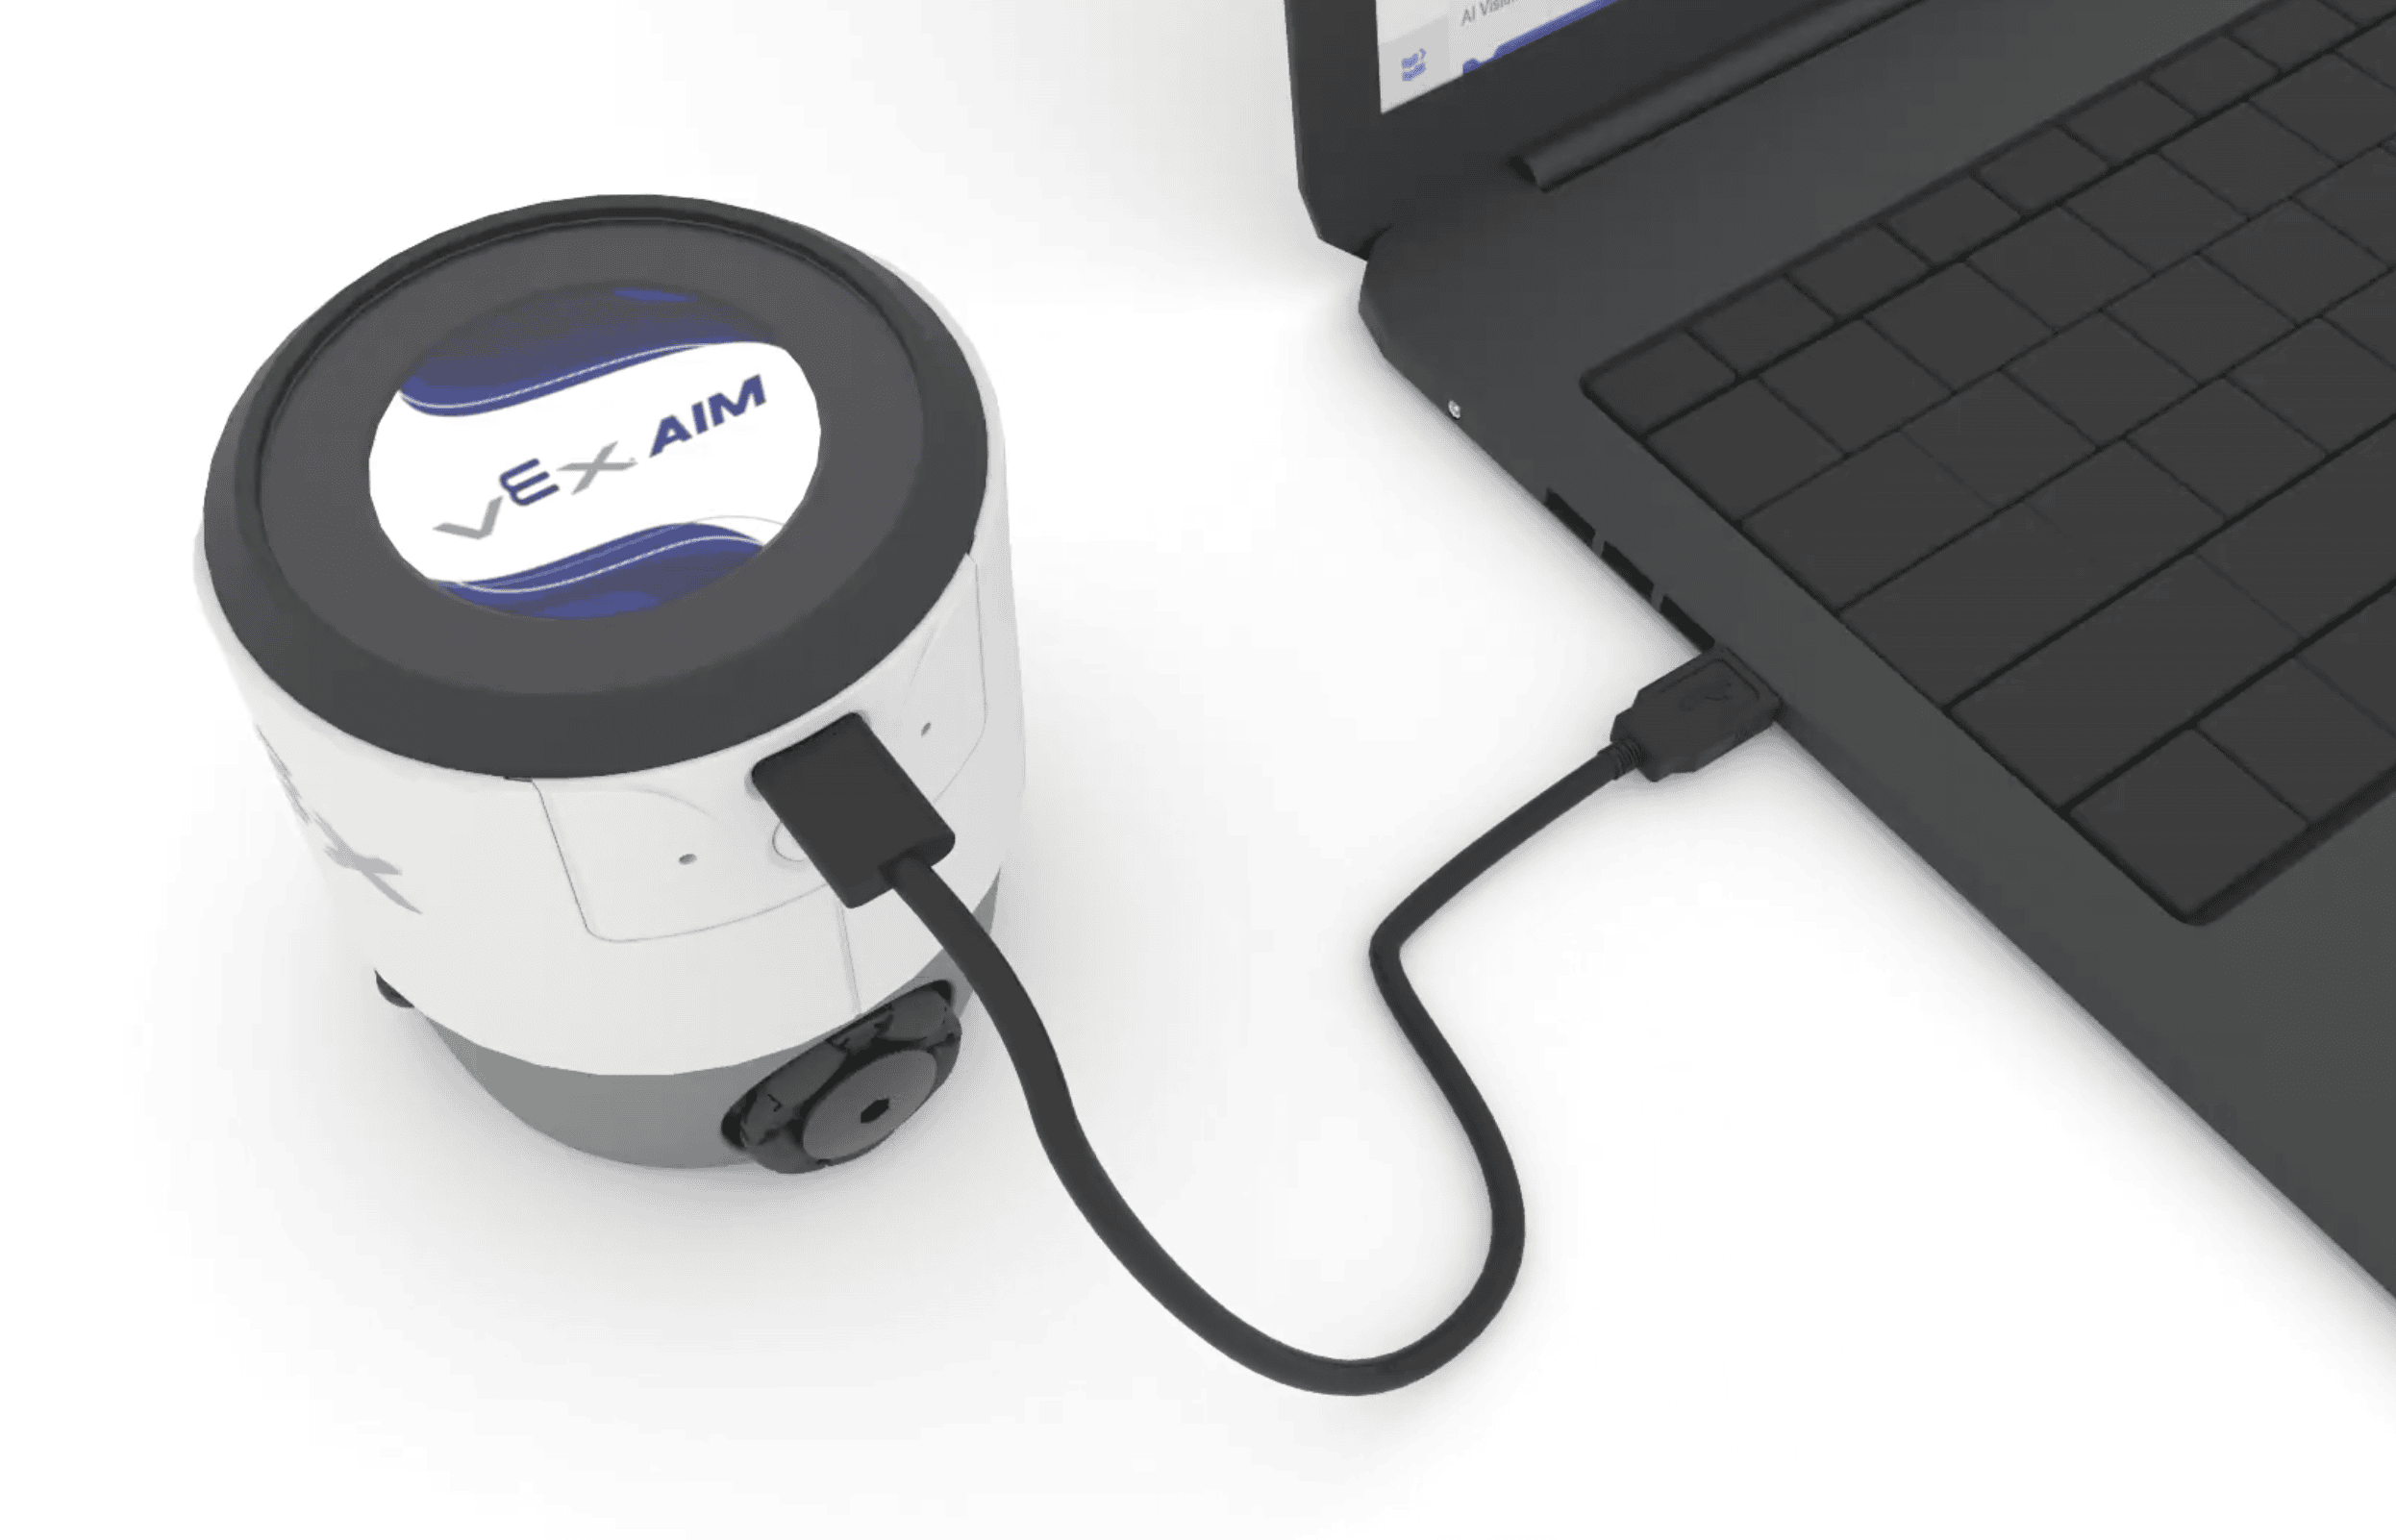
Use a USB-C cable to connect your controller to your computer.

VEX AIR Drone Controller to the left of a laptop with a cable connecting the USB-C port on the controller to the computer.

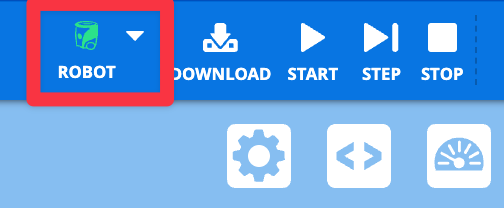
Select the Controller icon in the top-right corner#

A screenshot of the upper right corner of the VEXcode AIR Toolbar, with the white Controller icon highlighted, to the left of the grayed out download button.

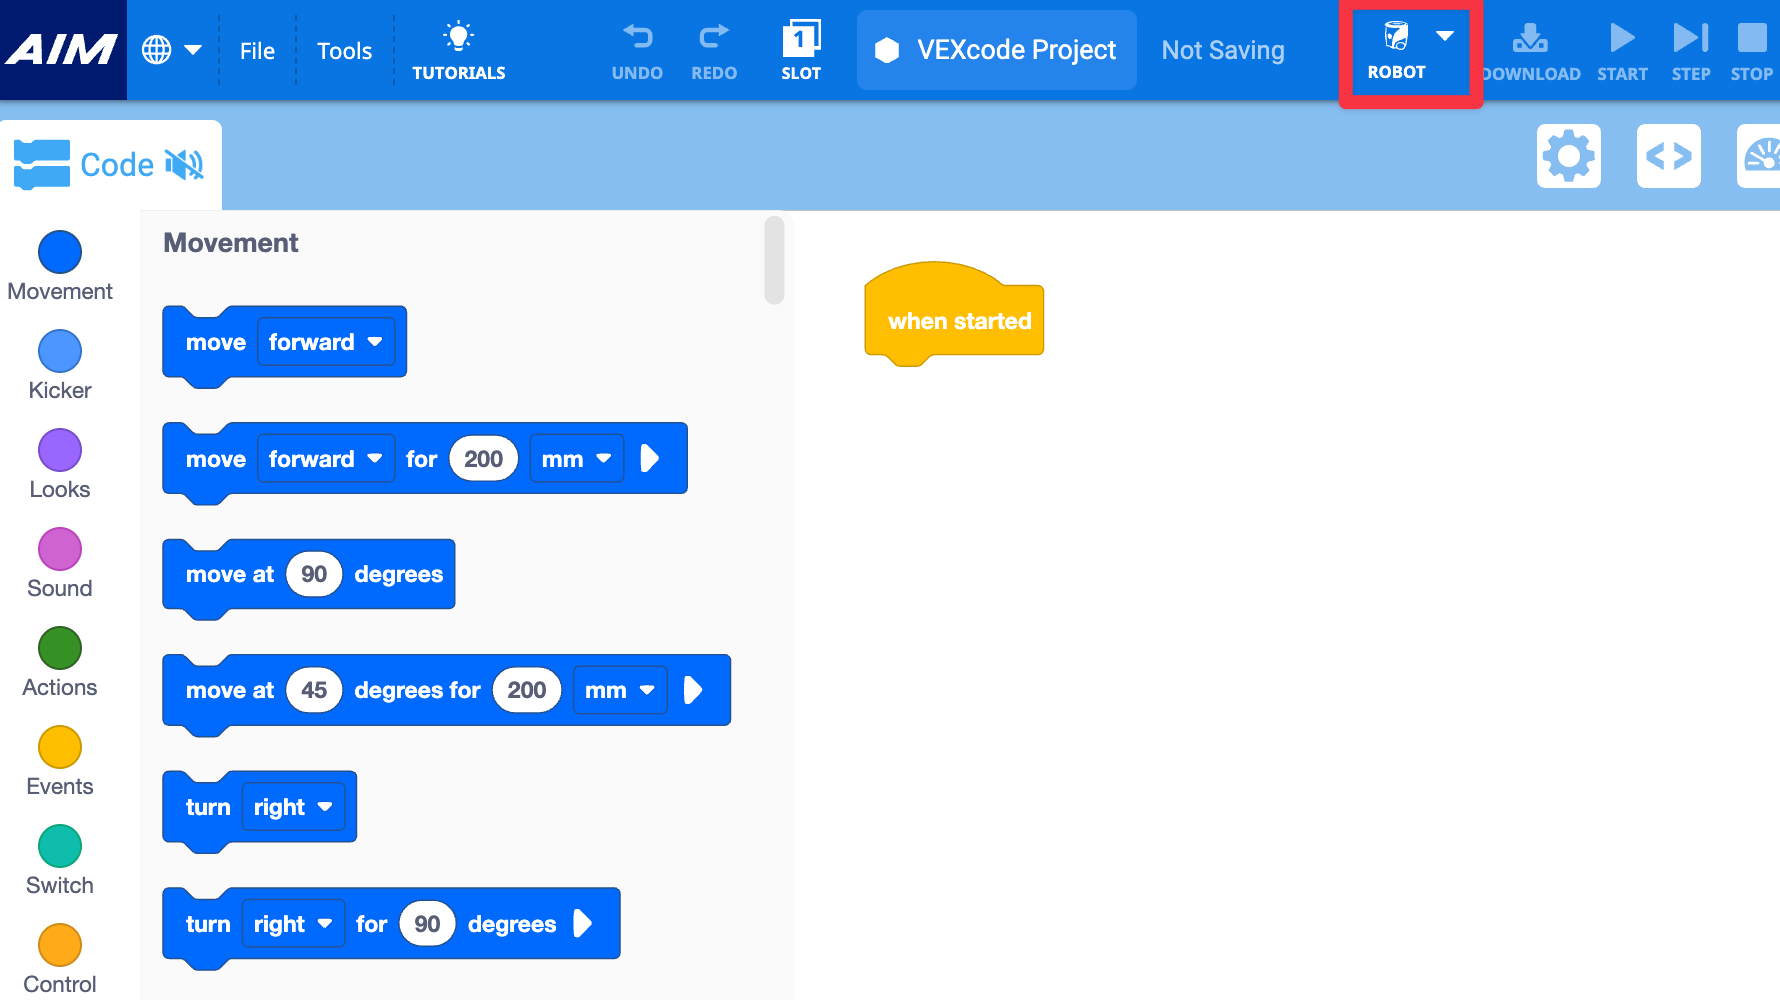
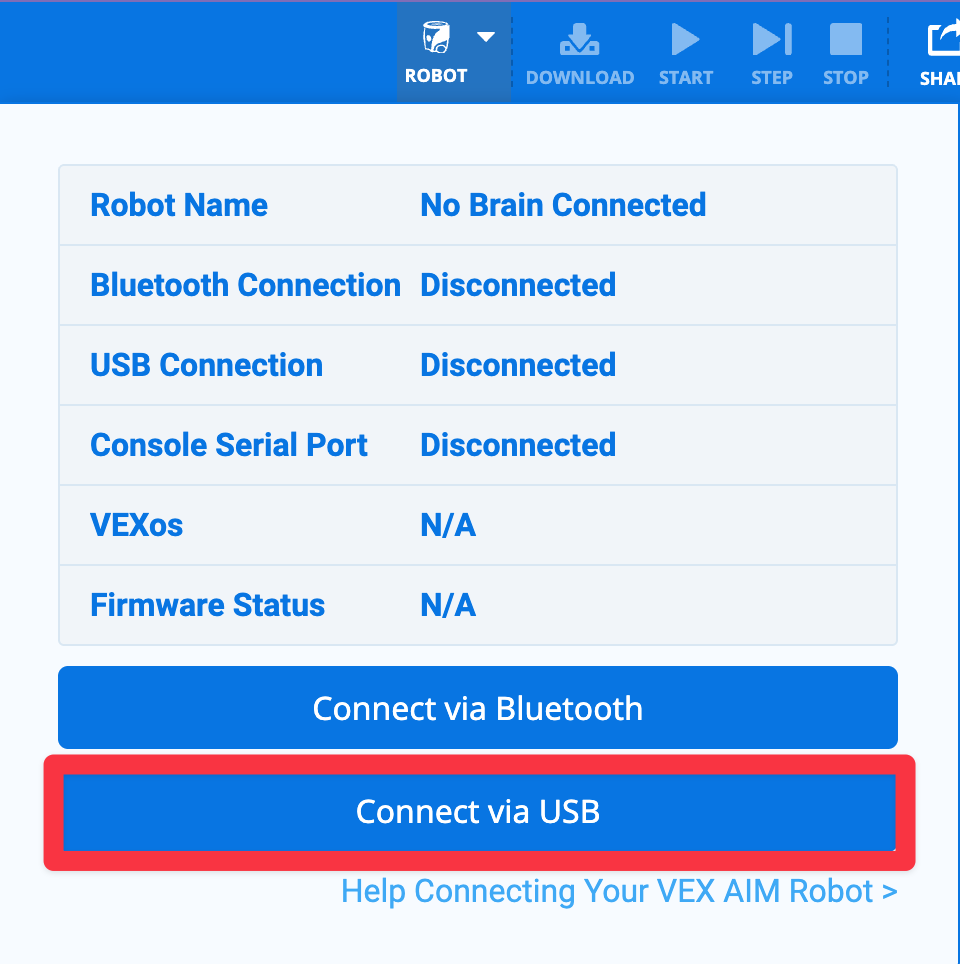
Select Connect via USB from the menu#

A screenshot of the Controller dialog box in VEXcode AIR with the Connect via USB button on the bottom highlighted.

Follow the device prompts#

A prompt reads Your browser is about to connect to your VEX AIR Controller via USB, and instructs to select the VEX Robotics Communication Port and press Connect when prompted. The Continue button in the lower right corner is highlighted.

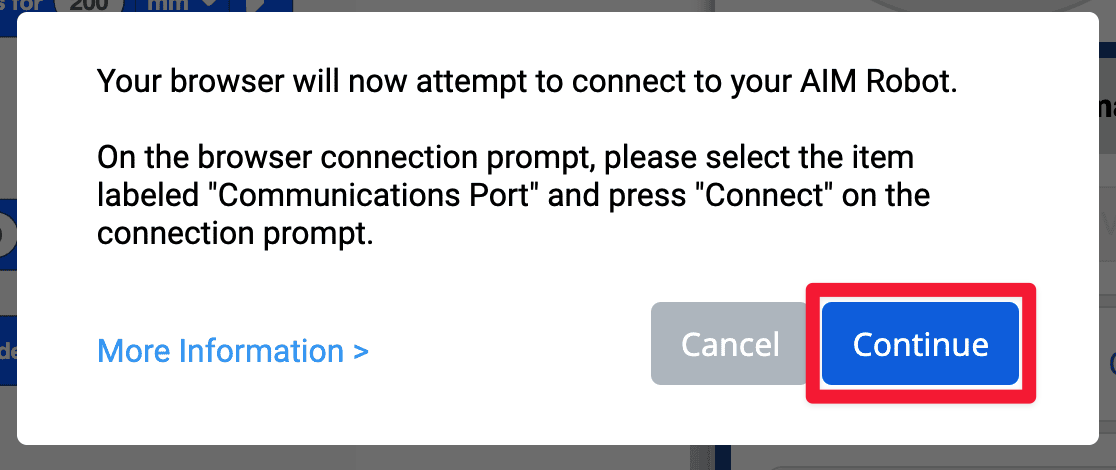
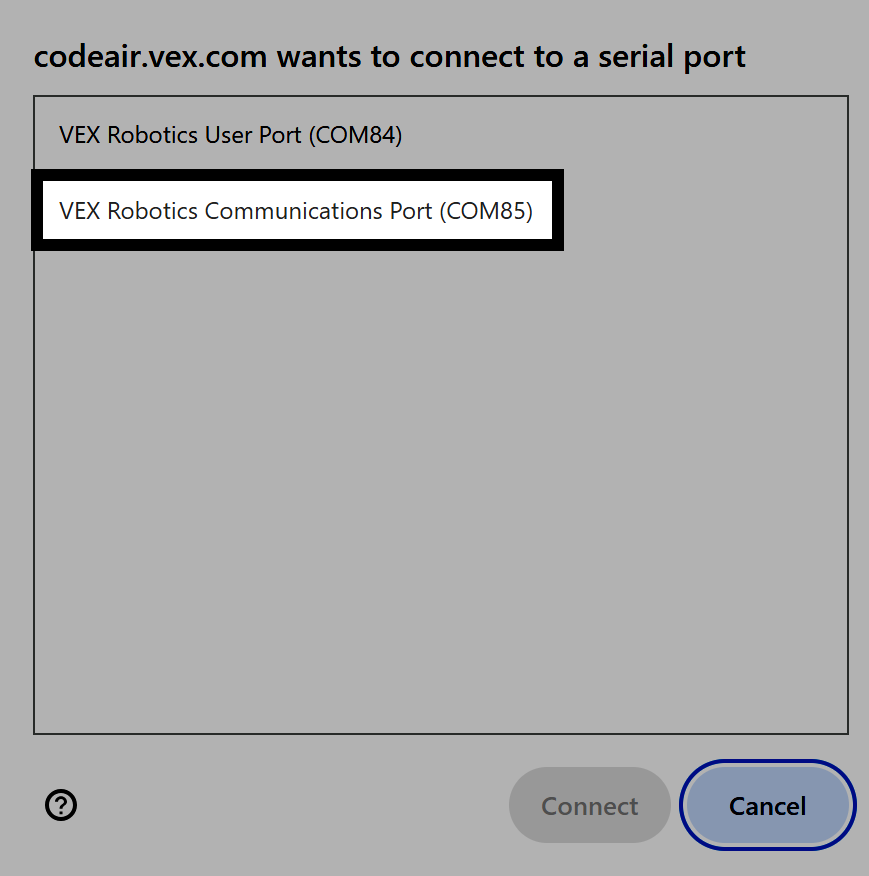
Pick the right connection option#

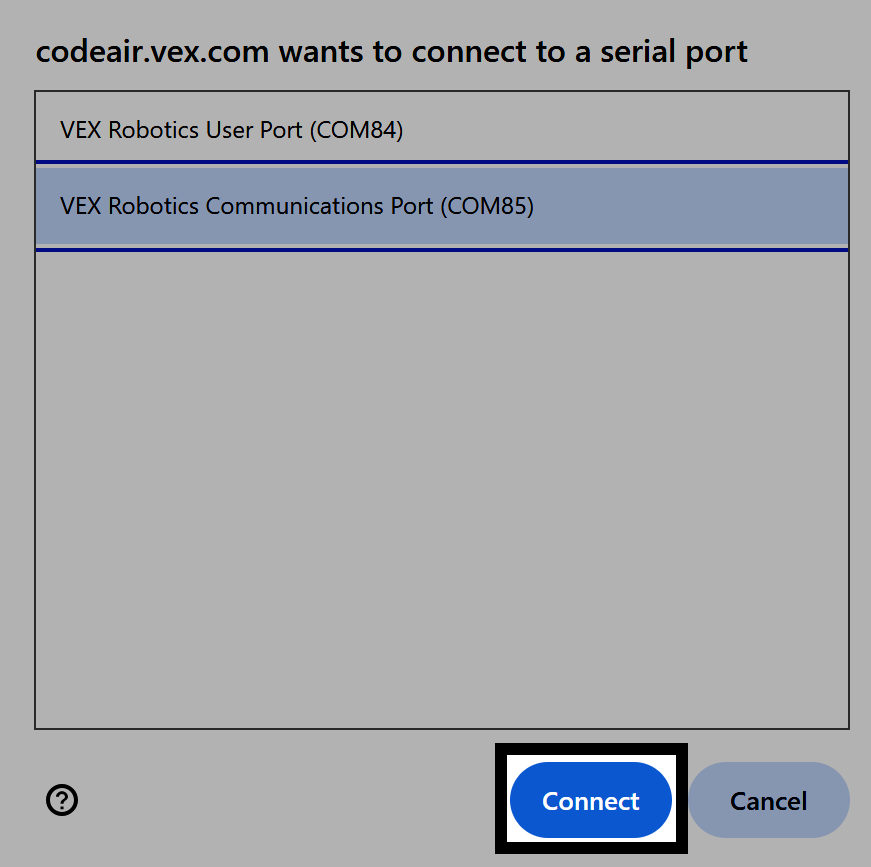
Select the option with Communications Port.

A prompt reads codeair.vex.com wants to connect to a serial port, and the second option that reads VEX Robotics Communications Port is highlighted, indicating what to select.

Finalize your connection#

The same image as the one previous, now with the Connect button in the lower right corner to the left of the Cancel button highlighted.

You are connected#

The Controller icon in the upper right corner of VEXcode AIR will now appear green.

The same screenshot of the Controller icon in VEXcode AIR as before, now with the icon showing green.